Initial Engagement and Grip Setup
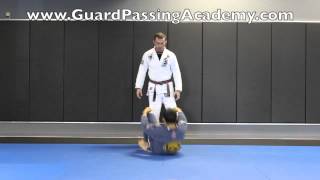
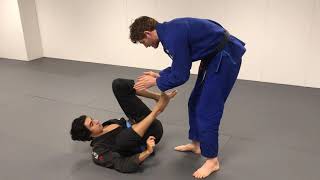
The leg drag pass begins during the engagement phase when neither grappler has established grips. As the passer closes distance, the cross-side hand secures the opponent's pants while the same-side hand controls the shin, creating the foundation for the leg drag. This early grip application allows the passer to begin displacing the opponent's leg before full positional contact is established.
The Leg Drag Mechanics
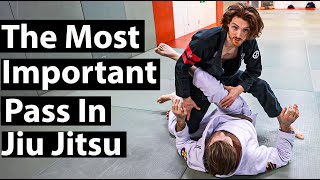
As the passer advances, they push the opponent's leg out of the way while simultaneously pulling the chin upward, creating the characteristic drag motion. This combination of hip displacement and upper-body control allows the passer to establish lateral pressure while transitioning into a passing position.
Common Guard Recovery Response
The most frequent defensive reaction occurs when the opponent pushes their hips away from the passer's chest while simultaneously pressing to create separation. This movement often allows the defender to successfully recover their guard by reestablishing leg positioning. Understanding this reaction enables the passer to anticipate and counter the defense.
Lowering the Level to Prevent Chest Escape
To counter the chest-escape guard recovery, the passer drops their level significantly, making it mechanically difficult for the opponent to generate effective pushing force. This lower posture forces the defender to choose alternative escape options, such as placing the leg over the passer's head, which opens different counter-opportunities.
Trapping the Leg and Walking Backward
When the opponent places their leg over the passer's head, the passer immediately traps that leg while stepping backward. As they retreat, the passer maintains downward pressure on the trapped leg while keeping their upper body weight distributed onto that same leg, preventing the defender from creating space for guard recovery.
Knee-Over-Leg Positioning and Collar Control
Once the leg is controlled and the passer's weight is centered, they insert their knee across the opponent's leg and establish collar control on the side the opponent is facing. The passer then drops their head and brings both feet up to complete the passing sequence into side control, using the combination of knee placement and upper-body control to stabilize the position.
Pressure Distribution During the Pass
A critical element is maintaining consistent pressure on the trapped leg even as the passer moves laterally to complete the pass. The upper body remains heavy on the leg while the lower body transitions, ensuring the opponent cannot manipulate or escape the controlled limb during the final passing movements.
Leg Drag Pass Vs Guard Recovery
Key Takeaways
- •Initial Engagement and Grip Setup
- •The Leg Drag Mechanics
- •Common Guard Recovery Response
- •Lowering the Level to Prevent Chest Escape
To know more about this course click here 👇 https://bjjfanatics.com/collections/all/products/guard-passing-beyond-the-basics-by-thomas-lisboa To know more of Thomas Lisboa Instructionals click here 👇 https://bjjfanatics.com/search?q=thomas lisboa Guard Passing Beyond The Basics Part 1 - Concepts Of Breaking The Closed Guard & Stack Pass 15'00" - Breaking Closed Guard By Grabbing The Sleeve & Pressure Pass 10'05" - Breaking Closed Guard With Two Hands On The Leg & Basic Knee Cut Pass 7'50" - Lumberjack Sweep Defense 5'04" - Ankle Sweep Defense 3'21" - Countering The Ankle Sweep 4'58" - Posture Vs Hand On The Collar 6'42" - Breaking The Closed Guard With Knee Inside 5'02" Part 2 - Knee Cut Pass Details 11'21" - Knee Cut Pass Vs Leg Weave Pass 8'18" - Knee Cut Pass Vs Leg Weave Pass To Mount 6'11" - Low Leg Weave Pass 5'28" - Low Belt Grip Pass Vs Z-Guard With Crossing Feet 6'09" - Knee Cut Pass Vs Double Knee Cut Pass 6'29" - Reverse Half Guard Pass 9'50" - Kimura From Reverse Half Guard 8'33" - Monoplata From The ¼ Guard 5'42" Part 3 - Headquarters Stack Pass Vs De La Riva Guard 9'19" - Headquarters Over Under Pass Vs De La Riva Guard 7'20" - Headquarters Folder Pass Vs De La Riva Guard 8'56" - Pressure Pass Transitions - From Stack Pass To Over Under Pass 5'20" - Pressure Pass Transitions - From Over Under To Stack Pass 6'54" - Pressure Pass Vs Collar Sleeve Guard 8'22" - Stack Pass Vs Flexible Guys - Lapel Grip 6'20" - Stack Pass Vs Flexible Guys - Pant Grip 8'55" Part 4 - Stepping Inside To Knee Cut Pass Vs Butterfly Guard 4'43" - Blocking The Hip And Pushing The Knee Pass Vs Butterfly Guard 3'39" - Butterfly Sprawl Pass 4'06 - Long Step Pass Vs Butterfly Guard 4'20" - Cartwheel Pass Vs Butterfly Sweep 2'53" - Folder Pass Vs Butterfly Sweep 4'09" - Butterfly Twisting Hips Pass 7'02 - Butterfly Twisting Hips Pass Vs Butterfly Guard Double Underhook 4'19" Part 5 - Half Guard Pass Details 8'35" - Brabo Choke From Half Guard 6'04" - Brabo Choke Variation 3'56" - Kimura Vs Half Guard 7'31" - Reverse Kimura Vs Deep Half Guard 5'54" - Switch Base Pass Vs Deep Half Guard 7'07" - Switch Base Half Guard Vs Deep Half Guard Vs Double Knee Cut Pass 4'34" - Switch Base Half Guard Vs Deep Half Guard Vs Double Knee Cut Pass Variation 5'41" Part 6 - Cross Step Armbar 3'29" - Fake Step Pass 2'54" - Countering The Collar Drag 4'03 - Leg Drag Pass Vs Guard Retention 6'03" - Explosive Pant Grip Pass 4'35" - Long Step Pass From The Knees 4'17"
Frequently Asked Questions
What does this video teach about leg drag pass?
This video covers initial engagement and grip setup, the leg drag mechanics, common guard recovery response. It provides detailed instruction from Alliance Jiu Jitsu SJC - Irmãos Lisboa.
How long does it take to learn leg drag pass?
The basic mechanics can be understood in a single session, but developing reliable execution requires consistent drilling over weeks of practice. This 7-part breakdown helps structure your training by isolating each phase of the technique.
What are the key details for finishing leg drag pass?
Once the leg is controlled and the passer's weight is centered, they insert their knee across the opponent's leg and establish collar control on the side the opponent is facing. The passer then drops their head and brings both feet up to complete the passing sequence into side control, using the combination of knee placement and upper-body control to stabilize the position.