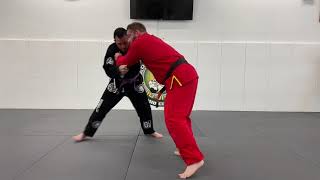
Initial Setup and Grip
The instructor demonstrates a same-side shot entry where the far-side arm comes across the opponent. The grip itself is flexible—the practitioner may grab the back of the opponent's neck, torso, or simply push with the shoulder to maintain momentum. No single grip method is mandatory; the priority is establishing control and initiating forward movement.
Leg Release and Hip Drive
As the opponent responds to the initial pressure, the practitioner releases their leg grip and shifts to one side. The movement transitions into a powerful upward drive generated from the hips and legs. The upper body follows this drive, with hands pushing through to complete the transition into the takedown position.
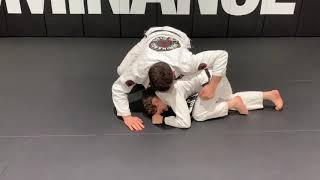
Posture Breaking and Arm Placement
The primary objective throughout the technique is breaking the opponent's posture downward and forward. The practitioner secures one arm across the opponent's body, connecting at the shoulder to create structural control. This positioning prevents the opponent from defending effectively and enables the explosive lift that follows.
Execution Sequence
The practitioner releases their leg engagement toward one side, then drives upward while straightening their positioning. This coordinated motion—leg release, hip explosion, and upward hand drive—completes the trip takedown in a single fluid movement. The technique relies on timing the opponent's weight shift rather than pure strength.
Drilling Protocol
The instructor structures practice as timed repetition drills, allowing practitioners to perform the technique multiple times in succession. Common formats include four-minute continuous drills or alternating two-minute rounds. Practitioners should focus on feeling the technique develop smoothly rather than forcing the movement.
Key Principles and Focus
Posture breaking remains the central mechanical goal throughout execution. The practitioner should prioritize control and leverage over speed, ensuring the opponent's balance is compromised before initiating the explosive phase. Consistency in posture disruption directly correlates with reliable takedown completion.
Single Leg Trip Takedown Technique, Concepts, and Drilling
Key Takeaways
- •Initial Setup and Grip
- •Leg Release and Hip Drive
- •Posture Breaking and Arm Placement
- •Execution Sequence
Merch out now https://theconflictcontinuum.company.site/ ___ ● Watch Grappling Concepts @conflictcontinuum ● Get our merchandise! https://theconflictcontinuum.company.site/ ● Follow on Instagram @theconflictcontinuum ● Check out our website https://conflictcontinuum.com/ ● Subscribe to channel @StellaTina_BJJ ___ Website: https://conflictcontinuum.com/ Instagram: @theconflictcontinuum Merch: https://theconflictcontinuum.company.site/ Collab: @theconflictcontinuum #stellatina #conflictcontinuum #jiujitsu #bjj #nogi #grappling #wrestling #combatsports #martialarts #selfdefense #ADCC #IBJJF #AJP #grapplingindustries
Related Techniques
Frequently Asked Questions
What does this video teach about trip takedown?
This video covers initial setup and grip, leg release and hip drive, posture breaking and arm placement. It provides detailed instruction from StellaTina_BJJ.
How long does it take to learn trip takedown?
The basic mechanics can be understood in a single session, but developing reliable execution requires consistent drilling over weeks of practice. This 6-part breakdown helps structure your training by isolating each phase of the technique.
What are the key details for finishing trip takedown?
The instructor structures practice as timed repetition drills, allowing practitioners to perform the technique multiple times in succession. Common formats include four-minute continuous drills or alternating two-minute rounds. Practitioners should focus on feeling the technique develop smoothly rather than forcing the movement.
Related videos

Khabib Nurmagomedov Takedown (Inside Leg Trip)
Steven Strangles People

Self defense Taekwondo Martial art (Take down techniques) 태권도 호신술 테이크 다운
MASTER HAN TV전설의발차기
MMA Takedown from the Clinch Tutorial
Stuart Tomlinson
Snap Down BJJ For Kids
Murray Ballenden - BJJ and S&C Coach
Snap Down using the Gi
Coach Travis Clark