Overview of Cross Choke Fundamentals
The cross choke requires understanding its application from both top and bottom positions, common failure points, and corrective measures. Success depends on proper posture control, grip placement, and sequential hand positioning rather than simultaneous gripping.
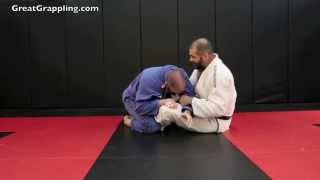
Establishing the First Grip from Guard
The practitioner must first break the opponent's posture using a two-on-one grip and shake control. The initial collar grip is established by climbing the arm until the wristwatch area contacts the neck, with the styloid head of the radius bone positioned against the pulse point. The collar must be opened fully to gather maximum material before establishing firm pressure.
Angle Creation Through Hip Rotation and Cutting
A single grip is insufficient for the choke; the practitioner must establish a second grip by rotating the hips and cutting with the calf, similar to armbar entry mechanics. This rotation and cutting motion simultaneously controls posture and opens the correct angle for the second hand insertion under the opposite ear.
Second Grip Insertion and Finishing Mechanics
Rather than grabbing and inserting, the practitioner executes a karate-chop motion to place the ulnar bone beneath the opponent's ear at the pulse point. Once gripped, the left elbow drops toward the opponent's navel while the right hand initiates the pulling force, creating a right-hand-dominant finish.
Alternative Cutting Method and Four-Finger Collar Entry
If the opponent learns to defend against hip rotation, the right foot can be planted on the mat to cut downward instead, allowing blind-side entry of the left hand with four fingers deep in the collar. This variation requires a punching motion with the right hand to create space before the left hand threads through completely.
Counter to Simultaneous Cross Choke Attempts
When an opponent attempts a cross choke while being choked themselves, the practitioner maintains their own choke grip while rotating to transition into an armbar using both legs as cutting tools. If the opponent withdraws their hands, the practitioner can abandon the armbar and return to finishing the original cross choke.
Choke Intensification Techniques
The choke can be tightened by moving the head to the centerline during application. An X-grip variation can be employed where the belt knot is attached to the X-grip configuration, allowing body weight to transfer through the technique from either top or bottom position.
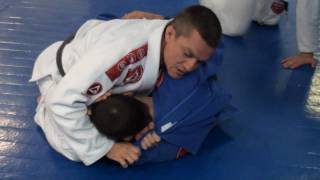
Cross Choke from Mount Position Setup
From mount, proper positioning requires wide knees and tight toes. The practitioner must understand that extending the right arm exposes vulnerability to bridge-and-roll escapes to the right, requiring compensatory lean to the left and minimal elevation of right toes on the mat for stability.
Mount Cross Choke Grip and Hand Function
The left hand is positioned to prevent rolling in one direction, then retracts with the elbow until a proper grip is secured. Once established, the left hand functions only to keep the elbow secured toward the opponent's abdomen, while the right hand follows the practitioner down to execute the actual choke pressure.
How To Make That Cross Choke Work!
Key Takeaways
- •Overview of Cross Choke Fundamentals
- •Establishing the First Grip from Guard
- •Angle Creation Through Hip Rotation and Cutting
- •Second Grip Insertion and Finishing Mechanics
Related Techniques
Frequently Asked Questions
What does this video teach about cross lapel rear choke?
This video covers overview of cross choke fundamentals, establishing the first grip from guard, angle creation through hip rotation and cutting. It provides detailed instruction from The Grappling Academy.
How long does it take to learn cross lapel rear choke?
The basic mechanics can be understood in a single session, but developing reliable execution requires consistent drilling over weeks of practice. This 9-part breakdown helps structure your training by isolating each phase of the technique.
What are the key details for finishing cross lapel rear choke?
From mount, proper positioning requires wide knees and tight toes. The practitioner must understand that extending the right arm exposes vulnerability to bridge-and-roll escapes to the right, requiring compensatory lean to the left and minimal elevation of right toes on the mat for stability.