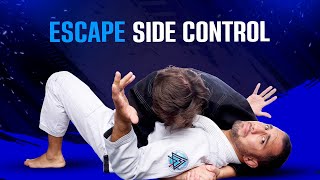
Introduction to Bridge and Roll Series
The instructor introduces four fundamental bridge and roll escapes from side control, specifically designed for situations where the opponent maintains tight pressure and minimizes space. These techniques form a progressive series addressing different positional scenarios.
First Variation: Bicep Positioning and Directional Bridging
When the opponent applies side control with tight knee pressure, the defender maintains elbow positioning at the hip to preserve space while moving the bicep from the neck to the crown of the head for increased leverage. The bridge direction should be toward 11 o'clock rather than 9 o'clock, as this angle provides superior mechanical advantage, followed by sitting up toward 5 o'clock when the opponent resists.
Hip Escape Integration with Figure-Four Leglock
After bridging and generating resistance, the defender sits up toward 5 o'clock while turning to their side and flaring the foot upward. The escape is completed by applying a figure-four lock on the opponent's leg, anchoring on the opponent's side to establish top control position.
Sequencing Body Adjustment Before Leg Control
A critical timing error to avoid is grabbing the opponent's foot before adjusting body position, which allows the opponent multiple defensive options. The correct sequence requires adjusting body positioning first, then lifting and securing the figure-four lock before attempting to manipulate the leg.
Second Variation: Knee Compression with Wide Base Elimination
When the opponent maintains a wide knee base in side control, the defender brings the elbow to the mat to drive the opponent's knees together, removing their stability base. A hard bridge toward 11 o'clock followed by hopping over the compressed legs completes the escape.
Body Positioning Compensation in Knee Compression
If driving the opponent's knees together proves difficult, the defender can slide their body upward to compensate for reduced pressure effectiveness before executing the bridge and hop. This adjustment maintains the technique's viability even when initial knee compression is incomplete.
Scarf Hold Rotation Variation
An alternative finish to the knee compression escape involves rotating to scarf hold position after the bridge instead of completing a standard escape. The defender drives the knees together, slides forward, bridges hard, and rotates around their own foot to establish scarf hold control.
Drilling the Complete Series
The instructor demonstrates continuous drilling of the bridge and roll variations, showing smooth transitions between tight knee pressure escapes and wide-base escapes with figure-four and scarf hold finishes. Practitioners should practice both sides to develop balanced escape proficiency.
Video 8 - Side Control Escape Bridge and Roll Series
Key Takeaways
- •Introduction to Bridge and Roll Series
- •First Variation: Bicep Positioning and Directional Bridging
- •Hip Escape Integration with Figure-Four Leglock
- •Sequencing Body Adjustment Before Leg Control
Side Control Escape Bridge and Roll Series 1- Bridge and Roll 2- Figure 4 the Leg 3- Bridge and hop Over 4- Bridge to Scarfold
Related Techniques
Frequently Asked Questions
What does this video teach about bridge and roll side control?
This video covers introduction to bridge and roll series, first variation: bicep positioning and directional bridging, hip escape integration with figure-four leglock. It provides detailed instruction from Brazilian Jiu Jitsu Incorporated.
How long does it take to learn bridge and roll side control?
The basic mechanics can be understood in a single session, but developing reliable execution requires consistent drilling over weeks of practice. This 8-part breakdown helps structure your training by isolating each phase of the technique.
What are the key details for finishing bridge and roll side control?
An alternative finish to the knee compression escape involves rotating to scarf hold position after the bridge instead of completing a standard escape. The defender drives the knees together, slides forward, bridges hard, and rotates around their own foot to establish scarf hold control.
Related videos
Using the UNDERHOOK to Escape Side Control
The Grapple Lab
Fundamentals: Underhook escape from side control
Bellingham BJJ
The Easy Way to Learn Side Control Escape
JonThomasBJJ
Dealing With Frames by Using Your Own Frame - Andre Galvao
Atos Jiu-Jitsu HQ | World's Best BJJ Academy - Home Page
The Easiest Way to Escape Side Control (Even Against Bigger Opponents!)
Matt Arroyo Jiu Jitsu