Introduction to Tai Otoshi
Tai Otoshi is a fundamental hip throw that requires precise timing and body positioning. This instructional guide covers the mechanics, foot placement variations, and defensive counters essential for executing this technique effectively.
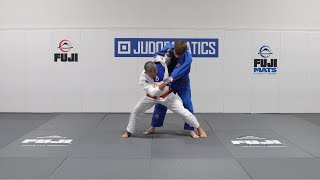
Classical Entry and Weight Distribution
The practitioner establishes control by ensuring the opponent's center of gravity remains aligned on a single line. By moving laterally while maintaining this alignment, the thrower capitalizes on the opponent's forward momentum and adds force through the hands before executing the throw.
Leg Positioning and Drive Mechanics
The throwing leg is positioned with the calf against the opponent's shin, with toes aligned for maximum control. The thrower drives the opponent forward initially, then executes a snapping motion by driving the calf backward while using the upper body to complete the throw.
Hand Position and Upper Body Control
The pulling hand maintains a strong wrist position, with the wrist raised toward the ear for optimal leverage. The throwing-side elbow is tucked against the ribs to enable proper hip rotation and body closure during the throw.
Foot Placement Variations: Toe Alignment
Practitioners may choose between aligning the toe with the opponent's or angling the foot differently based on partner size and throwing style. Toe alignment with the opponent provides superior hip control, while foot rotation offers additional safety against knee strikes when the opponent's weight shifts backward.
Grip Variations in Competition
Advanced variations include using an overhook with a sleeve grip or maintaining a cross-grip while transitioning to the lapel. These modern applications allow the thrower to execute Tai Otoshi from multiple grip configurations commonly seen in contemporary competition.
Right-Side Versus Left-Side Configuration
When throwing to the side opposite the opponent's front foot, the thrower takes a back step and positions the rear foot across the opponent's stance at a 90-degree angle. A hip bump displaces the opponent's near leg, shifting their weight onto the far leg before the throw is applied.
Creating Opportunities Through Osoto Gari
An Osoto Gari attack can set up Tai Otoshi by forcing the opponent's weight onto the far leg. After elevating the opponent's near leg with Osoto, the thrower can immediately transition by shooting the leg across to execute Tai Otoshi in either direction.
Adapting Tai Otoshi in Standup Grappling
From a Van Dory position, the thrower can execute what is termed a 'demo Tai Otoshi' by stepping back to create a right-side-versus-right-side configuration. This repositioning allows the throw to be applied even when the initial stance alignment appears unfavorable.
Combining with Uchimata Feints
When the opponent recognizes and defends an Uchimata entry by shifting weight outward, the thrower pivots and transitions directly into Tai Otoshi. This feint exploits the opponent's defensive commitment while allowing seamless entry into the throw.
Overcoming Elbow Pin Defense
If the opponent pins the throwing-side elbow against the thrower's body, releasing this tension first is essential. The thrower can step back to elevate the opponent's posture or apply lateral pressure, creating space for the elbow to drive through and the hips to rotate.
Grip Management and Hand Control
Controlling both hands during the throw is critical to preventing the opponent from disrupting the entry. The thrower maintains tension on the pulling hand while managing the opponent's gripping hand, adjusting the gi or releasing pressure strategically to enable hip penetration.
Tai Otoshi: Full Instructional
Key Takeaways
- •Introduction to Tai Otoshi
- •Classical Entry and Weight Distribution
- •Leg Positioning and Drive Mechanics
- •Hand Position and Upper Body Control
Enjoy this full tai otoshi instructional! Soto Makikomi Instructional Available for Streaming and Download for only $20 Soto Makikomi is a huge full body throw that is uses primarily by heavy weights. Dangerous, explosive and EFFECTIVE! Learn how to do it the proper way, with your and your partner's safety in mind. Enjoy this instructional now, now presented in 4K HD! CONCISE AND INFORMATIVE Just like his YouTube channel, this video cuts the fat of frivolous explanations that are only applicable to very unique circumstances. Instead, he presents you with a broad, proven and effective approaches that can be utilized across your entire judo system. His in depth explanations remain tailored for the judoka interested in leveling up their game.
Related Techniques
Frequently Asked Questions
What does this video teach about standard tai otoshi?
This video covers introduction to tai otoshi, classical entry and weight distribution, leg positioning and drive mechanics. It provides detailed instruction from Shintaro Higashi.
How long does it take to learn standard tai otoshi?
The basic mechanics can be understood in a single session, but developing reliable execution requires consistent drilling over weeks of practice. This 12-part breakdown helps structure your training by isolating each phase of the technique.
What are the key details for finishing standard tai otoshi?
If the opponent pins the throwing-side elbow against the thrower's body, releasing this tension first is essential. The thrower can step back to elevate the opponent's posture or apply lateral pressure, creating space for the elbow to drive through and the hips to rotate.