Mount Escape Series Overview
The instructor reviews fundamental mount escapes including the Chapman roll and hip escape before introducing the kipping escape variation. This technique focuses on hip bump escapes with multiple finishing options depending on the opponent's positioning and response.
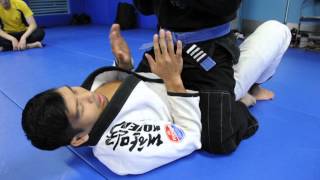
Hand and Elbow Positioning
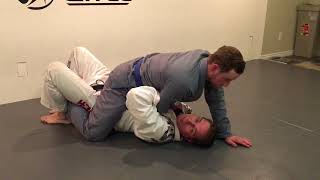
Proper framing begins with both hands placed on the opponent's hips while keeping elbows tucked tightly to the body. This positioning prevents the opponent from walking up high and maintains defensive integrity while the practitioner works to position their legs on the inside of the opponent's legs.
Basic Kipping Escape with Straight Finish
From the mounted position, the practitioner bumps their hips upward while pressing through their hands to lift the opponent. As the opponent remains airborne, the practitioner drives their knees through the center and extends their legs to kick the opponent away, allowing their own weight to be lifted into butterfly guard position.
Butterfly Sweep Combination
After successfully executing the basic kipping escape into butterfly guard, the practitioner can transition to a butterfly sweep by establishing an underhook with one arm and an overhook with the other. The practitioner then uses footwork and hip pressure to complete the sweep variation.
Opponent Hand Position Requirement
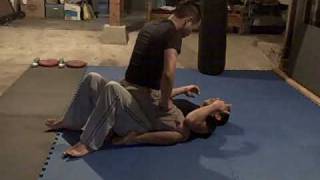
A critical prerequisite for the kipping escape is that the opponent must have their hands on the floor in a standard mount position. If the opponent sits upright without hand contact on the mat, the hip bump cannot generate sufficient lift; the practitioner must first encourage the opponent forward with a subtle hip lift and knee nudge.
Directional Hip Bump with Space Creation
Instead of bumping straight upward, the practitioner can angle the hip bump to one side while pushing with their hands over the shoulder. This angled pressure creates space on one of the opponent's legs, allowing the practitioner to immediately bring their lower knee underneath the opponent's leg to prevent re-establishment of mount pressure.
Heel Placement and Rule Considerations
When the practitioner's heel comes in to apply outward pressure on the opponent's leg, they must maintain awareness of ruleset constraints. Under IBJJF rules, the heel position must be controlled; in more permissive rulesets, the heel can be repositioned across the leg as needed.
Reactive Transitions to X Guard
As the opponent responds by pushing their foot back to the floor, the practitioner circles their foot through to establish an X guard position on the far leg. The subsequent technique depends on the opponent's reaction: if they stand, the practitioner circles underneath into an X guard position for a potential sweep or back control.
X Guard Sweep Execution
From the X guard setup, the practitioner positions their bottom leg behind the opponent's knee and their top leg in front of the hip. The practitioner drops the far leg while maintaining X guard pressure, then swims underneath both legs and applies pressure to turn the corner and transition to the top position.
Practical Considerations and Adaptability
The kipping escape effectiveness depends on relative size and strength differences between practitioners. The technique requires constant adaptation based on the opponent's defensive responses rather than following a single predetermined path from mount escape to finished position.
The Kipping Escape From Mount
Key Takeaways
- •Mount Escape Series Overview
- •Hand and Elbow Positioning
- •Basic Kipping Escape with Straight Finish
- •Butterfly Sweep Combination
The Kipping Escape from mount is one of the most effective ways to escape a tightly controlled mount. We start this video with a couple of basic hip bump escapes from under mount which will allow us to enter leglock entries and butterfly guard. These escapes are only able to be done if your opponent does not have tight control with their legs. We then move onto the details of how to make the kipping escape work for you. This escape is great when your opponent has tight control with their legs. Although I can hit this escape, one of the best in our gym at doing it in high level competition is Chris Leyendekers. Chris is one of our purple belts and is one of the top up and coming competitors in the UK. If you would like to follow his journey you can on Instagram @clb.apollo #bjj #jiujitsu #martialarts ➡️ Follow me on 🚨 INSTAGRAM: @thegrapplelab === Like this video? Please subscribe === PLEASE CHECK OUT ⬇️ 🚨 TIKTOK: www.tiktok.com/thegrapplelab 🚨 FACEBOOK: www.facebook.com/thegrapplelab 📹 VIDEOS: @submissionstories 🥋 SCRAMBLE: https://scramblestuff.com/ 🙇🏻 THEGRAPPLELAB: www.thegrapplelab.com 00:00 Hip Bump to Butterfly Guard 03:23 Hip Bump to Single Leg X 06:47 Kipping Escape
Related Techniques
Frequently Asked Questions
What does this video teach about kipping escape?
This video covers mount escape series overview, hand and elbow positioning, basic kipping escape with straight finish. It provides detailed instruction from The Grapple Lab.
How long does it take to learn kipping escape?
The basic mechanics can be understood in a single session, but developing reliable execution requires consistent drilling over weeks of practice. This 10-part breakdown helps structure your training by isolating each phase of the technique.
What are the key details for finishing kipping escape?
From the X guard setup, the practitioner positions their bottom leg behind the opponent's knee and their top leg in front of the hip. The practitioner drops the far leg while maintaining X guard pressure, then swims underneath both legs and applies pressure to turn the corner and transition to the top position.