Dominate the Mount with the Meathook System (BJJ Control Blueprint)
0
Standard High Mount·Precision MMA
Want to make your mount unescapable and turn every reaction into a submission? In this video, I break down the Meathook…
Translation: standard high mount
The Standard High Mount slides the hips up to the opponent's upper chest or armpit level, with the knees close to the opponent's shoulders, creating a dominant position with direct access to armbars, cross-chokes, and Ezekiel chokes. [1] The high mounting position makes it very difficult for the bottom fighter to use frames because the top fighter's weight is on the upper body. [1],[2] The standard high mount is the primary attacking mount position for submission-oriented fighters. [2],[3]
The standard high mount positions the hips above the opponent's chest, trapping their arms and increasing submission access. [1]
High mount was developed in BJJ as an advanced mount progression. [1]
Used in BJJ and MMA competition. [1]
No images yet for this technique.
Sign in to suggest an image.
Want to make your mount unescapable and turn every reaction into a submission? In this video, I break down the Meathook…
When you first start Jiu Jitsu, you're gonna be getting stuck in the bottom of mount. A lot. Even by people who aren't v…
It's not easy to get to the High Mount position and set up attacks when going against a skilled BJJ practitioner. He wi…
The standard high mount is a controlling position achieved from regular mount when the bottom player's elbows disconnect from their body, either through mistake or deliberate opening by the top player. MMA Leech emphasizes that high mount can arise opportunistically when an opponent pushes on the chest, or be forced through neck attacks, head blocking, or leg digging to separate the arms—though timing is critical to capitalize before the opponent regains elbow positioning. Precision MMA focuses on hand-trapping mechanics and underhook development as prerequisites for high mount attacks, using double cross-wrist pins and meathook grips to control the opponent's positioning and prevent frame defenses. Both instructors agree that high mount opens primary finishing options: the S-mount armbar (with cross-grip entry) works best when the opponent is flat, while the mounted triangle is more effective when the opponent is turned slightly onto their side, creating space between neck and mat for leg insertion. MMA Leech notes the distinction between true high mount (opponent flat) and technical/modified mount (opponent on side), as body angle affects submission geometry and difficulty. Precision MMA adds that the meathook system—pulling the opponent's shoulder inward and controlling head position—creates a base for transitioning to back takes via figure-four seatbelt and share-sit mechanics. Both instructors stress that forcing high mount against skilled defenders requires incremental position improvements and timing, as opponents can bridge, hip escape, or build their elbow base to defend against premature submission attempts.
Synthesized from 3 instructors
No instructional courses yet for this technique.
Sign in to suggest a course.
Risk of injury to the person this technique is applied to
Top positions enable pressure and striking; rib compression risk under heavy pressure
Skill level needed to execute this technique reliably
Whether this technique is allowed under major competition rule sets
Mastering Jujitsu (Renzo Gracie & John Danaher, 2003)
Alias sources — [1] Jiu-Jitsu University (Ribeiro, 2008) [2] Mastering Jujitsu (Gracie & Danaher, 2003) [3] Mastering Jujitsu (Gracie & Danaher, 2003)
Effectiveness sources — [1] Jiu-Jitsu University (Ribeiro, 2008)
Standard katakana transliteration of Western martial arts terminology (外来語) — used in Japanese MMA, boxing, and BJJ communities
Alias sources — [1] Jiu-Jitsu University (Ribeiro, 2008) [2] Mastering Jujitsu (Gracie & Danaher, 2003) [3] Mastering Jujitsu (Gracie & Danaher, 2003)
Effectiveness sources — [1] Jiu-Jitsu University (Ribeiro, 2008)
base stability, heavy hips, ride ability
heavier build with strong hips for pressure
hip adductors, core, glutes, quadriceps
According to MMA Leech, you can take advantage of your opponent's mistake—if they push on your chest in regular mount, transition to high mount. If your opponent is defending well, you'll need to force it by attacking their neck to open their elbows, or by blocking the top of their head so they can't scoop and then digging your leg underneath.
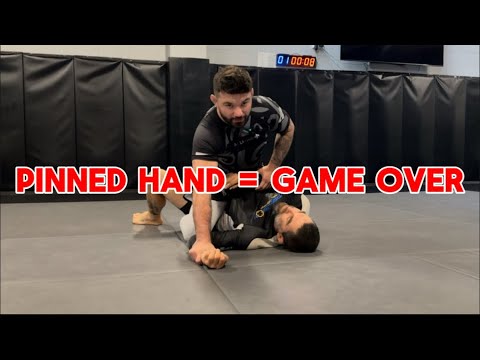
Precision MMA emphasizes getting behind your partner's elbow as the foundation for any mount attack. Work to establish an underhook or use hand pinning techniques to control their positioning before attempting submissions.
Precision MMA explains that when your opponent's head is on the floor, their bridge is powerful and they can dynamically move and off-balance you. By controlling their head and keeping it elevated, you eliminate their ability to bridge effectively and maintain your dominant position.
According to Precision MMA, a common mistake is shooting your arm across to clasp your hands together in defense—this is a 'dumb move' because it compromises your structure and allows your opponent to base out, hip escape, and regain control.
The Standard High Mount slides the hips up to the opponent's upper chest or armpit level, with the knees close to the opponent's shoulders, creating a dominant position with direct access to armbars, cross-chokes, and Ezekiel chokes. The high mounting position makes it very difficult for the bottom fighter to use frames because the top fighter's weight is on the upper body.
The standard high mount is a core position in BJJ's mount attacking system, representing the advanced mount position used for high-percentage submission finishes. It is taught as the primary offensive mount progression after establishing full mount.
IBJJF: legal — Legal, mount scores 4 points — highest-scoring position; IJF: legal — Legal, osaekomi (pin) — 10-19 seconds scores waza-ari, 20 seconds scores ippon; ADCC: legal — Legal, mount scores 2 points; Unified MMA: legal — Legal dominant position; UWW: legal — Legal, back exposure scores points, pin ends match by fall; FIAS Sport Sambo: legal — Legal, pin scores points
Danger rating 3/10. Moderate — top positions enable pressure and striking; rib compression risk under heavy pressure
The standard setup chain: Pass the Guard → Settle Weight → Control Arms → Threaten Submissions.
Standard counters include: Bridge (Upa) — explosive hip elevation to off-balance the top player / Elbow-Knee Escape (Shrimp) — create space by driving elbow to knee and hip-escaping / Frame — establish forearm frames to prevent the top player from settling weight.
Common variants: Low mount (hips heavy on the opponent's belly, grapevines in for sta…); High mount (knees under the armpits, arms isolated for submissions); S-mount (one knee high under the armpit, other leg across for arm …); Technical mount (one leg hooked, one knee posted, modified for back-take t…).
Used in BJJ and MMA competition.
Top errors to watch for: Walking both knees up simultaneously — alternate one knee at a time for stability / Not leaning forward during the climb — forward pressure is essential to prevent the opponent from creating space / Climbing without controlling the arms — as the knees advance, the arms must be managed / Walking the knees past the armpits — the armpits are the target; going further risks losing the mount.
The Standard High Mount is also known as Sutandādo Hai Maunto, Classic High Mount, Basic High Mount, Chest Mount.

