Reactive vs. Forced High Mount
The high mount can be achieved through two distinct approaches: capitalizing on the opponent's defensive mistakes or actively forcing the position. When an opponent pushes on the chest from standard mount, this creates an immediate opportunity to transition upward. Understanding when to exploit errors versus when to initiate the technique is fundamental to effective mount control.
Identifying the Transition Opportunity
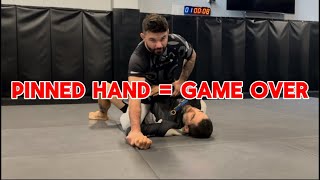
The opponent's elbows become the critical indicator for initiating high mount. When the opponent disconnects or raises their elbows away from their ribs, the mounted grappler should immediately transition upward to capitalize on this opening. This reactive approach requires constant positional awareness.
Forced High Mount: Neck Attacks
When facing a defensively sound opponent, light attacks to the neck can prompt elbow elevation. While experienced opponents may defend by keeping elbows tight and engaged, even slight neck pressure creates technical opportunities. This method forces a reaction rather than waiting for positional mistakes.
Head Control and Leg Digging
The third progression involves blocking the opponent's head to prevent scooping while simultaneously digging the leg deeper across their arms. The knees should connect as close to the ribs as possible for maximum control. Maintaining head control prevents the opponent from using scooping defense during this transition.
Timing the Attack
Once the opponent's arms are open, the mounted grappler must eventually release head control to execute finishing techniques. Proper timing ensures the attack is completed before the opponent can escape or improve their defensive position. The window of opportunity exists while the opponent remains beneath the high mount.
S-Mount Armbar Setup
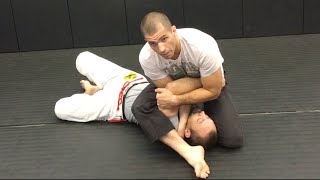
From high mount, the S-mount armbar begins with head trapping and establishing a cross grip. The grappler then sits to the side while keeping the opponent's arms extended. The opponent's wide arm positioning makes this submission particularly high-percentage from high mount.
Mounted Triangle: Position Requirements
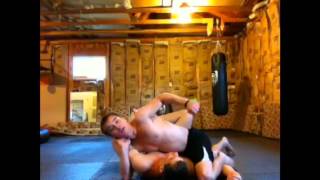
The mounted triangle is most effective when the opponent is positioned on their side, also called the technical or modified mount. This angle creates the space necessary to wrap the leg around the opponent's neck. The same basic structure applies, but the opponent's lateral positioning is critical for technical execution.
Flat vs. Sided Opponent Mechanics
When the opponent lies flat, the neck sits directly against the mat, eliminating the space beneath for leg wrapping. This geometric disadvantage makes the triangle significantly harder to execute from a flat position. The opponent's side-control position provides essential angles that flat positioning cannot offer.
Simple High Mount Set Up & Attacks (No Gi BJJ)
Key Takeaways
- •Reactive vs. Forced High Mount
- •Identifying the Transition Opportunity
- •Forced High Mount: Neck Attacks
- •Head Control and Leg Digging
It's not easy to get to the High Mount position and set up attacks when going against a skilled BJJ practitioner. He will do everything in his power to keep his elbows close to his body. But there are some things that you can do... I wanted to share a simple way to open his arms/elbows that I believe is very effective in order to achieve the high mount. Also, I show some attacks and submission options from there. -Professor Gustavo Gasperin Click Here To Subscribe So You Never Miss A Video ➤ https://bit.ly/2CxCEvi BJJ Courses: https://www.mmaleech.com/best-bjj-instructionals-for-beginners/ Facebook: https://www.facebook.com/mmaleech/ Instagram: https://www.instagram.com/mmaleech/ Free BJJ Mini-Courses: https://www.mmaleech.com/free-stuff/
Frequently Asked Questions
What does this video teach about standard high mount?
This video covers reactive vs. forced high mount, identifying the transition opportunity, forced high mount: neck attacks. It provides detailed instruction from MMA Leech.
How long does it take to learn standard high mount?
The basic mechanics can be understood in a single session, but developing reliable execution requires consistent drilling over weeks of practice. This 8-part breakdown helps structure your training by isolating each phase of the technique.
What are the key details for finishing standard high mount?
The mounted triangle is most effective when the opponent is positioned on their side, also called the technical or modified mount. This angle creates the space necessary to wrap the leg around the opponent's neck. The same basic structure applies, but the opponent's lateral positioning is critical for technical execution.
Related videos

The First 3 Mount Escapes You Need To Know in BJJ
Brandon Mccaghren
Dominate the Mount with the Meathook System (BJJ Control Blueprint)
Precision MMA
S Mount Armbar
MMA Leech
Mounted crucifix or salavery position: Basic instruction
Matthew Elliott
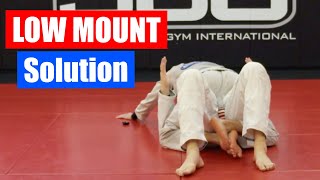
Solution For A Strong Low Mount
SBG PDX & Vancouver BJJ and MMA Videos