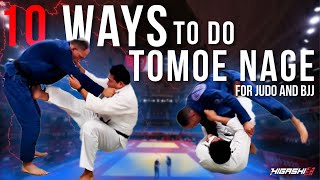
Introduction to Three Tomoe Nage Variations
This instructional covers three distinct tomoe nage variations that are highly effective in both judo and Brazilian Jiu-Jitsu. These techniques have been selected because they complement each other and address different directional applications: two side variations (yoko tomoe nage) and one backward variation (ushiro tomoe nage).
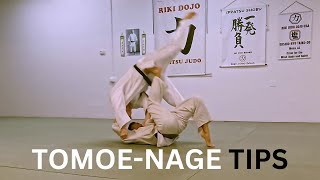
Side Tomoe Nage Setup and Hip Positioning
The foundational side tomoe nage begins with proper hip alignment. The practitioner positions their toes toward the center of the opponent's belt while keeping the hips further back, then steps underneath with the foot to create leverage for the foot placement on the opponent's hip.
Backward Tomoe Nage Mechanics
The straight back variation differs from side applications by attacking directly backward rather than laterally. The practitioner steps to the inside with the opposite foot while maintaining collar and sleeve grips, creating a vertical pulling motion before executing the throw.
Cross-Body Tomoe Nage Variation
The cross-body tomoe nage follows a similar entry but pulls the opponent across the practitioner's body toward the lapel side. This variation emphasizes horizontal momentum rather than vertical, requiring the opponent's body to be pulled forward and laterally across the attacker's centerline.
Combining Multiple Variations in Sequence
These three variations can be strung together as a combination by mixing directional changes and false attacks. A practitioner can execute a back tomoe nage, feign a side entry, and transition to an opposite-side variation to keep the opponent off-balance and confused.
Failed Tomoe Nage as a Guard Entry
A fundamental advantage of tomoe nage in jiu-jitsu is that even incomplete attempts result in a distance guard position. Failed throws allow the practitioner to maintain grips and immediately transition to guard-based submissions and sweeps, making this a low-risk, high-reward approach.
Failure Recovery—Foot Slip and Kanto Choke Transition
When the foot slips off the opponent's hip during a side tomoe nage, the practitioner can recover by repositioning the foot or transitioning to a Kanto choke. The Kanto involves threading the right arm low underneath the opponent's chin while casting the right leg over the back of the neck for a combined choke and leg hook finish.
Kanto Choke Execution and Finishing Position
The Kanto choke is most effective when the opponent's head is low and the attacker can secure a leg hook underneath the opponent's leg with the right leg across their neck. The finish involves heavy downward pulling with both the leg and arm while squaring the hips to maximize leverage and pressure.
Opposite Side Entry—Failed Throw Recovery
When executing a second yoko tomoe nage across the opposite side, failure occurs when the opponent sinks their weight backward due to insufficient upward pulling. The practitioner can then pummeling the left leg through to establish knee-on-belly position and transition into various leg entanglement attacks.
Ashigurami Variation from Failed Throw
After pummeling through from a failed side entry, the practitioner places their knee behind the opponent's leg and drives forward into an ashigurami position. From this foundation, the attacker can execute scooping takedowns, ankle locks, or straight ankle lock transitions by controlling the opponent's far leg and establishing leg hooks.
Tomoe Nage Secrets!! – 3 Variations | #judo #nyc #shintarohigashi
Key Takeaways
- •Introduction to Three Tomoe Nage Variations
- •Side Tomoe Nage Setup and Hip Positioning
- •Backward Tomoe Nage Mechanics
- •Cross-Body Tomoe Nage Variation
Tomoe Nage is one of the most effective sacrifice throws in Judo and BJJ—but what happens when your opponent doesn’t go flying? In this breakdown, I’ll show you three essential variations and, more importantly, how to recover and counter if your throw fails. This is a must-watch for grapplers looking to sharpen their throwing game and transition smoothly into dominant positions. A huge thank you to Sensei @bzglick for his insights in this video! 00:00:00 Introduction 00:00:16 What we are learning today 00:00:51 Yoko Tomoe Nage 00:01:21 Strightback Tomoe Nage 00:01:50 Cross body yoko Tomoe Nage 00:03:12 What if it fails? Want me at your dojo for a seminar? 💬 DM me on Instagram and let’s make it happen! 🔗 Subscribe & Support Here: https://www.patreon.com/shintaro_higashi_show Don’t forget to Subscribe and click the bell 🔔 icon to be notified about new content drops & podcast episodes! Links: 🇯🇵 Kokushi Budo Institute (The Dojo) Class Schedule in New York, NY 🗽: https://www.kokushibudo.com/schedule 🇯🇵 Shop Higashi Brand Merch & Judo Instructionals: https://www.higashibrand.com 📚 Shintari Higashi x BJJ Fanatics Judo Courses & Instructionals Collection: https://bjjfanatics.com/collections/shintaro-higashi/
Frequently Asked Questions
What does this video teach about standard tomoe nage?
This video covers introduction to three tomoe nage variations, side tomoe nage setup and hip positioning, backward tomoe nage mechanics. It provides detailed instruction from Shintaro Higashi.
How long does it take to learn standard tomoe nage?
The basic mechanics can be understood in a single session, but developing reliable execution requires consistent drilling over weeks of practice. This 10-part breakdown helps structure your training by isolating each phase of the technique.
What are the key details for finishing standard tomoe nage?
When executing a second yoko tomoe nage across the opposite side, failure occurs when the opponent sinks their weight backward due to insufficient upward pulling. The practitioner can then pummeling the left leg through to establish knee-on-belly position and transition into various leg entanglement attacks.