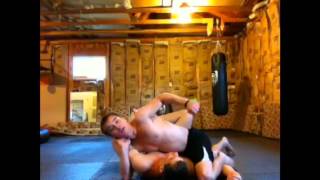
Setup and Arm Disconnection
The instructor begins by addressing the fundamental challenge of the S-mount armbar: when an opponent keeps their elbows tightly connected to their body, the armbar opportunity is unavailable. To create the necessary opening, the instructor initiates a collar choke threat to force the opponent to defend, which naturally causes them to open their arms even slightly. This small separation of the elbows from the body is sufficient to begin working the armbar setup.
Choke Pressure and Elbow Opening
As the instructor commits to the collar choke by pressing their forearm toward the mat, the opponent's defensive response causes them to turn slightly, further opening their elbow away from their body. Against more experienced opponents who maintain tighter elbow position, the instructor uses a specific technique: punching the opponent's elbow inward to drive it toward the center of their body, creating the necessary space.
Chest Control Behind the Triceps
When the opponent successfully resists having their elbow driven inward, the instructor adapts by positioning their chest directly behind the opponent's triceps rather than trying to force the arm further. This body positioning allows the instructor to use their entire body weight to separate the arm from the torso, applying sustained pressure without relying on arm strength alone.
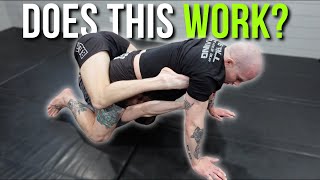
Leg Positioning Around the Head
The instructor transitions to the leg work by lifting their knee up and around the opponent's head, positioning the arm between their legs. Maintaining head control during this transition is critical to prevent the opponent from driving their elbow to the mat and escaping. The instructor's final position has their knee crook positioned tightly behind the opponent's armpit to maximize control and pressure.
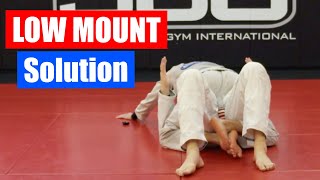
S-Mount Pressure and Grip
Once in the S-mount position, the instructor sits heavily on the opponent's chest with their body weight distributed forward rather than sitting on their heel. The controlling arm is repositioned with the elbow aligned with the opponent's elbow, ensuring proper leverage for the armbar. The closer the instructor brings their knee crook behind the armpit, the tighter and more effective the position becomes.
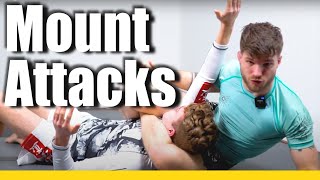
Defending Against the Figure-Four Hand Position
As the instructor begins to complete the armbar by passing their leg, an experienced opponent defends by locking their hand in a figure-four grip, waiting to catch the passing leg. Before completing the leg pass, the instructor must neutralize this defensive hand by positioning their own hand between the opponent's forearms to control the triceps and open space.
Passing the Leg with Hand Control
With the opponent's triceps controlled and space created, the instructor leans toward the opponent's leg to make their own leg light and mobile. The instructor then sweeps the defending hand away while passing their leg underneath the opponent's arm, securing the final armbar position. The position is finalized by squeezing the knees together and positioning the knee crook tightly behind the triceps for maximum pressure.
S Mount Armbar
Key Takeaways
- •Setup and Arm Disconnection
- •Choke Pressure and Elbow Opening
- •Chest Control Behind the Triceps
- •Leg Positioning Around the Head
Watch our Special FREE Tutorials at http://www.mmaleech.com/free-stuff/ Go to our Facebook page for the latest trends in BJJ and MMA. https://www.facebook.com/mmaleech. The S mount is one of the hardest mounts to escape from and offers plenty of attacks, like the Armbar I want to show you in this video. It’s a slow, step by step armbar, that’s very hard to stop, even if your opponent knows what you are trying to do. If he tries to defend it by locking up his arms in a figure 4 position (most people will do), make sure to watch the video until the end where I show you how to get rid of his defenses.
Related Techniques
Frequently Asked Questions
What does this video teach about s-mount?
This video covers setup and arm disconnection, choke pressure and elbow opening, chest control behind the triceps. It provides detailed instruction from MMA Leech.
How long does it take to learn s-mount?
The basic mechanics can be understood in a single session, but developing reliable execution requires consistent drilling over weeks of practice. This 7-part breakdown helps structure your training by isolating each phase of the technique.
What are the key details for finishing s-mount?
As the instructor begins to complete the armbar by passing their leg, an experienced opponent defends by locking their hand in a figure-four grip, waiting to catch the passing leg. Before completing the leg pass, the instructor must neutralize this defensive hand by positioning their own hand between the opponent's forearms to control the triceps and open space.