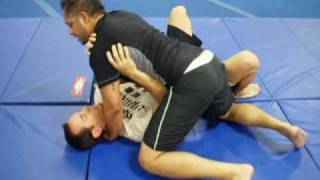
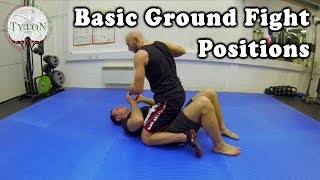
Establishing Control from Mount Position
Begin by controlling your opponent's head and arm while maintaining constant downward pressure. The instructor emphasizes that disconnection and loss of weight distribution are critical errors to avoid. Proper positioning requires keeping the chest pressed firmly against the opponent's body throughout the transition.
Weight Distribution and Hip Pressure
Maintain ground contact with both feet while shifting weight progressively onto the opponent. The instructor demonstrates lifting the hip slightly before pressing downward to establish the upper side mount position. Consistent pressure prevents the opponent from creating space or reversing the position.
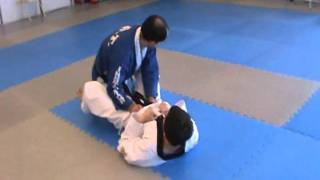
Arm Control and Chest Positioning
Hook the opponent's arm while keeping the chest glued to their body throughout the transition. Slide the top foot upward while maintaining continuous pressure and control. This tight positioning creates multiple submission opportunities from the side mount.
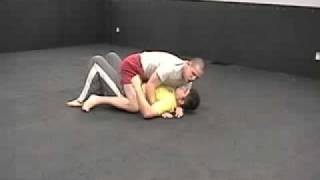
Preventing Reversal Techniques
When the opponent attempts to grab around the waist for a reversal, elevate the hips slightly off the ground and press downward with authority. The sprawling motion—extending one leg while maintaining weight distribution—prevents the opponent from bridging or escaping. Keep weight pressure continuous throughout the defensive movement.
Knee Slide and Leg Control
Drive the knee through while checking the opponent's leg to prevent escape. The instructor demonstrates stepping out wide before bringing the leg high to control both of the opponent's legs. Maintaining head control and pinning pressure ensures the opponent cannot counter the transition.
Managing Leg Defense
When the opponent crosses their legs defensively, coming over the top creates space to stick the leg through and check their movement. Pin the head with hand pressure while creating separation at the knee. This control sequence prevents the opponent from generating counterattacks.
Transitioning to Seated Position
From the secured side mount, drop to one knee and step around while maintaining control of both opponent limbs. The instructor presents two options: a direct knee drop transition or a switch to the opposite side. Hand placement and lower body positioning determine which follow-up technique to execute.
Final Transition to Middle Position
Lift the leg and press crosswise toward the opponent's chest before rotating. Lean the chest into the opponent's body and hop up to reset positioning. This concluding movement establishes the middle control position for subsequent techniques.
Cyberdojang.com: Positioning - Transitioning to Side Mounts
Key Takeaways
- •Establishing Control from Mount Position
- •Weight Distribution and Hip Pressure
- •Arm Control and Chest Positioning
- •Preventing Reversal Techniques
Here's the preview of the latest Cyberdojang.com lessons taught by Hwa Rang Do Grandmaster Taejoon Lee. In this session, he teaches the concepts of gotoogi (grappling). In this segment he shows how enhance your positioning, focusing on the various side mount transitions. www.cyberdojang.com. The official online school of Hwa Rang Do Grandmaster Taejoon Lee. Hope to see you there. Hope you enjoyed our preview. Please join us at www.cyberdojang.com.
Related Techniques
Frequently Asked Questions
What does this video teach about tkd mount transition?
This video covers establishing control from mount position, weight distribution and hip pressure, arm control and chest positioning. It provides detailed instruction from Hwa Rang Do.
How long does it take to learn tkd mount transition?
The basic mechanics can be understood in a single session, but developing reliable execution requires consistent drilling over weeks of practice. This 8-part breakdown helps structure your training by isolating each phase of the technique.
What are the key details for finishing tkd mount transition?
From the secured side mount, drop to one knee and step around while maintaining control of both opponent limbs. The instructor presents two options: a direct knee drop transition or a switch to the opposite side. Hand placement and lower body positioning determine which follow-up technique to execute.
Related videos
Taekwondo Reversing Mount & Passing Guard
Maximum Martial Arts University
Brazilian Jiujitsu technique: Mount transition
fightculturevision
Grappling Drill F: Basic Grappling Positions.
Korean Academy of Taekwondo
JKD Ground Fighting Techniques
EliteDefenseSystems
Basic Ground Fight Positions - Grappling & Ground Fight
STRONGER Than Life!