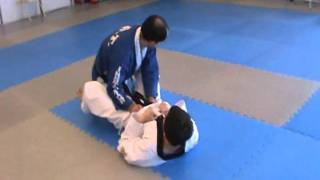
Cross-Side Control Foundation
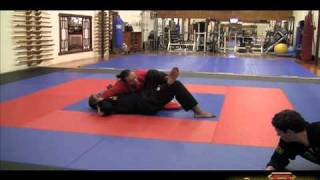
The instructor establishes the fundamental base position for cross-side control, emphasizing the importance of a strong defensive posture. One arm secures under the opponent's neck while the other controls their arm, with hands locked together. The controlling leg pins against the opponent's hip while the base leg extends laterally for stability.
Weight Distribution and Chest Pressure
Proper weight transfer is critical in maintaining control from cross-side position. The practitioner should minimize weight on their elbows and instead direct all pressure chest-to-chest onto the opponent. This weight distribution maximizes control while reducing the opponent's ability to escape or bridge.
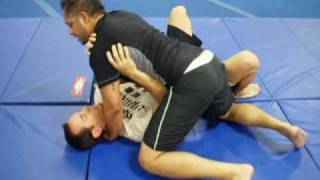
Knee Pin Transition
The knee pin serves as a transitional technique rather than a submission in isolation. From the base position, the controlling knee slides up and exchanges position with the chest, moving across the opponent's diaphragm. The instructor then scrapes the leg downward toward the mount position while maintaining upper body control.
Three Lock Series - Arm Up Lock
The first lock in the series begins from base position with the opponent's arm elevated. One hand grips the opponent's wrist while the other hand slides underneath to create the lock. The practitioner lifts upward with both hands to complete the submission.
Three Lock Series - Arm Switch Lock
The second lock requires switching hand positions after establishing the first lock. The practitioner removes the elevated arm and repositions hands to control the same arm from the opposite direction. This lock is created by rolling the back hand or arm to apply pressure on the opponent's joints.
Three Lock Series - Arm Down Lock
The third lock involves controlling the opponent's arm in a down position. The practitioner grabs the wrist and places their forearm as close as possible to the opponent's elbow—a common error occurs when the controlling arm is positioned too far from the elbow. The lock is completed by pulling upward with proper arm placement.
Wrist Choke Technique
From a solid base position, the instructor demonstrates the wrist choke by inserting one arm across the opponent's neck and grabbing their shirt on the far side. The practitioner then rolls into the choke while shifting all body weight onto the controlling wrist. This creates a pressure-based submission that capitalizes on the mechanical advantage of the cross-side position.
JKD Ground Fighting Techniques
Key Takeaways
- •Cross-Side Control Foundation
- •Weight Distribution and Chest Pressure
- •Knee Pin Transition
- •Three Lock Series - Arm Up Lock
http://www.JKDnewsletter.com Jeet Kune Do training using ground fighting moves from Brazilian Jiu Jitsu from cross side or side mount. For 3 free interviews with JKD Expert Instructors go to http://www.JKDnewsletter.com
Related Techniques
Frequently Asked Questions
What does this video teach about tkd ground control?
This video covers cross-side control foundation, weight distribution and chest pressure, knee pin transition. It provides detailed instruction from EliteDefenseSystems.
How long does it take to learn tkd ground control?
The basic mechanics can be understood in a single session, but developing reliable execution requires consistent drilling over weeks of practice. This 7-part breakdown helps structure your training by isolating each phase of the technique.
What are the key details for finishing tkd ground control?
The third lock involves controlling the opponent's arm in a down position. The practitioner grabs the wrist and places their forearm as close as possible to the opponent's elbow—a common error occurs when the controlling arm is positioned too far from the elbow. The lock is completed by pulling upward with proper arm placement.
Related videos
Grappling Drill F: Basic Grappling Positions.
Korean Academy of Taekwondo
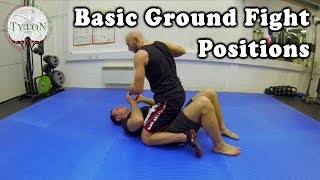
Basic Ground Fight Positions - Grappling & Ground Fight
STRONGER Than Life!
Taekwondo Reversing Mount & Passing Guard
Maximum Martial Arts University
Brazilian Jiujitsu technique: Mount transition
fightculturevision
Cyberdojang.com: Positioning - Transitioning to Side Mounts
Hwa Rang Do