Guard Position Fundamentals
When defending from the guard, the instructor establishes two primary concerns: preventing sweeps and defending against submissions. A wide, stable base—similar to an equilateral triangle—provides superior stability compared to a narrow stance. The practitioner should maintain an upright posture with the neck retracted and arms protected close to the body.
Hand Positioning and Elbow Control
The instructor demonstrates three guard-passing hand positions: belt grip, elbow dig, and elbow control. Each position serves to neutralize the opponent's offensive capabilities while protecting against arm attacks and chokes. Maintaining control of the opponent's elbows reduces their ability to execute techniques without hand involvement.
Tailbone Guard Pressure and Escape
The tailbone guard technique involves placing the knee on the opponent's tailbone to create discomfort and force positional adjustment. In training, controlled pressure encourages the opponent to open space; in self-defense applications, maximal force between the legs creates the necessary separation to escape. This pressure must be paired with elbow digging for maximum effectiveness.
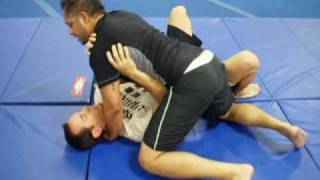
Guard Pass Mechanics
When executing an underhand guard cut, the practitioner must control the opponent's leg to prevent re-establishment of the guard. The technique involves driving the opponent forward to create a stacked position, then driving the knee over the hip to achieve front mount control. Failure to control the leg results in the opponent easily recapturing the guard.
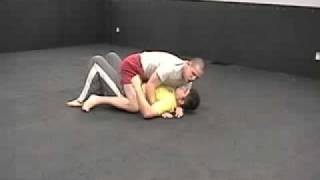
Front Mount and Secure Mount Positions
Front mount provides superior control compared to guard, with the legs positioned above the opponent's hips for increased leverage. The secure mount (Superman position) offers maximum control through leg grapevining and arm positioning—either with one forearm under the opponent to prevent shrimping or both arms extended for versatility. This position limits the opponent's defensive options while maximizing control.
Transition to Back Mount
When the opponent is pressured on the head, natural instinct typically drives them to turn onto their stomach, especially in untrained individuals and wrestlers. Rather than preventing this turn, the instructor deliberately creates space to facilitate the transition, immediately securing the back mount position. Back mount is superior because the opponent cannot see or effectively counter incoming attacks.
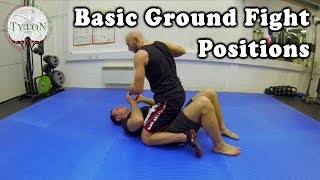
Back Mount Control Against Standing
When the opponent attempts to stand by creating space between hips and ground, the instructor hooks under both arms while spreading them wide for complete control. Proper hook placement under the arms prevents escape and maintains positional dominance. The sitting back mount position requires a single leg hook rather than crossed legs for optimal control.
The Never-Ending Drill Sequence
The complete drill creates a continuous cycle: guard positions → guard pass → front mount → secure mount → back mount → standing defense → 180-degree rotation → sitting back mount → guard recapture. This flowing sequence trains seamless transitions between positions while demonstrating the interconnected nature of grappling fundamentals. The cycle repeats to reinforce timing and positioning throughout the continuous exchange.
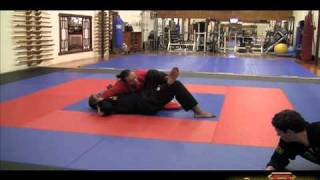
Grappling Drill F: Basic Grappling Positions.
Key Takeaways
- •Guard Position Fundamentals
- •Hand Positioning and Elbow Control
- •Tailbone Guard Pressure and Escape
- •Guard Pass Mechanics
Grappling Drill F. Basic Grappling Positions. Normally for green belts.
Related Techniques
Frequently Asked Questions
What does this video teach about tkd ground control?
This video covers guard position fundamentals, hand positioning and elbow control, tailbone guard pressure and escape. It provides detailed instruction from Korean Academy of Taekwondo.
How long does it take to learn tkd ground control?
The basic mechanics can be understood in a single session, but developing reliable execution requires consistent drilling over weeks of practice. This 8-part breakdown helps structure your training by isolating each phase of the technique.
What are the key details for finishing tkd ground control?
When the opponent attempts to stand by creating space between hips and ground, the instructor hooks under both arms while spreading them wide for complete control. Proper hook placement under the arms prevents escape and maintains positional dominance. The sitting back mount position requires a single leg hook rather than crossed legs for optimal control.
Related videos
JKD Ground Fighting Techniques
EliteDefenseSystems
Basic Ground Fight Positions - Grappling & Ground Fight
STRONGER Than Life!
Taekwondo Reversing Mount & Passing Guard
Maximum Martial Arts University
Brazilian Jiujitsu technique: Mount transition
fightculturevision
Cyberdojang.com: Positioning - Transitioning to Side Mounts
Hwa Rang Do