The First 3 Mount Escapes You Need To Know in BJJ
0
Standard Bridge And Roll·Brandon Mccaghren
When you first start Jiu Jitsu, you're gonna be getting stuck in the bottom of mount. A lot. Even by people who aren't v…
Translation: standard bridge and roll
The Standard Bridge And Roll from side control bridges the hips explosively while turning into the opponent, using the bridge momentum and body rotation to tip the opponent over. [1] The defender times the bridge for when the opponent's weight is high or committed in one direction, then drives the hips up and turns the body toward the opponent, rolling them over the top. [1],[2] The escape finishes with the defender on top, typically in the opponent's closed guard. [2],[3]
The bridge and roll from side control is effective primarily when the opponent settles into a static side control with their weight distributed forward. [1] It is less reliable than the hip escape against experienced grapplers but remains a useful tool when timed with the opponent's weight shift. [1],[2]
The standard bridge and roll is a fundamental side control escape. [1]
Used in BJJ competition. [1]
No images yet for this technique.
Sign in to suggest an image.
When you first start Jiu Jitsu, you're gonna be getting stuck in the bottom of mount. A lot. Even by people who aren't v…
Get the full series, The Pillars: Half Guard Bottom 5-vol. course When you learn this simple but highly effective break…
Third Law BJJ bridge and shrimp
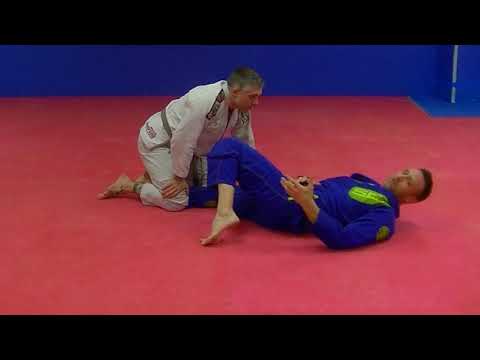
The standard bridge and roll from side control is a foundational escape technique that relies on trapping the opponent's limbs and using hip momentum to reverse position. Brandon Mccaghren emphasizes trapping both of the opponent's arms on one side of their body—either by pinning the hand and collecting the elbow, using both hands, or securing an overhook if they grab around the head—while keeping the other arm tight to avoid exposure. Foot placement is critical: rather than trapping from center, practitioners should shift their hips and pull their heels to their buttocks to establish an effective leg trap. The escape itself requires looking back over the shoulder and bridging in a backward diagonal direction, not sideways, executed as one fluid motion rather than separate bridge-then-roll components. 40 Plus BJJ provides contextual timing guidance, noting that bridging is most effective when the opponent's chest pressure is higher (above the sternum line) rather than when their hips are low and smashing; when hips are low, a shrimp escape is preferable. Team Third Law Academy adds the detail that the bottom hand should be placed at the throat to manage pressure and prevent submissions, while the other hand controls the hips without pushing, followed by bringing the legs together and executing the movement as an integrated bridge-shrimp-turn sequence to restore guard position.
Synthesized from 3 instructors
No instructional courses yet for this technique.
Sign in to suggest a course.
Risk of injury to the person this technique is applied to
Bottom escapes from mount/side control; bridge and hip escape mechanics (Ribeiro 2008)
Skill level needed to execute this technique reliably
Whether this technique is allowed under major competition rule sets
Jiu-Jitsu University (Saulo Ribeiro, 2008)
Alias sources — [1] Jiu-Jitsu University (Saulo Ribeiro, 2008) [2] Brazilian Jiu-Jitsu: Theory and Technique (Renzo Gracie & Royler Gracie, 2001)
Effectiveness sources — [1] Jiu-Jitsu University (Saulo Ribeiro, 2008) [2] Brazilian Jiu-Jitsu: Theory and Technique (Renzo Gracie & Royler Gracie, 2001)
Standard katakana transliteration of Western martial arts terminology (外来語) — used in Japanese MMA, boxing, and BJJ communities
Alias sources — [1] Jiu-Jitsu University (Saulo Ribeiro, 2008) [2] Brazilian Jiu-Jitsu: Theory and Technique (Renzo Gracie & Royler Gracie, 2001)
Effectiveness sources — [1] Jiu-Jitsu University (Saulo Ribeiro, 2008) [2] Brazilian Jiu-Jitsu: Theory and Technique (Renzo Gracie & Royler Gracie, 2001)
hip escape (shrimping) speed, framing strength, timing
flexible hips and quick lateral movement
hip flexors, obliques, triceps (framing), core
According to Brandon McCaghren, trap both of your opponent's limbs on one side of their body, then bridge and look back over your shoulder as if doing a backwards roll. You can trap the hand with an overhook or other methods, but keep your other hand tight to yourself to avoid exposure.
Rather than trapping from the center where your opponent can stay low and hide their foot, shift your hips over, turn your knees toward their leg, and pull your heel to your butt to create a much more effective trap.
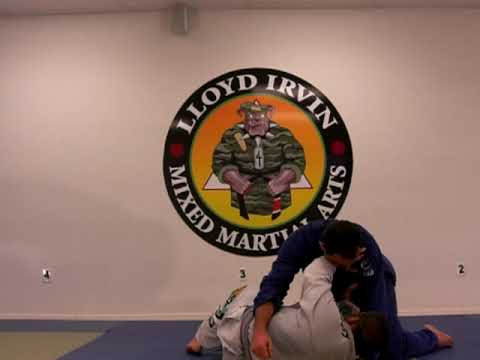
Make the bridge and roll one fluid movement rather than two separate motions. Brandon McCaghren emphasizes that combining these into a single smooth movement will significantly increase your success rate, and you should look back over your shoulder and bridge in that direction rather than rolling sideways.
Pushing with your hands won't be effective and exposes you to having your wrists pinned under your opponent's weight. Instead, bring your legs together and use your legs and hips to create the escape.
The Standard Bridge And Roll from side control bridges the hips explosively while turning into the opponent, using the bridge momentum and body rotation to tip the opponent over. The defender times the bridge for when the opponent's weight is high or committed in one direction, then drives the hips up and turns the body toward the opponent, rolling them over the top.
The standard bridge and roll from side control is a fundamental escape technique in judo and BJJ, taught as a basic method of reversing the side control position. It is one of the first side control escapes taught to beginners.
Unified MMA: legal — Legal defensive technique; IBJJF: legal — Legal — escapes and sweeps are fundamental to BJJ, sweep from bottom scores 2…; IJF: legal — Legal; ADCC: legal — Legal, sweep scores 2 points (4 from mount/back); FIAS Sport Sambo: legal — Legal; FIAS Combat Sambo: legal — Legal
Danger rating 3/10. Moderate — bottom escapes from mount/side control; bridge and hip escape mechanics (Ribeiro 2008)
The standard setup chain: Frame Defence → Trap the Arm → Bridge Explosively → Roll to Top.
Standard counters include: Heavy Hips — maintain low hip pressure and wide base to absorb the bridge / Grapevine — hook legs inside opponent's thighs to neutralize hip movement / Post Hand — post arm on the mat in the direction of the bridge to maintain balance.
Common variants: Shrimp to guard (framing and hip-escaping to recover full guard or half guard); Underhook escape (winning the underhook and coming to knees or reversing); Bridge to knees (bridging into the opponent and transitioning to turtle or…); Ghost escape (inverting under the opponent to re-guard from the opposit…).
Used in BJJ competition.
Top errors to watch for: Trapping only the arm without the leg — the opponent bases with the free leg and resists the roll / Bridging vertically instead of diagonally — the roll requires angular momentum over the trapped shoulder / Weak bridge that doesn't generate enough lift — the bridge must be powerful enough to displace the opponent / Releasing the traps during the bridge — maintain the arm and leg control throughout the roll.
The Standard Bridge And Roll is also known as Sutandādo Burijji Ando Rōru, Basic Side Control Roll, Standard Side Mount Reversal.