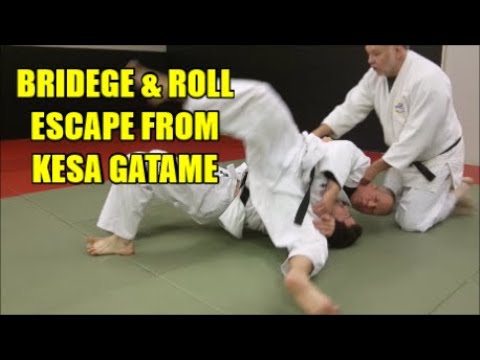
BRIDGE & ROLL PIN ESCAPE FROM KESA GATAME
0
Standard Bridge And Roll Kesa·JBBA Judo Education Channel·Added by Admin
For information on the Judo Black Belt Association (JBBA) Coach Education Program (JCEP), go to www.judoblackbelt.com. T…
Translation: standard kesa gatame bridge and roll
The Standard Bridge And Roll Kesa executes the fundamental kesa gatame escape by trapping the opponent's far arm, bridging explosively toward the opponent's head, and rolling them over the bridge. [1] The defender secures the opponent's far wrist or sleeve, bridges the hips high toward the ceiling, then rolls toward the opponent's head side, using the trapped arm and bridge momentum to flip the opponent. [1],[2] The escape finishes with the defender on top, typically in the opponent's closed guard or half guard. [2],[3]
A fundamental judo osaekomi escape. [1]
Used in judo competition. [1]
No images yet for this technique.
Sign in to suggest an image.
For information on the Judo Black Belt Association (JBBA) Coach Education Program (JCEP), go to www.judoblackbelt.com. T…
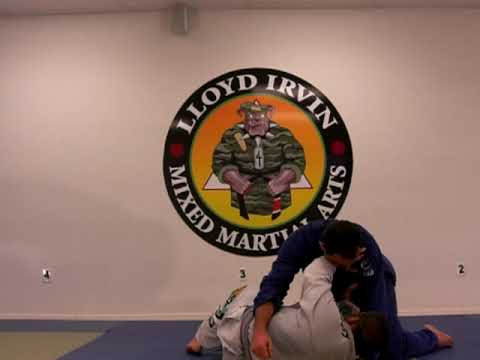
Here is an effective escape from the Mount or Vertical Hold and counter with a straight knee lock. Demonstrated by Derri…
Third Law BJJ bridge and shrimp
The standard bridge and roll from kesa gatame is a two-phase escape executed from bottom position that requires precise sequencing and body control. JBBA Judo Education Channel emphasizes the fundamental principle: bridge first, then roll—two distinct movements rather than a single combined action. The defender establishes a body lock or gable grip around the opponent's torso, scoots their hips close, plants their feet firmly on the mat, and drives a bridge directly toward their own head to create space and lift the opponent. Only after achieving full bridge height does the defender initiate the roll, driving over the bridge while maintaining foot contact with the mat throughout—a critical detail, as losing foot connection compromises the escape. JBBA stresses that premature rolling or flailing feet will trap the defender; the bridge must be developed as a standalone skill before adding the roll component. Team Third Law Academy #2 and welcomematstevescott offer complementary details on hand positioning and defensive mechanics during side control escapes and mount reversals, emphasizing that hands should control the opponent's hips rather than their upper body, and that tight body connection during the rolling phase prevents re-pinning. All instructors agree that the escape requires explosive commitment once initiated and that practitioners should drill the bridge component separately to build the requisite strength and timing.
Synthesized from 3 instructors
No instructional courses yet for this technique.
Sign in to suggest a course.
Risk of injury to the person this technique is applied to
Bottom escapes from mount/side control; bridge and hip escape mechanics (Ribeiro 2008)
Skill level needed to execute this technique reliably
Whether this technique is allowed under major competition rule sets
Jiu-Jitsu University (Saulo Ribeiro, 2008)
Alias sources — [1] Kodokan Judo (Jigoro Kano, 1986) [2] Brazilian Jiu-Jitsu: Theory and Technique (Renzo Gracie & Royler Gracie, 2001)
Effectiveness sources — [1] Jiu-Jitsu University (Saulo Ribeiro, 2008) [2] Kodokan Judo (Jigoro Kano, 1986)
Mixed Japanese-Western terminology — combines traditional Japanese terms with katakana loanwords
Alias sources — [1] Kodokan Judo (Jigoro Kano, 1986) [2] Brazilian Jiu-Jitsu: Theory and Technique (Renzo Gracie & Royler Gracie, 2001)
Effectiveness sources — [1] Jiu-Jitsu University (Saulo Ribeiro, 2008) [2] Kodokan Judo (Jigoro Kano, 1986)
hip escape (shrimping) speed, framing strength, timing
flexible hips and quick lateral movement
hip flexors, obliques, triceps (framing), core
Keep your hands on the opponent's hips, not their arms or upper body. Steve Scott emphasizes that where the hips go, the person goes—if you grab their arms instead, you're giving them an armlock setup.
You want to be on your side, not on your back. This position allows you to get proper arch and leverage for the leg lock, similar to juji gatame on the leg, and lets you drive further back regardless of flexibility.
Place your shin tight in the opponent's crotch area and use it to block their hip and thigh. Steve Scott notes that cupping the knee hook as tight as possible is crucial for making the lock effective.
Bridge and roll are two separate events—you bridge first and hold, then turn. The JBBA Judo Education Channel emphasizes not doing them simultaneously; bridge then turn, bridge then turn.
Speed is critical—you need to make an explosive movement as soon as you realize you're in trouble. The JBBA Judo Education Channel notes that once you get stuck, it becomes very hard to escape.
The Standard Bridge And Roll Kesa executes the fundamental kesa gatame escape by trapping the opponent's far arm, bridging explosively toward the opponent's head, and rolling them over the bridge. The defender secures the opponent's far wrist or sleeve, bridges the hips high toward the ceiling, then rolls toward the opponent's head side, using the trapped arm and bridge momentum to flip the opponent.
The standard bridge and roll from kesa gatame is a foundational judo and BJJ escape technique, taught as the primary method of escaping the scarf hold position. It has been a standard part of ground work training for over a century.
Unified MMA: legal — Legal defensive technique; IBJJF: legal — Legal — escapes and sweeps are fundamental to BJJ, sweep from bottom scores 2…; IJF: legal — Legal; ADCC: legal — Legal, sweep scores 2 points (4 from mount/back); FIAS Sport Sambo: legal — Legal; FIAS Combat Sambo: legal — Legal
Danger rating 3/10. Moderate — bottom escapes from mount/side control; bridge and hip escape mechanics (Ribeiro 2008)
The standard setup chain: Frame Defence → Trap the Arm → Bridge Explosively → Roll to Top.
Standard counters include: Heavy Hips — maintain low hip pressure and wide base to absorb the bridge / Grapevine — hook legs inside opponent's thighs to neutralize hip movement / Post Hand — post arm on the mat in the direction of the bridge to maintain balance.
Common variants: Shrimp to guard (framing and hip-escaping to recover full guard or half guard); Underhook escape (winning the underhook and coming to knees or reversing); Bridge to knees (bridging into the opponent and transitioning to turtle or…); Ghost escape (inverting under the opponent to re-guard from the opposit…).
Used in judo competition.
Top errors to watch for: Bridging straight up without direction — the bridge must angle toward the opponent's back / Not trapping the arm before rolling — the arm trap is essential; without it, the opponent posts and stops the roll / Using a weak bridge — the bridge must be explosive; generate maximum hip height and momentum / Rolling in the wrong direction — always roll over the opponent's trapped-arm shoulder.
The Standard Bridge And Roll Kesa is also known as Sutandādo Kesa-gatame Burijji Kaeshi, Basic Kesa Bridge Escape, Scarf Hold Reversal.