Bridge and Roll Escape by Travis Stevens
0
Bridge And Roll Kesa·BJJ Fanatics
BRIDGE AND ROLL ESCAPE https://www.bjjfanatics.com This video explains the Bridge and Roll Escape BJJ Technique. Travi…
Translation: kesa gatame bridge and roll
The Bridge And Roll Kesa subfamily covers the escape from kesa gatame where the defender bridges explosively toward the opponent and rolls them over, using the opponent's headlock grip against them by converting it into a pivot point for the roll. [1] The bridge must be directed toward the opponent's head side, as this is the direction where the kesa gatame is weakest — the opponent's arm around the head creates an unstable base on that side. [1],[2] The roll converts the defensive position into a top position as the opponent is rolled onto their back with the defender ending up in their guard or mount. [2],[3]
The bridge and roll from kesa gatame uses an explosive bridge to create space and roll the opponent over. [1]
Adapted from judo osaekomi escape methods. [1]
Used in judo and BJJ competition. [1]
No images yet for this technique.
Sign in to suggest an image.
BRIDGE AND ROLL ESCAPE https://www.bjjfanatics.com This video explains the Bridge and Roll Escape BJJ Technique. Travi…
Many give up on the bridge and roll technique also known as Upa in BJJ thinking that the technique is flawed. The truth …
No instructional courses yet for this technique.
Sign in to suggest a course.
Risk of injury to the person this technique is applied to
Bottom escapes from mount/side control; bridge and hip escape mechanics (Ribeiro 2008)
Skill level needed to execute this technique reliably
Whether this technique is allowed under major competition rule sets
Jiu-Jitsu University (Saulo Ribeiro, 2008)
Alias sources — [1] Kodokan Judo (Jigoro Kano, 1986) [2] Judo Formal Techniques (Tadao Otaki & Donn Draeger, 1983)
Effectiveness sources — [1] Kodokan Judo (Kano, 1986)
Mixed Japanese-Western terminology — combines traditional Japanese terms with katakana loanwords
Alias sources — [1] Kodokan Judo (Jigoro Kano, 1986) [2] Judo Formal Techniques (Tadao Otaki & Donn Draeger, 1983)
Effectiveness sources — [1] Kodokan Judo (Kano, 1986)
explosive hip bridge power, shrimping ability, timing
strong glutes and hip extensors for powerful bridges
glutes, hip extensors, core, quadriceps
Every move, in any martial art, shares a few universal traits. Mix and match below to pinpoint the right tool — or compare equivalents across styles.
Looking up prevents your opponent from setting grips on you and allows you to frame across their body more effectively. According to Travis Stevens, looking up also helps you pull their grip off your body rather than rounding your back, which creates problems.
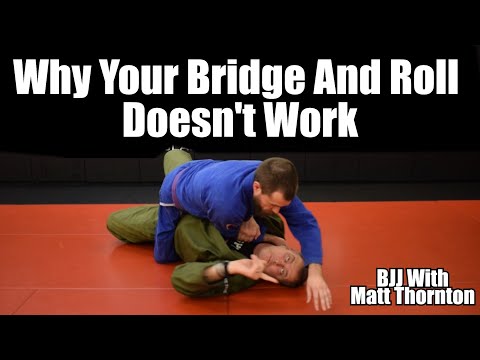
The angle should be at 12 o'clock (straight up), not at 3 o'clock (to the side). Matt Thornton emphasizes that if you have the correct 12 o'clock angle, your opponent will have to defend using their hips, and very little hip lift is needed to make the escape work.
Keep your elbows down on the mat and don't let your opponent get underneath them. Matt Thornton stresses this is critical—if their elbows get up under yours, the escape won't work and you should tuck your tailbone and lift your hips slightly to maintain control.
Travis Stevens advises against the bump-and-roll method because while it may work at white and blue belt levels, it leaves you with poor positioning and isolated arms that give your opponent too many options as you advance.
The Bridge And Roll Kesa subfamily covers the escape from kesa gatame where the defender bridges explosively toward the opponent and rolls them over, using the opponent's headlock grip against them by converting it into a pivot point for the roll. The bridge must be directed toward the opponent's head side, as this is the direction where the kesa gatame is weakest — the opponent's arm around the head creates an unstable base on that side.
The bridge and roll from kesa gatame is one of the classical judo escape techniques, taught alongside the kesa gatame pin as its primary counter. It remains the most commonly taught kesa gatame escape in both judo and BJJ.
Unified MMA: legal — Legal defensive technique; IBJJF: legal — Legal — escapes and sweeps are fundamental to BJJ, sweep from bottom scores 2…; IJF: legal — Legal; ADCC: legal — Legal, sweep scores 2 points (4 from mount/back); FIAS Sport Sambo: legal — Legal; FIAS Combat Sambo: legal — Legal
Danger rating 3/10. Moderate — bottom escapes from mount/side control; bridge and hip escape mechanics (Ribeiro 2008)
The standard setup chain: Frame Defence → Trap the Arm → Bridge Explosively → Roll to Top.
Standard counters include: Heavy Hips — maintain low hip pressure and wide base to absorb the bridge / Grapevine — hook legs inside opponent's thighs to neutralize hip movement / Post Hand — post arm on the mat in the direction of the bridge to maintain balance.
Common variants: Bridge and roll (upa) (explosive bridge trapping arm and leg to reverse position); Elbow-knee escape (framing and shrimping to recover guard); Foot drag escape (dragging the opponent's foot with the heel to create spac…); Combination escape (bridging to force a reaction, then shrimping when the opp…).
Used in judo and BJJ competition.
Top errors to watch for: Bridging toward the opponent's chest — this is the wrong direction; bridge toward their back / Not generating enough hip height on the bridge — a weak bridge doesn't create the momentum for the roll / Trying to roll without blocking the opponent's post — if they can post their free hand, the roll fails / Rolling over the wrong shoulder — the roll goes over the opponent's trapped-arm shoulder.
The Bridge And Roll Kesa is also known as Kesa-gatame Burijji Kaeshi, Kesa Gatame Upa, Scarf Hold Bridge Escape.