Introduction to Nami Juji Jime
The instructor introduces a comprehensive study of nami kata and gyaku juji jime variations, emphasizing that technical details are essential for proper execution. These foundational choking techniques will be taught progressively, beginning from the mount position for easier learning.
Mount Position Setup
When establishing the mount position, the instructor must drive upward to block the opponent's armpit while maintaining pressure. This positioning creates the foundation necessary for executing all subsequent variations of juji jime.
Nami Juji Jime: Hand Placement and Grip
In nami juji jime (palms down cross choke), the first hand is inserted with the thumb inside while the forearm uses the ulna bone—not the radius—to apply pressure across the neck. The second hand passes underneath and mirrors the first grip with thumb inside and ulna pressure applied.
Body Positioning and Pressure Application
The instructor relaxes their body weight downward while keeping elbows closed rather than pulling upward. Pulling upward creates an escape space at the neck; instead, pressure must be directed downward, using the mat as a surface to enhance compression.
Kata Juji Jime: Single-Hand Variation
In kata juji jime, one hand remains in the standard position while the opposite hand is rotated with four fingers inside and thumb outside. The instructor demonstrates that either hand can be rotated, and both variations are technically correct as taught in traditional kata.
Kata Juji Jime: Rotation and Finishing
The rotating hand uses the radius bone to apply pressure while being turned inward, then the body relaxes downward to apply final compression. Alternatively, the grip can be switched so the first hand uses four fingers inside while the second hand uses only the thumb.
Gyaku Juji Jime: Reverse Palm Variation
Gyaku juji jime is executed with both palms facing upward, with four fingers inserted inside on both hands. Both hands are dipped and rotated inward simultaneously before applying downward body pressure to complete the choke.
Critical Technical Checkpoints
Regardless of variation, practitioners must consistently monitor hand placement depth, dipping angle, and rotation degree. These technical details determine the effectiveness and safety of all nami, kata, and gyaku juji jime applications from the mount position.
Nami, Kata and Gyaku Juji Jime Part I: From Mount
Key Takeaways
- •Introduction to Nami Juji Jime
- •Mount Position Setup
- •Nami Juji Jime: Hand Placement and Grip
- •Body Positioning and Pressure Application
Tori: Sensei Jose Eudes Monteiro Uke: Kelvin Cheong Technique: Nami, Kata and Gyaku Juji Jime from Mount Follow us: Facebook: https://www.facebook.com/higashi.ca Instagram: https://www.instagram.com/higashi.ca YouTube: shorturl.at/orDW0 Contact: [email protected] Music: Track: Split — KV [Audio Library Release] Music provided by Audio Library Plus Watch: https://youtu.be/RsyIznC9PXA Free Download / Stream: https://alplus.io/split
Related Techniques
Frequently Asked Questions
What does this video teach about nami juji jime?
This video covers introduction to nami juji jime, mount position setup, nami juji jime: hand placement and grip. It provides detailed instruction from Higashi Canada.
How long does it take to learn nami juji jime?
The basic mechanics can be understood in a single session, but developing reliable execution requires consistent drilling over weeks of practice. This 8-part breakdown helps structure your training by isolating each phase of the technique.
What are the key details for finishing nami juji jime?
Gyaku juji jime is executed with both palms facing upward, with four fingers inserted inside on both hands. Both hands are dipped and rotated inward simultaneously before applying downward body pressure to complete the choke.
Related videos
Nami, Kata & Gyaku Part II: From Guard
Higashi Canada

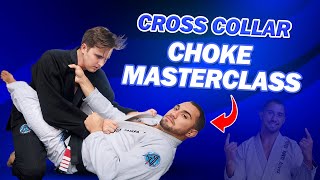
How to Actually FINISH The Cross Collar Choke from Guard
Stephan Kesting

Cross Collar Choke - Fundamentals Made Easy
Jordan Teaches Jiujitsu
Everything You Need to Know About the Cross Collar Choke | Jiu Jitsu Fundamentals #bjj
Matt Arroyo Jiu Jitsu
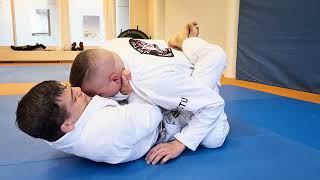
Juji Jime and Kata Juji-Jime from Full Guard - BJJ Cross Collar Choke Submission for MMA Grappling
Peter Mettler Martial Arts