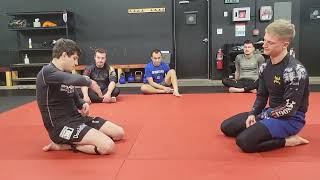
Initial Setup and Arm Trap
The instructor begins from an underhook position and initiates movement to the opposite side while trapping the opponent's arm. As the rotation begins, one arm is positioned near the head to establish control before executing the grip transition that sets up the choke entry.
Grip Transition and Weight Transfer
After establishing the initial grip, the instructor switches hand positioning and transfers weight by hopping or walking to the opposite side of the opponent's body. This lateral movement is critical for positioning the attacking arm properly under the opponent's head.
Arm Positioning Under the Head
The instructor emphasizes that one arm becomes trapped under the opponent's head during the transition. The attacking arm must be tucked and brought downward to create the structural lock needed for the choke, which can be finished even if the head remains in the initial position.
Step-by-Step Breakdown from Underhook
A methodical repetition begins with the underhook position, where the attacking grappler breaks down the opponent's structure by extending the arm downward. The defender then rotates as far as possible before grabbing and sliding the hand to establish mount control as a staging position.
Mount Position Entry and Hand Placement
From mount position, the attacking grappler slides the hand under the opponent's head and grabs the wrist to establish control. The movement transitions into a hop that angles the body to properly set the head-and-arm triangle configuration.
Rotation Mechanics and Arm Control
The instructor clarifies the importance of spinning the opponent's arm during rotation to maintain positional advantage. Proper rotation prevents the opponent from creating space or defending by ensuring the trapped arm moves in conjunction with the body rotation.
Final Positioning and Squeeze Application
Once the head-and-arm triangle position is fully secured with the instructor's head positioned for leverage, the final choke is applied by gradually increasing pressure through synchronized squeezing. The position is confirmed as secure before the submission is fully engaged.
Americana to head and arm triangle choke
Key Takeaways
- •Initial Setup and Arm Trap
- •Grip Transition and Weight Transfer
- •Arm Positioning Under the Head
- •Step-by-Step Breakdown from Underhook
MMA class - BJJ technique
Frequently Asked Questions
What does this video teach about arm triangle choke?
This video covers initial setup and arm trap, grip transition and weight transfer, arm positioning under the head. It provides detailed instruction from Rachel Smith.
How long does it take to learn arm triangle choke?
The basic mechanics can be understood in a single session, but developing reliable execution requires consistent drilling over weeks of practice. This 7-part breakdown helps structure your training by isolating each phase of the technique.
What are the key details for finishing arm triangle choke?
The instructor clarifies the importance of spinning the opponent's arm during rotation to maintain positional advantage. Proper rotation prevents the opponent from creating space or defending by ensuring the trapped arm moves in conjunction with the body rotation.
Related videos

Head And Arm Rear Naked Choke by Heath Pedigo
BJJ Fanatics

How To Do Rear Ezekiel Choke In Gi & No-Gi
Resenha BJJ

Sode Guruma Jime || Sleeve Wheel Choke
The Judo Way of Life
High Wrist Guillotine Choke Submission in Turtle. Arm In, High Elbow, Side Control, Mount, Butterfly
Pica Pau Jiu Jitsu & Grappling
HOW TO DO THE REVERSE GUILLOTINE CHOKE EXECUTIONER BJJ JIU JITSU
Redneckjiujitsu