Clinch Position Fundamentals
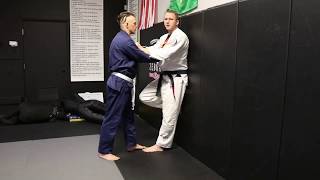
The instructor establishes a fighting stance and demonstrates the basic clinch position for takedowns. The arms are tucked at the waist with the head positioned against the opponent's upper chest and jaw to create off-balance leverage. This clinch serves as the foundation for three directional variations: straight forward, to the side, and from behind.
Outer Leg Trip from Forward Clinch
From the established clinch, the practitioner uses their rear leg to make calf-to-calf contact while pulling on the opponent's waist and turning them with head pressure. The combination of head pressure and body rotation unbalances the opponent, allowing the leg trip to complete the takedown into mount position.
Outer Leg Hook Variation
The instructor demonstrates an alternative leg-based takedown using an outside leg hook instead of a trip. After establishing tight clinch contact, the practitioner steps in calf-to-calf and lifts the opponent's leg while turning, finishing in mount position.
Inside Leg Hook Takedown
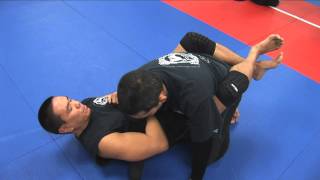
Using the same clinch setup, the practitioner applies pressure to push the opponent back slightly, then hooks the inside leg and drives upward. This variation ends with the practitioner in the opponent's guard, from which they can either secure the legs for a guard pass or exit the position.
Body Fold Takedown
From the clinch position, the practitioner uses head pressure to push straight back while pulling on the waist, executing a body fold. This technique drives the opponent backward and downward, concluding in mount position when performed correctly.
Lead Leg Trips and Hooks
The instructor transitions to using the lead leg instead of the rear leg for trips and hooks, requiring a deeper clinch penetration. The practitioner adjusts head positioning to the opposite side and uses combined head and body rotation to execute the takedown, with options to step between the legs or step over depending on positioning.
Side Clinch Position Advantages
Clinching to the opponent's side provides superior defensive positioning, restricting the opponent's striking options with the far-side hand. The practitioner maintains greater control over the opponent's body while executing the same outer leg trips, hooks, and body fold techniques from this angle.
Hip Throw from Side Clinch
The instructor demonstrates a hip throw variation initiated from the side clinch position. After establishing control, the practitioner regrips the opponent's arm, steps in front with hip placement, and drives them over for the takedown.
Takedown from Rear Clinch Position
From behind the opponent, the practitioner establishes a rear clinch and executes a leg trip by taking a deep step and sitting down, rotating the opponent over the leg. This variation concludes with the practitioner in mount position on the opponent's back.
Clinch / Body Lock Takedowns - Orange County Martial Arts Center
Key Takeaways
- •Clinch Position Fundamentals
- •Outer Leg Trip from Forward Clinch
- •Outer Leg Hook Variation
- •Inside Leg Hook Takedown
Demonstration of various takedowns from the clinch position.
Related Techniques
Frequently Asked Questions
What does this video teach about body clinch?
This video covers clinch position fundamentals, outer leg trip from forward clinch, outer leg hook variation. It provides detailed instruction from Orange County Martial Arts Center.
How long does it take to learn body clinch?
The basic mechanics can be understood in a single session, but developing reliable execution requires consistent drilling over weeks of practice. This 9-part breakdown helps structure your training by isolating each phase of the technique.
What are the key details for finishing body clinch?
The instructor demonstrates a hip throw variation initiated from the side clinch position. After establishing control, the practitioner regrips the opponent's arm, steps in front with hip placement, and drives them over for the takedown.