Introduction to Sacrifice Throws
Sacrifice throws form the foundation of advanced hapkido technique. While appearing deceptively simple on the surface, these throws require precise body mechanics and understanding of the opponent's center of balance.
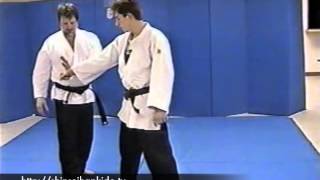
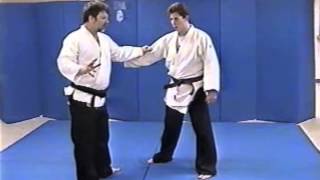
Tominagi (Stomach Throw): Setup and Foot Placement
The practitioner grasps the opponent's lapels high near the neck for control. The supporting foot is placed at an angle toward the opponent's groin, allowing it to sink slightly into the joint and prevent slipping during execution.
Tominagi: Body Mechanics and Center Control
The throwing leg collapses and drives through the opponent's center of mass, located approximately two inches below the navel at the Hara point. Controlling this balance point is essential to all effective judo-based throws and determines successful technique execution.
Tominagi: Variations - Controlled Drop vs. Momentum Roll
The standard Tominagi executes a controlled vertical drop, positioning the opponent face-to-face for post-throw control and submission. The momentum variation utilizes the throw's force to carry the practitioner over the opponent's body, allowing a roll-through finish.
Obinagi (Belt Throw) and Valley Drop
Obinagi targets the opponent's torso regardless of grip availability. The valley drop mirrors Obinagi's initial setup but incorporates a mid-air twist with legs positioned on either side, collapsing the opponent's balance and forcing them face-first to the ground.
Scissor Stroke: Leg Positioning and Execution
One leg positions above the waist while the opposite leg secures behind the knees. The practitioner rolls the opponent over the legs, driving them face-first to the mat while maintaining control throughout the technique.
Subinagi: Setup and Grip Structure
The practitioner controls the opponent's head by tucking it into the chest while securing the torso with a firm grip on the shirt, belt, or undergarment. The head rests on the shoulder as one leg drives across for the throw.
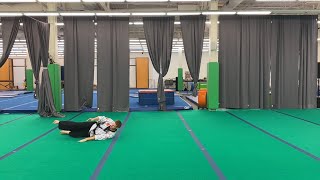
Subinagi: Roll-Through and Post-Throw Control
Upon completing the throw, the practitioner rolls over the opponent's body while maintaining arm and material control. The practitioner's foot secures the groin area, establishing dominant positioning for striking or submission techniques.
Subinagi: Application from Charging Attacks
When executed from a charging attack, the practitioner captures the opponent's momentum while securing multiple control points simultaneously. The groin trap and arm containment allow the practitioner to finish with strikes from a dominant position.
Shinsei Hapkido Sacrifice Throws
Key Takeaways
- •Introduction to Sacrifice Throws
- •Tominagi (Stomach Throw): Setup and Foot Placement
- •Tominagi: Body Mechanics and Center Control
- •Tominagi: Variations - Controlled Drop vs. Momentum Roll
Shinsei Hapkido Sacrifice Throws
Related Techniques
Frequently Asked Questions
What does this video teach about hapkido projection throw?
This video covers introduction to sacrifice throws, tominagi (stomach throw): setup and foot placement, tominagi: body mechanics and center control. It provides detailed instruction from Richard Milliken.
How long does it take to learn hapkido projection throw?
The basic mechanics can be understood in a single session, but developing reliable execution requires consistent drilling over weeks of practice. This 9-part breakdown helps structure your training by isolating each phase of the technique.
What are the key details for finishing hapkido projection throw?
Upon completing the throw, the practitioner rolls over the opponent's body while maintaining arm and material control. The practitioner's foot secures the groin area, establishing dominant positioning for striking or submission techniques.