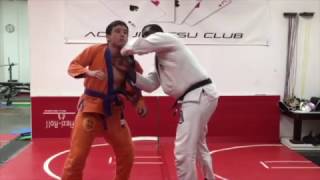
The Core Problem with Wrestling in BJJ
Most practitioners struggle with takedowns because they lack understanding of fundamental principles and objectives. This video addresses the highest-percentage takedown methods that provide optimal positional advantage in Brazilian Jiu-Jitsu.
The Primary Objective: Controlling the Arms
The most effective takedown strategy in BJJ involves neutralizing the opponent's arms to access either body locks or back control. This principle guides all subsequent hand-fighting and positioning decisions.
Lead Hand vs. Rear Hand Engagement
Always initiate contact with the rear hand rather than reaching with the lead hand, which invites single-leg takedown attempts. When the opponent reacts to rear-hand contact, the instructor's forearm blocks leg-capture attempts and enables immediate snap-downs.
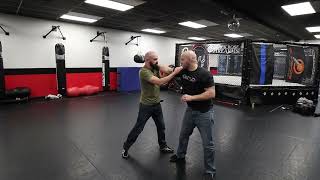
Head Position and Directional Control
Establish proper head-to-head contact with the forehead matched to the opponent's forehead to maintain control and generate movement. Practitioners should continuously snap the opponent forward while circling to identify opportunities for underhooks, single legs, or back access.
Stance Recognition for the Slide-By
Success with slide-by techniques requires positioning the opponent in a lead-foot-to-lead-foot stance rather than an opposite stance. When the opponent's lead leg is weighted toward the instructor's passing side, rotation becomes easier and the technique flows more naturally.
Executing the Slide-By Technique
After pulling the opponent forward into proper foot position, grip the inside of the bicep, tuck the ear toward the shoulder, and slide past the opponent into back control. The technique requires both correct positioning and a slight forward pressure from the opponent to execute smoothly.
Disguising Intent and Preventing Resistance
Avoid telegraphing the slide-by by immediately reaching for the bicep grip, as this alerts the opponent to resist. Instead, extend into the shoulder first and only switch to the bicep grip as footwork develops, keeping the opponent uncertain of the instructor's next action.
Transitioning to the Underhook When Resistance Occurs
When the opponent resists the slide-by by pulling the elbow to the ribs, abandon the technique and instead cut the elbow underneath toward the inside. This transition capitalizes on the opponent's defensive movement and establishes a dominant underhook position.
Executing the Underhook with Proper Shoulder Placement
Once the underhook is secured, immediately drive the shoulder as high as possible underneath the opponent's armpit rather than leaving the hand low. Immediate action is essential—practitioners should not hesitate, as the underhook creates vulnerability to arm-lock submissions.
Finishing Options: Knee Tap and Throw-By Combinations
From the underhook position, execute either knee taps or a far-side knee tap into near-side throw-by to expose the opponent's back. Both techniques employ the same fundamental motion as the slide-by, with arm position adjusted to work from underneath rather than overhead.
Takedowns For BJJ Are Easy Once You Understand This
Key Takeaways
- •The Core Problem with Wrestling in BJJ
- •The Primary Objective: Controlling the Arms
- •Lead Hand vs. Rear Hand Engagement
- •Head Position and Directional Control
✅ 31 Ways In 31 Days to get better faster: https://hpucoaching.aweb.page/p/8bbc26b0-66ae-4a71-af9a-ae95862201e0 ✅Systemise your learning to become a confident competitor and leader on the mats without overwhelm or confusion: https://Yourbjjgame.com
Related Techniques
Frequently Asked Questions
What does this video teach about from standing?
This video covers the core problem with wrestling in bjj, the primary objective: controlling the arms, lead hand vs. rear hand engagement. It provides detailed instruction from Josh Saunders .
How long does it take to learn from standing?
The basic mechanics can be understood in a single session, but developing reliable execution requires consistent drilling over weeks of practice. This 10-part breakdown helps structure your training by isolating each phase of the technique.
What are the key details for finishing from standing?
Once the underhook is secured, immediately drive the shoulder as high as possible underneath the opponent's armpit rather than leaving the hand low. Immediate action is essential—practitioners should not hesitate, as the underhook creates vulnerability to arm-lock submissions.
Related videos
Standing BJJ Submissions & Takedown Options | Texas BJJ
Aces Jiu Jitsu Club
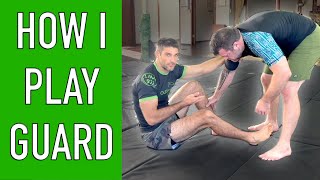
How to play seated open guard (BJJ Analysis)
Less Impressed More Involved BJJ
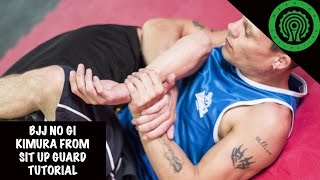
BJJ No Gi Kimura from Sit up Guard Tutorial
Stuart Tomlinson
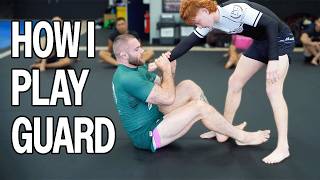
How To Attack Anyone From Seated Guard - Delete Stallers
Josh Saunders
BJJ Black Belt and former UFC fighter show law enforcement control techniques.
Gard Defense Solutions