Introduction: No-Gi Judo Takedowns for BJJ
This instructional series presents five judo-derived takedowns specifically adapted for no-gi grappling. These techniques prioritize safety by mitigating the risk of front headlock positions that commonly arise from shot-based takedowns such as double and single legs.
Weight Distribution and Balance Breaking
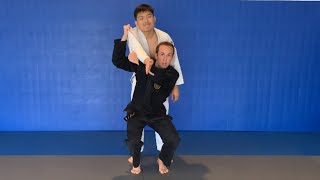
The fundamental principle begins with identifying the opponent's stance and forcing their weight onto a single leg. This is accomplished through a strong collar tie combined with tricep control, creating immediate balance disruption and establishing optimal positioning for the throw.
Balance Break to Leg Sweep Execution
Once the opponent's weight is committed to a single leg, the practitioner steps inward and executes an outside leg sweep. This combination of balance manipulation followed by leg displacement creates a high-percentage throwing opportunity.
Opposite-Handed Matchups: Collar Tie Battle
When facing an opposite-handed opponent, control of the collar tie becomes critical. The practitioner must secure inside position before attempting throws, as outside position significantly reduces throwing effectiveness.
Grip Control and Shoulder Shrug Escape
If the opponent secures inside position with wrist control, a shoulder shrug opens their elbow and allows the practitioner to establish inside grip control. Subsequent wrist control acquisition is essential before transitioning to the throwing phase.
Taitoshi Setup and Posture Breaking
The taitoshi throw begins with posture breaking via the collar tie. As the opponent's posture breaks and they counter with an upward pop, their weight concentrates on their lead leg—the precise moment to execute the hip throw.
Taitoshi Execution: Timing and Hip Drive
During the opponent's upward momentum, the practitioner makes armpit contact and drives their bent leg through before extending for maximum power. This timing during the pop prevents weight distribution shifts that would nullify the throw.
Otsotoshi: Distance Gauging and Weight Transfer
When the opponent leads with the opposite foot, otsotoshi becomes the preferred technique. The practitioner establishes a collar tie that creates neck-to-shoulder tension, forcing weight onto the rear leg before sweeping the front leg.
Uchimata Setup: Whizzer Control
From opposite-handed collar tie positions, the whizzer provides a powerful setup for uchimata. The practitioner must strip the opponent's grip while maintaining a shallow whizzer position to preserve hip mobility necessary for hip throw execution.
Adaptability in Technique Application
While these five takedowns represent highly effective approaches, instructors should emphasize that multiple variations exist for each technique. Individual practitioners must experiment to discover which execution style aligns with their body mechanics and grappling style.
5 Best NoGi Judo Takedowns/ Throws for BJJ
Key Takeaways
- •Introduction: No-Gi Judo Takedowns for BJJ
- •Weight Distribution and Balance Breaking
- •Balance Break to Leg Sweep Execution
- •Opposite-Handed Matchups: Collar Tie Battle
Keller Locke-Sodhi and Rhys Allan teach FIVE of their favourite Judo takedowns adapted for NoGi grappling/ Brazilian Jiu Jitsu. Keller is an ex Australian Judo athlete, BJJ/Judo BlackBelt and ADCC trials Champion, while Rhys is a National Judo Champion turned NoGi grappling competitor. 00:00 - Intro 00:46 - 1. Osoto Gari 02:13 - 2. Tai Otoshi 04:53 - 3. Deashi Harai 06:20 - 4. Uchi Mata 08:32 - 5. Kouchi Gari 09:32 - Worst Throws Website: https://grapplingeducation.com/ Instagram: https://www.instagram.com/grapplingeducation/ Filmed by @judekeann Edited: @chaplin.io #jiujitsu #judo #nogi #bjj #adcc
Frequently Asked Questions
What does this video teach about standard kick catch?
This video covers introduction: no-gi judo takedowns for bjj, weight distribution and balance breaking, balance break to leg sweep execution. It provides detailed instruction from Grappling Education.
How long does it take to learn standard kick catch?
The basic mechanics can be understood in a single session, but developing reliable execution requires consistent drilling over weeks of practice. This 10-part breakdown helps structure your training by isolating each phase of the technique.
What are the key details for finishing standard kick catch?
From opposite-handed collar tie positions, the whizzer provides a powerful setup for uchimata. The practitioner must strip the opponent's grip while maintaining a shallow whizzer position to preserve hip mobility necessary for hip throw execution.