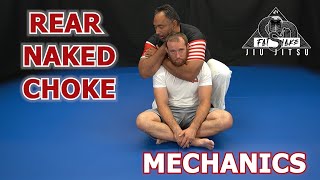
Hand Placement and Base Position
The choking hand should be placed at the base of the skull rather than the top of the head, as the opponent's primary defense involves pulling down on the upper arm. Once positioned, the practitioner should establish hooks with the legs, puff the chest into the opponent, and squeeze everything together to create a secure base.
Pressure Application and Timing
Pressure should be applied gradually and consistently, similar to an anaconda squeeze, rather than with maximum force from the start. If full pressure is applied immediately, the opponent can maintain composure until the attacker fatigues. However, if the choke crosses directly across the throat, maximum pressure can be applied immediately for a faster finish.
Knuckle Variation for Increased Tightness
When the standard palm-to-base-of-skull position is defended, the hand can be rotated so the knuckles face forward, allowing the choking hand to move slightly farther around the side of the opponent's head. This minor adjustment often provides enough additional leverage to secure the finish when the standard position proves insufficient.
Gable Grip Alternative
A variation uses a gable grip instead of the figure-four, with the rear hand posted against the back of the opponent's shoulders. This position allows the practitioner to drive forward with one arm while pulling backward with the other in a chopping motion. The standard rear naked choke should typically be attempted first, as transitioning to the gable grip from a defended position is easier than reversing the sequence.
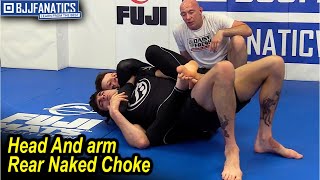
Single-Arm Cutting and Progression
The choking arm can begin by cutting across the opponent's shoulder before gradually working toward the neck during hand-fighting exchanges. A single-arm finish is possible if the hand reaches far enough back and the wrist is rotated so the knuckles drive into the side of the neck while the head drives the opponent's head into the pressure. This approach can be combined with an elbow drape to protect the choking arm from defense.
Elbow Drape Protection Technique
By draping the non-choking elbow over to protect the choking arm instead of using a figure-four, the practitioner maintains pressure even if the opponent successfully pulls down on the choking arm. This position allows for an immediate continuation or switch without losing both arms, unlike a figure-four where losing the grip results in complete loss of control.
Difficulty of Achieving Position
The most challenging aspect of the rear naked choke is achieving the position initially, not maintaining it once locked. Once secured, success depends primarily on maintaining the squeeze and pressure while the opponent attempts to defend. Proper hip and back control must be established beforehand to prevent the opponent from escaping the position entirely.
Neck Defense from Seatbelt Control
When transitioning from the seatbelt grip, the opponent immediately begins defending the neck by tucking the chin, shrugging shoulders, and protecting the throat. The practitioner should expect multiple unsuccessful attempts—potentially three to five—before successfully locking in the choke, as the opponent will actively resist any hand entry to the neck area.
Initial Setup from Seatbelt Grip
From the seatbelt position, the choking arm should immediately cup the opponent's shoulder, while the bottom hand grabs the wrist or collar to control the opponent's defensive hand before it can rise. This sequencing prevents the opponent from establishing defensive barriers around the neck and creates opportunities to transition into the choke.
How to do a Rear Naked Choke | BJJ
Key Takeaways
- •Hand Placement and Base Position
- •Pressure Application and Timing
- •Knuckle Variation for Increased Tightness
- •Gable Grip Alternative
In this video, I discuss a few variations of the Rear Naked Choke (RNC) that I like to utilize both in training and competition. I also believe that the hardest part is actually securing the RNC to begin with. Therefore, we discuss a few key concepts that you should be paying attention to if you wish to lock in a RNC. Check out Combat Corner for all of your fighting gear needs! www.combatcorner.com SOCIAL MEDIA: Instagram: https://www.instagram.com/davidheineman90/ Tik Tok: https://www.tiktok.com/@davidheineman90 Facebook: https://www.facebook.com/staysafesd www.staysafemartialarts.com Stay Safe #staysafemartialarts #staysafe #jiujitsu #rearnakedchoke #submissiongrappling #grappling
Related Techniques
Frequently Asked Questions
What does this video teach about rear choke?
This video covers hand placement and base position, pressure application and timing, knuckle variation for increased tightness. It provides detailed instruction from Stay Safe Martial Arts.
How long does it take to learn rear choke?
The basic mechanics can be understood in a single session, but developing reliable execution requires consistent drilling over weeks of practice. This 9-part breakdown helps structure your training by isolating each phase of the technique.
What are the key details for finishing rear choke?
When transitioning from the seatbelt grip, the opponent immediately begins defending the neck by tucking the chin, shrugging shoulders, and protecting the throat. The practitioner should expect multiple unsuccessful attempts—potentially three to five—before successfully locking in the choke, as the opponent will actively resist any hand entry to the neck area.