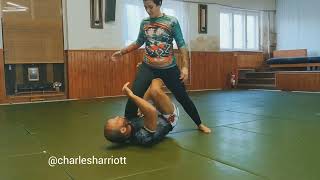
Knee Shield vs. Z-Guard Setup
The knee shield is a half-guard control in which the practitioner traps the opponent's leg with a hook while placing the knee on the opponent's chest between the sternum and shoulder, keeping the arms framed against the neck and arm. The z-guard is a lower variation of the knee shield that incorporates hip control and connected feet to create additional pressure and prevent the opponent from escaping.
Advantages of Z-Guard Over High Knee Shield
The high knee shield allows opponents to lean their torso forward and mill kick their leg back to the mat due to the knee placement on the chest. The z-guard's lower positioning and foot connection prevent this escape route by restricting the opponent's ability to achieve parallel alignment with the mat while maintaining greater overall control.
Transition Trigger: Opponent Meshing Knees
When the opponent presses their knees together against the practitioner's knees during knee shield, the defender's feet naturally separate, creating vulnerability to mill kicks and windshield escapes. This knee-meshing moment signals an ideal time to transition into the z-guard configuration.
Knee Placement and Foot Connection
In the z-guard, the top knee is repositioned to rest on top of the opponent's thigh rather than across the chest, with the shin against the hip bone. This placement creates separation between the practitioner's knees, allowing the feet to be touched together or cross-locked without collapsing when the opponent applies pressure.
Incorrect Shin Placement to Avoid
Placing the shin across the opponent's stomach in the z-guard configuration results in foot separation and allows the opponent to pass through the guard. The correct shin position is on top of the thigh, not across the centerline of the body.
Heel Curl and Hip Push: Sitting on Heel Control
The z-guard's primary control mechanism involves curling the back heel toward the buttocks while simultaneously pushing the top leg against the opponent's hip, forcing the opponent to sit on their heel. This scissors action prevents the opponent from aligning their hip with their knee, which is necessary for escaping the position.
Timing and Energy Management
The practitioner should remain relaxed when the opponent is passive but actively engage the curl-and-push action whenever the opponent attempts to stand or shift weight. This selective engagement prevents unnecessary energy expenditure while maintaining positional security against escape attempts.
Z-Guard VS. Knee Shield Half Guard
Key Takeaways
- •Knee Shield vs. Z-Guard Setup
- •Advantages of Z-Guard Over High Knee Shield
- •Transition Trigger: Opponent Meshing Knees
- •Knee Placement and Foot Connection
What are the main differences between Z-Guard and Knee Shield Half Guard? In this video I explain how to set up your Z-Guard and important details on how to use your legs properly, especiallly when comparing it with the Knee Shield Half Guard. Click Here To Subscribe So You Never Miss A Video ➤ https://bit.ly/2CxCEvi BJJ Courses: https://www.mmaleech.com/best-bjj-instructionals-for-beginners/ Facebook: https://www.facebook.com/mmaleech/ Instagram: https://www.instagram.com/mmaleech/ Free BJJ Mini-Courses: https://www.mmaleech.com/free-stuff/
Related Techniques
Frequently Asked Questions
What does this video teach about knee knot?
This video covers knee shield vs. z-guard setup, advantages of z-guard over high knee shield, transition trigger: opponent meshing knees. It provides detailed instruction from MMA Leech.
How long does it take to learn knee knot?
The basic mechanics can be understood in a single session, but developing reliable execution requires consistent drilling over weeks of practice. This 7-part breakdown helps structure your training by isolating each phase of the technique.
What are the key details for finishing knee knot?
The z-guard's primary control mechanism involves curling the back heel toward the buttocks while simultaneously pushing the top leg against the opponent's hip, forcing the opponent to sit on their heel. This scissors action prevents the opponent from aligning their hip with their knee, which is necessary for escaping the position.