Distance Control and Initial Setup
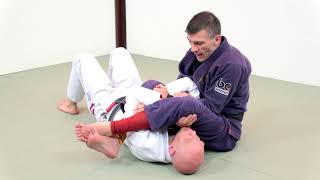
Before attacking the armbar, the practitioner must first control distance by bringing the opponent into mid-range position. This is achieved by gripping the collar or back of the neck while using the legs to curl the opponent closer, establishing a foundation for isolation and control.
Isolating the Target Arm
Once the opponent is brought in close, the practitioner identifies which arm to submit. The same-side foot is then placed on the opponent's head, with the shin blocking the shoulder to maintain a tight position that prevents arm extraction and premature escapes.
Preventing Common Escapes
Loose positioning allows the opponent to strip the leg or escape the submission. Maintaining tightness throughout the technique prevents telegraphing the position and eliminates the opponent's ability to generate leverage for escape.
Arm Positioning and Hip Control
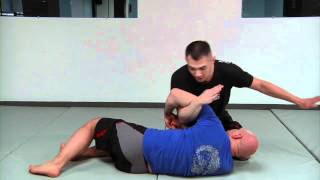
The isolated arm must be pulled deeply into the practitioner's body with full control maintained over the opponent's posture. The heel is placed on the hip while keeping the attacking leg tight against the opponent's body to restrict movement.
The Leg Chop Motion
Rather than lifting the leg vertically, the practitioner executes a chopping motion across the body in a perpendicular manner. This technique generates proper leverage while maintaining control of both the arm and the opponent's position.
Finishing Position and Hip Drive
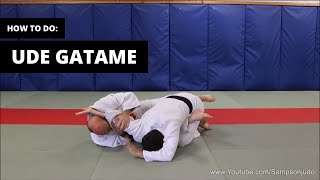
The free leg crosses over the opponent's head with the foot placed firmly on the mat. As the practitioner raises the hips in a slow, controlled manner, pressure is distributed across the opponent's shoulder joint, completing the submission.
Perpendicular Body Positioning
The practitioner's body must achieve a perpendicular angle to the opponent's arm to maximize submission pressure. Hip pressure is maintained on one side while the attacking leg chops across the opposite side, creating optimal mechanical advantage.
Postural Alignment for Submission
The practitioner should maintain a sight line to the opponent's ear as a reference point for proper angular positioning. If the angle is incorrect, the practitioner pivots around the opponent until the proper alignment is achieved before executing the final hip drive.
Armbar Techniques to Improve your BJJ Game
Key Takeaways
- •Distance Control and Initial Setup
- •Isolating the Target Arm
- •Preventing Common Escapes
- •Arm Positioning and Hip Control
Improve your BJJ Game with these Arm Bar Techniques http://www.rtbjja.org Black Belt Piet Wilhelm demonstrates Armbar Techniques at Cleveland MMA Seminar Check out this video and more BJJ Training Videos at: http://rtbjja.org Subscribe to my channel: http://www.YouTube.com/user/renatotavares
Related Techniques
Frequently Asked Questions
What does this video teach about royler's armbar?
This video covers distance control and initial setup, isolating the target arm, preventing common escapes. It provides detailed instruction from Renato - The Open Mat Podcast.
How long does it take to learn royler's armbar?
The basic mechanics can be understood in a single session, but developing reliable execution requires consistent drilling over weeks of practice. This 8-part breakdown helps structure your training by isolating each phase of the technique.
What are the key details for finishing royler's armbar?
The practitioner's body must achieve a perpendicular angle to the opponent's arm to maximize submission pressure. Hip pressure is maintained on one side while the attacking leg chops across the opposite side, creating optimal mechanical advantage.