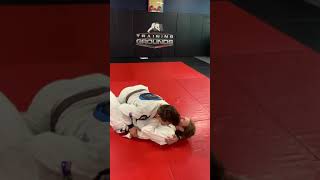
Position Setup: Butterfly Guard to Half Mount
This technique applies when the opponent has one hook established in butterfly guard while attempting to trap the top player's leg. The position differs from a fully locked half guard, as the opponent's foot remains active and can be used to lift or create space. Success requires the opponent's hook to remain in place for the mount transition to work effectively.
Upper Body Control and Shoulder Pressure
The instructor secures the opponent's head and maintains tight upper body contact. The key detail is reaching the arm under the opponent's armpit to create shoulder pressure that rotates their body away from the direction of the pass. This shoulder positioning creates the necessary space and angular advantage to progress toward mount.
The Critical Leg Hook Detail
The outside leg (not the one trapped in half guard) must hook tightly around the opponent's leg. Without this hook, the opponent can lift the top player and regain guard position. Once the hook is established, the opponent becomes unable to create lifting space, locking them into position for the pass.
Creating Space and Leg Positioning
Maintain the leg hook while using the arm to control the opponent's leg and prevent them from framing it out. A wide step creates the necessary space for the outside leg to clear over the opponent's body. The instructor's hips remain low and body arched to prevent the opponent from generating upward pressure.
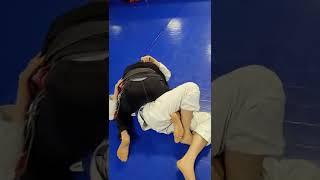
The Mount Transition
With the hook secured and space created, drive forward using shoulder pressure to rotate the opponent's upper body. The outside leg comes over cleanly, with the forehead remaining on the mat to maintain control. Once the second leg clears the opponent's body, immediately secure mount position.
Pressure Principles and Common Defenses
The leg hook prevents the opponent from pushing the top player away during the transition. Even if the opponent attempts to block the passing leg, continued forward pressure and rotation allow the pass to complete. The combination of shoulder pressure, tight positioning, and the leg hook creates a system the opponent cannot effectively defend.
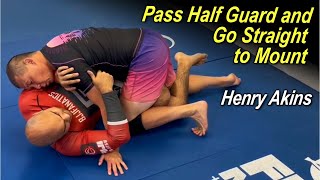
Half/Butterfly Guard Pass to Mount
Key Takeaways
- •Position Setup: Butterfly Guard to Half Mount
- •Upper Body Control and Shoulder Pressure
- •The Critical Leg Hook Detail
- •Creating Space and Leg Positioning
Often your opponent will feel safe when they manage to insert a butterfly guard hook from their half guard. However, I love to pass this position, and I think it works really well as one of my highest percentage passages to mount.
Frequently Asked Questions
What does this video teach about half mount pass?
This video covers position setup: butterfly guard to half mount, upper body control and shoulder pressure, the critical leg hook detail. It provides detailed instruction from Roger Gracie TV.
How long does it take to learn half mount pass?
The basic mechanics can be understood in a single session, but developing reliable execution requires consistent drilling over weeks of practice. This 6-part breakdown helps structure your training by isolating each phase of the technique.
What are the key details for finishing half mount pass?
With the hook secured and space created, drive forward using shoulder pressure to rotate the opponent's upper body. The outside leg comes over cleanly, with the forehead remaining on the mat to maintain control. Once the second leg clears the opponent's body, immediately secure mount position.