Introduction to Isolated Arm Escapes
When the top player traps the bottom player's arm overhead without effective control, a systematic escape becomes available. This scenario requires the bottom player to understand hand positioning and bridge mechanics to regain frame and mobility.
Determining Hip Post vs. Cross Hip Post
The choice between a standard hip post and cross hip post depends entirely on who controls the inside elbow or knee position. If the bottom player's elbow can get inside the top player's knee, a hip post is appropriate; if the top player's knee is inside, a cross hip post becomes necessary.
The Directional Bridge
Once hand position is established, the bottom player bridges upward and over one shoulder to force the top player to base out further. This directional bridge concentrates the top player's weight onto a single knee, creating space to retract the isolated arm back to an inside position.
Hand Control Post-Bridge
Immediately after bridging, the bottom player establishes control by placing both hands on the top player's hips if elbows are inside, or uses a hand-over-hand grip on one hip. This control prevents the top player from re-establishing attacks during the transition.
Advancing to Inside Elbow Position
From the controlled position, the bottom player can either execute a kipping motion to bring knees back inside or use a walking shrimp to advance the inside elbow. Both methods lead to advantageous positions for counterattacks and submissions.
Advanced Single-Hand Bridge Escape
For experienced practitioners, a quick single-handed bridge or pendulum motion can shift weight onto one knee, allowing a direct one-handed kick to escape. This advanced variation requires precise timing and weight distribution to succeed.
Critical Mistakes to Avoid
Practitioners must never resort to passive arm wrapping or hugging the top player's back, as these positions provide zero escaping leverage. This fundamental error is ineffective across all skill levels from white belt to black belt and should be completely eliminated from one's defensive repertoire.
Mount Escapes for Blue Belts and ADCC Champions by Gordon Ryan
Key Takeaways
- •Introduction to Isolated Arm Escapes
- •Determining Hip Post vs. Cross Hip Post
- •The Directional Bridge
- •Hand Control Post-Bridge
Hi everyone, my name is Gordon Ryan. This is a look into my life. If you enjoy it, watch it. If you hate it, watch it. If you don't want to watch it, I don't care. I'll be rich and famous either way. Enjoy ❤️ ______________________________________________ All My Links: https://linktr.ee/Gordonlovesjiujitsu Worlds best Jiu Jitsu instructionals⬇️⬇️⬇️ https://gordonthekingryan.com/ ______________________________________________ Follow Me Here: Official IG 👉🏻 https://www.instagram.com/gordonlovesjiujitsu/ Technique breakdowns 👉🏻 https://www.instagram.com/gordonlovesjiujitsu_/ ______________________________________________
Related Techniques
Frequently Asked Questions
What does this video teach about hip out mount escape?
This video covers introduction to isolated arm escapes, determining hip post vs. cross hip post, the directional bridge. It provides detailed instruction from Gordon Ryan.
How long does it take to learn hip out mount escape?
The basic mechanics can be understood in a single session, but developing reliable execution requires consistent drilling over weeks of practice. This 7-part breakdown helps structure your training by isolating each phase of the technique.
What are the key details for finishing hip out mount escape?
For experienced practitioners, a quick single-handed bridge or pendulum motion can shift weight onto one knee, allowing a direct one-handed kick to escape. This advanced variation requires precise timing and weight distribution to succeed.
Related videos
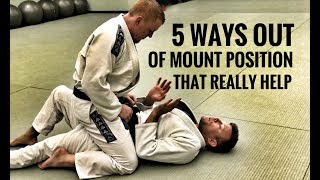
Jiu-Jitsu Escapes | 5 Ways Out of The Mount
Knight Jiu-Jitsu
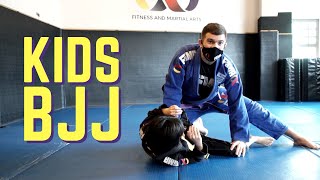
Kids BJJ - Gorilla Escaping the Cage | FaMA | Singapore
FaMA - Fitness and Martial Arts
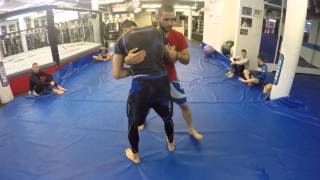
Clinch Takedown - Turning the Corner from Over Under Position - Firas Zahabi
Tristar Gym

MUST KNOW Mount escape advice❗🥋
Jordan Teaches Jiujitsu
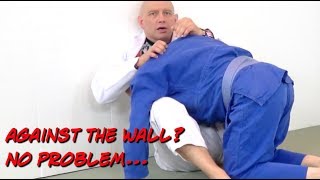
How to Use a Wall or a Fence While Grappling
Stephan Kesting