Understanding the High Hook Control
The escape begins by recognizing the opponent's hand position around the neck and head. The curved hand grip must be opened through proper rotational mechanics rather than direct pulling. Head position and axis alignment are critical to achieving effective rotation.
Primary Escape Mechanics: Shoulder and Head Position
The first line of defense involves raising the shoulder while maintaining an elevated head position on the correct axis. The jaw tucks into the shoulder to manipulate the opponent's arm off the neck while the free hand remains extended for defensive coverage. This shoulder-in position initiates the turning motion that opens the opponent's grip.
The 50-50 Tie-Up Position and Footwork Integration
When both practitioners have mutual head control, the escape requires a small lateral step to generate momentum. This step functions as a pulling mechanism that assists the rotational turn and breaks the opponent's balance upward. The combination of turn and step creates the separation necessary to release the grip.
Hand Control and Wrist Manipulation
After opening the opponent's hand, the practitioner captures the wrist with a relaxed grip. The captured hand is then turned upward and directed away from the body to complete the separation. This wrist control prevents the opponent from reestablishing the hold.
Back Control Transition and Head Positioning
Following the hand escape, the practitioner circles behind the opponent and tilts the head into their back for pressure and control. Head angle and body contact determine movement timing to defend against elbow strikes. This positioning secures back control and neutralizes potential counterattacks.
Shoulder Strike Alternative: Upper Body Pressure
As an alternative counter, the practitioner can drive a shoulder strike into the opponent's stomach or upper ribs while maintaining forward momentum. This strike disrupts the opponent's focus and creates a secondary escape route. The explosive entry on the dive eliminates the grip through sheer kinetic pressure.
Shoulder Shuck: Wrist-to-Shoulder Drag Method
The shoulder shuck isolates the opponent's wrist and pulls it across the practitioner's shoulder to break the grip. Downward elbow pressure combined with shoulder elevation prevents grip reattachment as the hand slides off. The key is applying tension during the opponent's natural attempt to resettle the grip.
Wrist Control and Arm Positioning for Leverage
Once the hand is shucked off the shoulder, the palm rotates down with the thumb reengaging for continued wrist control. To overcome stronger opponents, the practitioner raises the shoulder and achieves a straight-arm position to eliminate reliance on tricep strength. Body tilt and shoulder elevation extend the arm fully, maximizing leverage advantage.
Arm Drag Execution and Hip Positioning
After dropping the controlled wrist to the hip, the practitioner underhooks with the free hand and pops the hips away to prevent finger hooks. The rear leg moves back and out to prevent single-leg takedown attempts during the drag transition. This repositioning creates space for the arm drag to flow toward the high-line position.
High-Line Finish and Throat Control
The arm drag naturally positions the opponent's arm across their own throat when executed from the proper angle. Minimal additional manipulation is required as the dragged arm creates direct pressure to the throat. The sequence concludes with positional dominance and a strong finishing setup.
How To Escape the 50-50 Head Control Tie up - Core JKD
Key Takeaways
- •Understanding the High Hook Control
- •Primary Escape Mechanics: Shoulder and Head Position
- •The 50-50 Tie-Up Position and Footwork Integration
- •Hand Control and Wrist Manipulation
Ming makes it very easy to understand how to use this technique so you can get out of the standard 50-50 clinch range head and neck control—even against strong opponents. He also demonstrates how to get behind the attacker using a flow that gives you a standing rear choke. The techniques of Core Jeet Kune Do are battle-tested under harsh conditions. What you see here is the cleaned version containing all tactical accuracy and effectiveness required when you have to put your self-defense on the line. All our pain is for your benefit.
Related Techniques
Frequently Asked Questions
What does this video teach about standard plum?
This video covers understanding the high hook control, primary escape mechanics: shoulder and head position, the 50-50 tie-up position and footwork integration. It provides detailed instruction from corejkd.
How long does it take to learn standard plum?
The basic mechanics can be understood in a single session, but developing reliable execution requires consistent drilling over weeks of practice. This 10-part breakdown helps structure your training by isolating each phase of the technique.
What are the key details for finishing standard plum?
After dropping the controlled wrist to the hip, the practitioner underhooks with the free hand and pops the hips away to prevent finger hooks. The rear leg moves back and out to prevent single-leg takedown attempts during the drag transition. This repositioning creates space for the arm drag to flow toward the high-line position.
Related videos

Dominate the Muay Thai Clinch with Petchboonchu
fightTIPS

How To Learn Any Martial Arts at Home | Full Guide
Plum Sphere
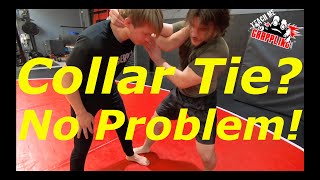
BEAT the Collar Tie!... Anton Kalista's Throw by
TeachMeGrappling Coach Brian
Kyle Bradley counters muay thai clinch with a big takedown
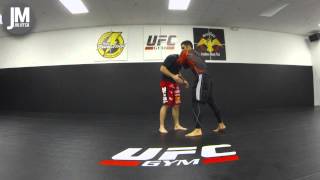
JM Modern Jiu Jitsu
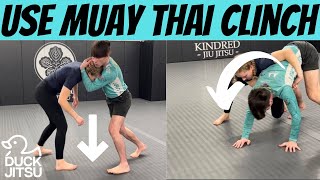
Use The Muay Thai Clinch For Grappling | Duck-Jitsu Teaches Class QuadPod Escapes
Duck_Jitsu