Khabib Nurmagomedov Takedown Technique (Wall Wrestling)
0
Wall Takedown·Steven Strangles People
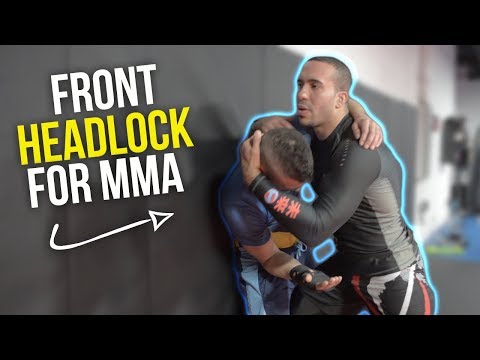
This is a system used by Khabib Nurmagomedov. He often uses the upper body lock to setup his snap downs and front headlo…
Translation: cage/wall takedown (katakana)
The Wall Takedown family encompasses all takedowns executed against the cage wall or a wall surface, where the vertical barrier provides an additional structural element that fundamentally alters takedown mechanics. [1] The wall prevents the opponent from retreating to absorb force, creates friction that can be used to control position, and provides a surface to pin opponents against while setting up takedowns. [1],[2] Wall takedowns include body lock lifts off the wall, double and single leg attacks from the cage clinch, and trips executed while the opponent is pressed against the fence. [2] This family is unique to MMA and cage-based combat sports, as no traditional martial art developed techniques specifically for wall-assisted takedowns. [2],[3]
Wall takedowns emerged as a distinct category with the advent of cage-based MMA in the 1990s, as fighters discovered that the octagon fence created unique tactical opportunities. [1] Wrestlers like Randy Couture, Matt Hughes, and later Khabib Nurmagomedov developed sophisticated cage wrestling systems that became essential components of MMA strategy. [2],[3]
Cage wrestling is one of the most common positional situations in UFC fights, with wall takedowns accounting for a significant percentage of all successful takedowns. [1]
No images yet for this technique.
Sign in to suggest an image.
This is a system used by Khabib Nurmagomedov. He often uses the upper body lock to setup his snap downs and front headlo…
No instructional courses yet for this technique.
Sign in to suggest a course.
Risk of injury to the person this technique is applied to
Cage/wall-assisted takedowns; controlled descent against structure
Skill level needed to execute this technique reliably
Whether this technique is allowed under major competition rule sets
Japanese MMA standard terminology
Japanese MMA standard terminology
Standard katakana transliteration of Western martial arts terminology (外来語) — used in Japanese MMA, boxing, and BJJ communities
Katakana transliteration used in Japanese MMA/Shooto
penetration step speed, upper body endurance for finishing, balance
longer arms for reach, quick hips for level change
quadriceps, hip flexors, shoulders, grip/forearms
Every move, in any martial art, shares a few universal traits. Mix and match below to pinpoint the right tool — or compare equivalents across styles.
The Body Lock Wall Takedown subfamily executes body lock takedowns while the opponent is pressed against the cage wall, using the wall as a control surface that prevents backward retreat. [1] The attacker establishes a body lock clinch with the opponent's back against the fence, then uses lifting, tripping, or lateral displacement to bring the opponent to the mat. [1,2] The wall provides a fixed reference point that simplifies the takedown mechanics — the attacker only needs to move the opponent in one direction (down) rather than managing multiple escape angles. [2] This is one of the highest-percentage takedown methods in modern MMA. [2,3]
The Double Leg From Cage subfamily covers double-leg takedown entries executed while the opponent is pressed against the cage wall, using the fence as a backstop. [1] Unlike open-mat double legs that require a penetration step across distance, the cage double leg starts from a clinch position against the wall, where the attacker drops level and attacks both legs from close range. [1,2] The cage prevents the opponent from circling away or sprawling backward, forcing them to fight the takedown through grip fighting, hip position, and underhooks alone. [2] This is a fundamental MMA cage wrestling technique. [2,3]
The Single Leg From Cage subfamily covers single-leg takedown entries executed while the opponent is pressed against the cage, targeting one leg from the clinch position. [1] The attacker drops level and captures one of the opponent's legs while maintaining chest-to-chest pressure against the wall. [1,2] Single legs from the cage are often preferred over double legs because they require less space to execute and can be initiated from various clinch positions including underhook, overhook, and collar tie. [2] The cage provides the control surface that prevents the opponent from hopping away on the free leg. [2,3]
Wall/cage takedowns use the cage or wall surface as a third point of control — the opponent is pinned against the surface while the attacker works for trips, body locks, or lifts. Unique to MMA and not applicable in open-mat grappling. (MMA training manuals; The Ultimate MMA Training Guide)
Feinting is essential for gathering information about your opponent's reactions. By feinting an attack, you can observe how they instinctively respond—such as presenting a counter like an overhand right—which gives you valuable intelligence about their defensive patterns and tendencies.
Pay attention to what your opponent is showing you about their personality and how they respond to pressure—whether they get stressed, throw wildly, or panic when pressured. This awareness should guide your technical decisions rather than just exchanging moves randomly.
Once you've established position, keep control of your opponent's chin throughout the technique; never let go of it. If you need to reposition or move around them, maintain that chin connection to preserve control in the rough position.
The Wall Takedown family encompasses all takedowns executed against the cage wall or a wall surface, where the vertical barrier provides an additional structural element that fundamentally alters takedown mechanics. The wall prevents the opponent from retreating to absorb force, creates friction that can be used to control position, and provides a surface to pin opponents against while setting up takedowns.
Wall takedowns emerged as a distinct category with the advent of cage-based MMA in the 1990s, as fighters discovered that the octagon fence created unique tactical opportunities. Wrestlers like Randy Couture, Matt Hughes, and later Khabib Nurmagomedov developed sophisticated cage wrestling systems that became essential components of MMA strategy.
IJF: legal — Legal takedown technique; IBJJF: legal — Legal at all belt levels, scored as takedown (2 points); UWW: legal — Legal in freestyle, may be restricted in Greco-Roman depending on technique; Unified MMA: legal — Legal takedown technique; ADCC: legal — Legal, scored 2-4 points in second half of match; FIAS Sport Sambo: legal — Legal — all takedowns permitted; FIAS Combat Sambo: legal — Legal; NCAA Folkstyle: legal — Legal, scored as takedown (2 points)
Danger rating 4/10. Moderate — cage/wall-assisted takedowns; controlled descent against structure
The standard setup chain: Establish Contact → Create Off-Balance → Execute the Takedown → Follow to Ground.
Standard counters include: Sprawl — drop hips back and drive weight down to stuff the takedown attempt / Underhook — establish inside position to control distance and prevent the takedown entry / Post and Circle — post on the attacker's head and circle away to break their angle / Level Change Defence — recognize the shot early and react with appropriate hip defence.
Common variants: Inside single (shooting to the inside of the lead leg, head inside position); Outside single (attacking from the outside of the lead leg); High crotch (securing the thigh above the knee with head in the hip); Low single (attacking the ankle from outside range without deep penet…).
Cage wrestling is one of the most common positional situations in UFC fights, with wall takedowns accounting for a significant percentage of all successful takedowns.
Top errors to watch for: Shooting from too far away when the cage already prevents retreat — waste of energy / Staying head-to-head without creating an angle along the cage / Letting the opponent get double underhooks against the fence — now they control you / Dropping your hands to the legs without maintaining upper body pressure.
The Wall Takedown is also known as Kēji Teikudaun, Cage Takedown, Wall Work, Cage Wrestling.