Establishing Safe Distance
The practitioner begins by closing the distance to their opponent while maintaining a defensive posture. Shields remain up to prevent strikes, ensuring the opponent cannot effectively punch, kick, or grab during the approach.
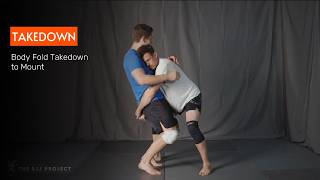
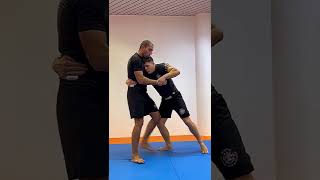
Creating the Clinch Position
Once in range, the practitioner moves to the opponent's side and establishes a tight clinch. Arms wrap around the opponent's torso while the head stays pressed firmly against their centerline for control and leverage.
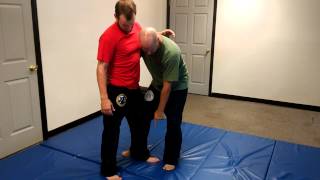
Securing Arm Control
The practitioner locks both elbows down to prevent the opponent from escaping or creating space. This compressed arm position maintains control of the opponent's upper body.
Initiating the Takedown Mechanics
The head begins to drive backward while the back leg simultaneously buckles behind the opponent's knee. This coordinated movement combines upper body pressure with lower body disruption of balance.
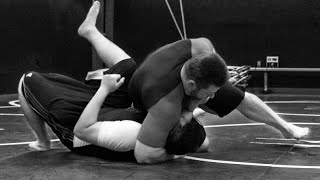
Executing the Fold and Drive
The practitioner uses the head drive to fold the opponent forward while the buckle action collapses their supporting leg. The opponent is driven downward through synchronized pressure from both head and leg.
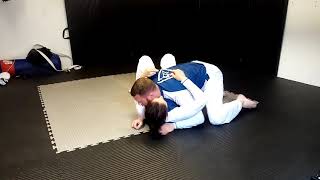
Finishing in Side Control
After the takedown is complete, the practitioner transitions to side control position and secures a controlling pin. This dominant finishing position prevents the opponent from escaping or reversing the technique.
Safe Clinch to Body Fold Takedown
Key Takeaways
- •Establishing Safe Distance
- •Creating the Clinch Position
- •Securing Arm Control
- •Initiating the Takedown Mechanics
Frequently Asked Questions
What does this video teach about body fold takedown?
This video covers establishing safe distance, creating the clinch position, securing arm control. It provides detailed instruction from Team Daruma Dojo.
How long does it take to learn body fold takedown?
The basic mechanics can be understood in a single session, but developing reliable execution requires consistent drilling over weeks of practice. This 6-part breakdown helps structure your training by isolating each phase of the technique.
What are the key details for finishing body fold takedown?
The practitioner uses the head drive to fold the opponent forward while the buckle action collapses their supporting leg. The opponent is driven downward through synchronized pressure from both head and leg.
Related videos
The Body Fold Takedown: Structure Over Strength
The BJJ Project
Gracie Combatives lesson 14: Body Fold Takedown
Andrew Campbell
Clinch & Body Fold Takedown
White Tiger Martial Arts Academy
M.G.C. Self-Defense Lesson #14: Body Fold Takedown
Modesto Judo Club
Body Fold Takedown Entry Details Gracie Jiu Jitsu Self Defense Short
Peter Mettler Martial Arts