Foundational Positioning for Right-Handed Stance
The instructor establishes that a right-handed grappler assumes a stance with the right leg forward, opposite to the striking side. When executing a takedown with the right leg, the head naturally travels to the left. Understanding this biomechanical principle is essential before attempting the duck under technique.
Entry Mechanics: The Outside Step
The duck under employs an outside step with the left foot, positioning the chest, belly button, and hips toward the opponent at a specific angle. The practitioner maintains an upright chest position with the head back and hips engaged. This initial positioning prevents premature commitment to going behind the opponent, which commonly results in throw counters.
Rotation and Front Control
After the outside step, the practitioner pushes off the rear leg and rotates to face the front of the opponent rather than immediately moving behind. This controlled rotation prevents being caught with lat throws or chin throws, which occur when the grappler rushes prematurely to the back position.
Adjusting Technique for Left-Handed Opponents
Against a left-handed opponent in high stance, the outside step and rotation must be mirrored to avoid head contact with the opponent's chest or arm. The practitioner's body angle, chest orientation, and rotation direction change fundamentally while maintaining the principle of controlled front positioning before back control.
Grip Establishment and Head Control
From collar tie control, the practitioner uses gentle pressure to direct the opponent's head toward their biceps, creating space to execute the duck under. Multiple grip options including underhook, elbow control, and inside tie can facilitate the technique, though collar tie is recommended for initial learning.
Managing Post and Grip Transitions
As the practitioner ducks under and secures waist or hip control, the opponent naturally steps back and brings their arm over the head. If the opponent posts across the neck, the practitioner must chop and break this post before establishing a different control point. The grip should transition smoothly from initial collar control to waist, hip, or claw grip as the position develops.
Pulling and Controlling to Front Position
Rather than running behind the opponent, the practitioner pulls them toward their front center, maintaining control of the neck and using the claw grip (hands clasped around the head). This prevents falling into lateral throw counters such as haraigoshi or sorugari. Depth of stepping and proximity to the opponent are critical for preventing escape gaps.
Weight Distribution and Base Positioning
The practitioner must place their full body weight on the opponent by staying on the toes rather than the knees, forcing the opponent to carry the load. Maintaining active toes—remaining ready to push off—allows rapid transitions to side control if the opponent attempts to roll or stand. This positioning prevents the opponent from sitting into guard and slows their defensive movements.
Transitioning to Side Control
When the opponent pulls the practitioner down, maintaining an elevated base on the toes enables immediate transition to side control, either direction depending on positioning. If the practitioner settles onto their knees instead, the opponent can more easily establish guard position and create defensive space. Staying heavy and mobile through the toes maximizes positional advantage and passing opportunities.
Learning the "DUCK Under" Takedown
Key Takeaways
- •Foundational Positioning for Right-Handed Stance
- •Entry Mechanics: The Outside Step
- •Rotation and Front Control
- •Adjusting Technique for Left-Handed Opponents
This video I breakdown another duck under. Sometimes I teach it differently so there is always new details that aren't on other videos of mine. Check out the details and you are sure to find something useful! Enjoy! If you have any questions, comments, or suggestions, please comment below. More videos to come! Please like, share, and subscribe!! PLEASE Click this link to SUPPORT the TeachMeGrappling Channel!!! https://www.patreon.com/TeachMeGrappling or https://www.paypal.me/CoachBrianPeterson Your contribution is much appreciated and will help me continue to bring you content! 🙏 www.NextLevelGuy.com The NextLevelGuy Podcast with Coach Brian Peterson has been released!! Check it out!
Frequently Asked Questions
What does this video teach about standard duck under back take?
This video covers foundational positioning for right-handed stance, entry mechanics: the outside step, rotation and front control. It provides detailed instruction from TeachMeGrappling Coach Brian.
How long does it take to learn standard duck under back take?
The basic mechanics can be understood in a single session, but developing reliable execution requires consistent drilling over weeks of practice. This 9-part breakdown helps structure your training by isolating each phase of the technique.
What are the key details for finishing standard duck under back take?
The practitioner must place their full body weight on the opponent by staying on the toes rather than the knees, forcing the opponent to carry the load. Maintaining active toes—remaining ready to push off—allows rapid transitions to side control if the opponent attempts to roll or stand. This positioning prevents the opponent from sitting into guard and slows their defensive movements.
Related videos

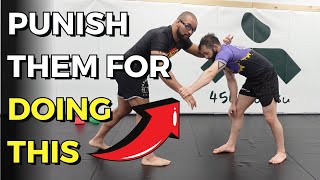
Master THIS Duck Under Takedown to Score More In BJJ
Brandon Reed BJJ
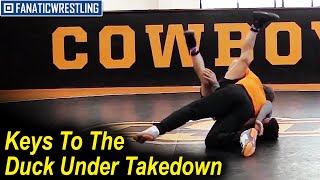
Keys To The Duck Under Takedown by John Smith
FANATIC WRESTLING
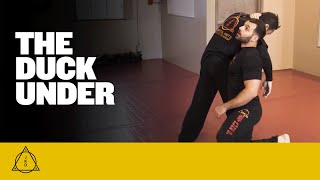
How to Take Down Your Opponent with the Duck Under
NY Martial Arts Academy
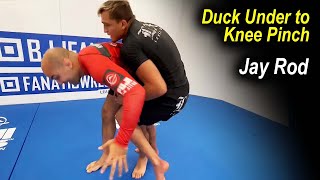
Duck Under to Knee Pinch - Jay Rod
Bernardo Faria BJJ Fanatics
The Slickest Way to Take the Back Fast in BJJ (Duck Under Technique)
Brandon Reed BJJ