Grip Control as Foundation
In judo stand-up, control of grip initiates offensive opportunity. When an opponent establishes a collar grip with their dominant hand, they gain the advantage to execute throws such as seoi nage and rear techniques. Breaking the opponent's grip immediately upon contact allows the defender to seize control and transition to their own attacks.
Grip Break Mechanics
The grip break involves sliding the opponent's arm downward along the collar while simultaneously pulling their body forward. This action forces the opponent to step and repositions them for the subsequent throw. The instructor emphasizes that proper grip breaking is fundamental to approximately 90% of standing judo technique.
Entry and Positioning
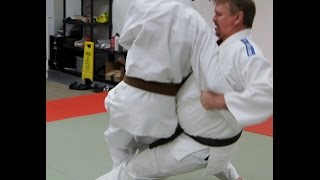
After breaking the grip and securing control, the thrower pulls the opponent forward while obtaining a grip on the opponent's back at their center. The thrower then takes a deep step inward, positioning themselves to execute the sacrifice throw with momentum directed through their hip.
Descent Before Hip Opening
The critical distinction in this sacrifice throw is the sequence of movement: the thrower must pull the opponent downward first before opening the hip. By the time the thrower's hip begins to rotate, the opponent's posture should already be broken downward, ensuring the throw's effectiveness through proper timing rather than just rotational force.
Rotational Momentum Generation
To maximize power, the thrower skips or bounds off their far foot while moving forward, creating rotational momentum that propels both bodies through the throwing arc. This weight transfer and jumping action generate the centrifugal force necessary for an effective sacrifice throw, with greater rotation and speed producing stronger results.
Speed and Finishing Position
The throw is completed by maintaining connection between shoulders while rotating through the sacrifice position. The instructor demonstrates that consistent practice develops the timing and coordination needed to execute the technique at competition speed, where momentum and rotation work together to complete the throw effectively.
Neil Owen - Yoko Sutemi Waza (Side Sacrifice Throw)
Key Takeaways
- •Grip Control as Foundation
- •Grip Break Mechanics
- •Entry and Positioning
- •Descent Before Hip Opening
For more information or to try a free class visit http://infinitymartialarts.com.au/ or http://infinity4martialarts.co.uk/ Neil Owen teaches a side sacrifice throw (Yoko Sutemi Waza).
Related Techniques
Frequently Asked Questions
What does this video teach about sacrifice throw — sutemi waza?
This video covers grip control as foundation, grip break mechanics, entry and positioning. It provides detailed instruction from Infinity Martial Arts.
How long does it take to learn sacrifice throw — sutemi waza?
The basic mechanics can be understood in a single session, but developing reliable execution requires consistent drilling over weeks of practice. This 6-part breakdown helps structure your training by isolating each phase of the technique.
What are the key details for finishing sacrifice throw — sutemi waza?
To maximize power, the thrower skips or bounds off their far foot while moving forward, creating rotational momentum that propels both bodies through the throwing arc. This weight transfer and jumping action generate the centrifugal force necessary for an effective sacrifice throw, with greater rotation and speed producing stronger results.