Foundational Principle: Throwing Direction
In judo, the most effective throwing direction follows the principle of least resistance—toward the apex of the triangle formed between an opponent's feet. This direction is simultaneously the easiest for the thrower to execute and the hardest for the defender to counter, as lateral defense with the leg becomes compromised.
Momentum-Based Techniques
Sasae Tsurikomi Ashi exemplifies judo's principle of using an opponent's momentum rather than applying pure force. These footsweeping techniques are most effective when the opponent is already in motion, allowing the thrower to redirect existing energy rather than initiate it independently.
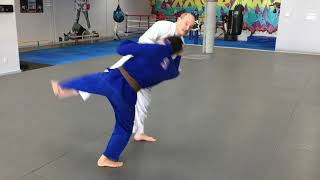
Foot Placement and Block Mechanics
The technique requires placing a foot block in the opponent's path to intercept their stepping motion, not as a kicking action but as a strategic barrier. The instructor demonstrates that without foot placement, hand control alone using body rotation can generate sufficient off-balance to execute the throw.
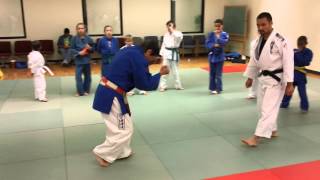
Body Positioning and Hand Placement
Proper execution demands maintaining an upright posture with bent knees while positioning the hands at chest height—approximately where the hands naturally align on the opponent's body. The thrower must step laterally to create space and position themselves outside the opponent's base.
Timing and Footwork Sequence
The technique's success depends on reading the opponent's weight distribution and foot movement rather than relying on shoulder position indicators. As the opponent commits to stepping, the thrower executes a small lateral step, then plants the blocking foot while rotating the hips to complete the throw.
Defensive Considerations
Following the opponent's forward movement directly compromises the thrower's position and facilitates the throw, making it a common coaching correction in competition judo. The thrower must maintain slight angular offset to properly execute hip rotation and maintain balance throughout the technique.
Practical Application and Safety
Sasae Tsurikomi Ashi is particularly effective against larger opponents due to its reliance on timing and leverage rather than strength. The technique carries relatively low risk of counter-attack, making it a reliable option when properly executed with attention to footwork and hip rotation.
Sasae Tsurikomi Ashi
Key Takeaways
- •Foundational Principle: Throwing Direction
- •Momentum-Based Techniques
- •Foot Placement and Block Mechanics
- •Body Positioning and Hand Placement
Fundamentals of Sasae Tsurikomi Ashi (Proping Ankle) Throw as demonstrated by Sensei's Felix & Jim @ the Tohkon Judo Academy of Chicago.
Related Techniques
Frequently Asked Questions
What does this video teach about sasae tsurikomi ashi?
This video covers foundational principle: throwing direction, momentum-based techniques, foot placement and block mechanics. It provides detailed instruction from WINNING.
How long does it take to learn sasae tsurikomi ashi?
The basic mechanics can be understood in a single session, but developing reliable execution requires consistent drilling over weeks of practice. This 7-part breakdown helps structure your training by isolating each phase of the technique.
What are the key details for finishing sasae tsurikomi ashi?
Following the opponent's forward movement directly compromises the thrower's position and facilitates the throw, making it a common coaching correction in competition judo. The thrower must maintain slight angular offset to properly execute hip rotation and maintain balance throughout the technique.