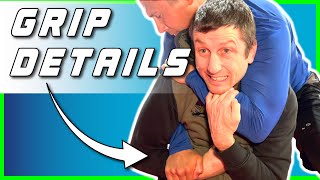
Establishing Seatbelt Control from Back
The instructor demonstrates positioning from back control with a seatbelt grip (one arm underhooking, one arm over the shoulder). Maintaining the underhook grip prevents the bottom player from pushing the top player's head away and returning to the mat. The top player secures control by keeping their chin on the opponent's shoulder and threading the top leg across to close the space.
Threading the Top Leg for Pressure
The instructor threads their top foot across the opponent's body, with the knee connecting to create a tighter seal that prevents the bottom player from escaping into the space. This leg positioning, combined with the seatbelt grip and chin placement, creates a difficult position to escape from.
Transitioning to Kimura Grip Setup
When the bottom player defends their neck and arm, the top player uses an Anderson Silva-style elbow whip to reposition. Rather than attempting to peel away the defending arm directly, the instructor whips back to establish a Kimura grip on the opponent's arm.
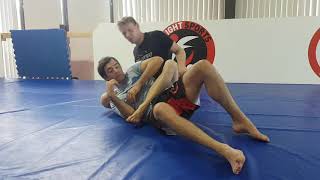
Foot Placement and Hip Positioning
The instructor places their heel in front of the opponent's forearm and then against the chest to maintain control. The top player then squares their hips while allowing the opponent to roll, transitioning from the Kimura grip to a Dave Camarillo hammer lock grip.
Grip Transition to Dave Camarillo Hammer Lock
After squaring the hips and rolling the opponent, the Kimura grip transitions to the Dave Camarillo hammer lock position. This progression uses the seatbelt control, chin pressure, threaded leg, and footwork to move from one submission grip to another.
Maintaining Heel Pressure During Submissions
As the opponent anticipates the arm lock and tries to defend by releasing the grip and re-gripping their own hands, maintaining tight heel pressure against the chest becomes critical. The heel placement closes the opponent's body loop and prevents them from creating space to escape or counter the submission.
Using Thumb Position for Triangle Attack
If the opponent successfully re-grips their hands to defend the arm lock, the instructor switches strategy by using thumb positioning to set up a triangle attack. This variation provides an alternative finishing option when the arm lock defense is successful.
Seatbelt/Kimura attacks and control from the back.
Key Takeaways
- •Establishing Seatbelt Control from Back
- •Threading the Top Leg for Pressure
- •Transitioning to Kimura Grip Setup
- •Foot Placement and Hip Positioning
Seatbelt/Kimura attacks and control from the back. Roger Dardis shows a sequence to finish from the back using a kimura seatbelt control. 1)Dave Camarillo style armlock 2)Straight armlock 3)Reverse triangle armlock Royal Grappling Academy Brazilian Jiu-Jitsu Academy Dublin Ireland.
Related Techniques
Frequently Asked Questions
What does this video teach about seatbelt back control?
This video covers establishing seatbelt control from back, threading the top leg for pressure, transitioning to kimura grip setup. It provides detailed instruction from Royal Grappling Academy BJJ Dublin.
How long does it take to learn seatbelt back control?
The basic mechanics can be understood in a single session, but developing reliable execution requires consistent drilling over weeks of practice. This 7-part breakdown helps structure your training by isolating each phase of the technique.
What are the key details for finishing seatbelt back control?
As the opponent anticipates the arm lock and tries to defend by releasing the grip and re-gripping their own hands, maintaining tight heel pressure against the chest becomes critical. The heel placement closes the opponent's body loop and prevents them from creating space to escape or counter the submission.
Related videos
Back Control SEATBELT and Hand Fighting!
TeachMeGrappling Coach Brian
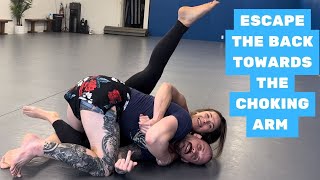
ESCAPING BACK CONTROL BY BEATING THE TOP HOOK!
Nexus Jiu Jitsu
Crucifix Control
John Will

Gordon Ryan - How to properly use a body triangle
Less Impressed More Involved BJJ
Back Attacks - Part 7: Strong Side Tactics // Tom Halpin
Tom Halpin