Introduction to Hook Back Control Escape
The instructor introduces a technique for escaping back control when the opponent has the top hook in place, without a body triangle. This escape focuses on defeating the top hook rather than the bottom hook, offering an alternative approach to the standard back escape sequence.
Primary and Secondary Hand Defense
The instructor explains that when defending back control, the primary defensive hand should oppose the opponent's primary choking arm. The secondary hand can briefly hold the opponent's choking arm while the primary hand works to clear the hooks, but should not serve as the primary defense throughout the escape.
Overhook vs. Underhook Escape Mechanics
When escaping to the underhook side, the defender beats the bottom hook first, then clears the elbow. However, when the opponent has the overhook, this sequence becomes difficult because the opponent's arm blocks elbow clearance. The top hook escape offers an alternative approach for this position.
Clearing the Top Hook
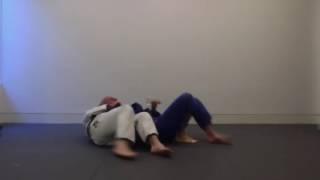
The defender maintains defensive hand position while moving to the overhook side, briefly trusting the secondary hand. The defender then extends the top leg, pulls the opponent's top hook out, and steps over the bottom hook while keeping the knee and elbow tight together to prevent the hook from being reset.
Controlling the Primary Choking Arm
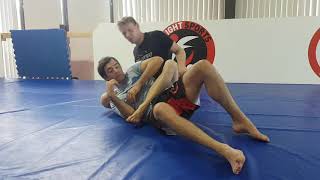
After clearing the top hook, the defender's primary hand reaches toward the opponent's primary elbow and pulls it down tight into the armpit area. This control accomplishes multiple objectives: restricting the opponent's choke setup, preventing height building, and hindering the opponent's ability to replant the top hook.
Flattening and Transitioning to Knees
The defender scoots the hips back into the opponent to flatten their hips to the mat while maintaining elbow control. The defender then transitions to the knees while keeping the opponent's elbow pinned, which prevents the opponent from building height and following up on top.
Final Elbow Clearance
With the opponent's primary elbow controlled and the defender on their knees, the defender posts on the mat with the free hand and sits back to clear the trapped elbow between their bodies. This final positioning completes the escape from back control.
ESCAPING BACK CONTROL BY BEATING THE TOP HOOK!
Key Takeaways
- •Introduction to Hook Back Control Escape
- •Primary and Secondary Hand Defense
- •Overhook vs. Underhook Escape Mechanics
- •Clearing the Top Hook
When you are in a bad position, you need answers to a whole host of problems that may arise. Sometimes your first or second response won’t work for any number of reasons. So here is yet another option for escaping back control. Most of the time when your back is taken your coach will tell you to beat the bottom hook and get your back to the mat. This is generally not wrong. Sometimes, especially when on the over hook side, this will not be efficient. So beating the top hook may be a better solution. Also, had a troll decide to comment on my body triangle escape video accusing me of not knowing the difference between primary and secondary hands when defending. So I add a little bit of that concept in for said moron to recognize that he wasted his time trying to get my subscribers to subscribe to him. Thanks for watching and I’ll see you in the next one. Subscribe for more videos and smash that like button! Follow us! Nexus Instagram- https://www.instagram.com/nexus_jiujitsu/?hl=en DrewJitsu Instagram- https://www.instagram.com/drewjitsu_bjj/?hl=en Agy Instagram- https://www.instagram.com/soha_aloha/?hl=en Nexus Website- https://nexusjiujitsu.com/#!/home
Related Techniques
Frequently Asked Questions
What does this video teach about hook back control?
This video covers introduction to hook back control escape, primary and secondary hand defense, overhook vs. underhook escape mechanics. It provides detailed instruction from Nexus Jiu Jitsu.
How long does it take to learn hook back control?
The basic mechanics can be understood in a single session, but developing reliable execution requires consistent drilling over weeks of practice. This 7-part breakdown helps structure your training by isolating each phase of the technique.
What are the key details for finishing hook back control?
The defender scoots the hips back into the opponent to flatten their hips to the mat while maintaining elbow control. The defender then transitions to the knees while keeping the opponent's elbow pinned, which prevents the opponent from building height and following up on top.
Related videos

Seatbelt/Kimura attacks and control from the back.
Royal Grappling Academy BJJ Dublin
Back Control SEATBELT and Hand Fighting!
TeachMeGrappling Coach Brian
Crucifix Control
John Will
Gordon Ryan - How to properly use a body triangle
Less Impressed More Involved BJJ
Back Attacks - Part 7: Strong Side Tactics // Tom Halpin
Tom Halpin