Introduction to Half Guard Underhook Passing
The instructor introduces the esgrima pass, a fundamental half guard passing technique that utilizes principles effective in side control. The technique emphasizes catching underhooks on the far side, near side, or both sides of the opponent's body. Success in these passes relies heavily on proper body weight distribution and positioning.
The Critical Flattening Phase
Before attempting any underhook, the passer must flatten the opponent from their side position to their back. The instructor emphasizes avoiding excessive pressure while the opponent still has an active knee shield, as this creates vulnerability to counter underhooks. Measured pressure combined with strategic knee placement enables effective flattening.
Establishing Control Grips
The passer begins by controlling the opponent's hip with one hand while establishing a counter-grip on the outside of the opponent's elbow with the other. This grip must be connected to the passer's ribcage to prevent the opponent from creating escape space. The elbow control directly counters the opponent's framing defense.
Knee Positioning and Semicircular Movement
The passer places their outside knee above the opponent's half guard knee, which enables controlled leg movement during the pass. As the passer walks backward in a semicircular pattern, the knee placement prevents the opponent from maintaining their protective knee shield position. This synchronized movement of the lower body is essential for flattening the opponent.
Achieving the Flattened Position
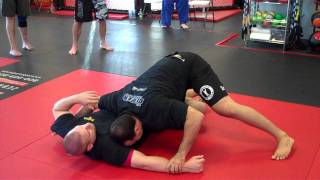
By walking backward while maintaining elbow control and hip pressure, the passer transitions the opponent from a defensive side position to a flat back position with both shoulders on the mat. This flattened configuration severely limits the opponent's hip escape options and creates opportunities for underhook entry. The position represents a critical reset point in the passing sequence.
Underhook Entry and Depth
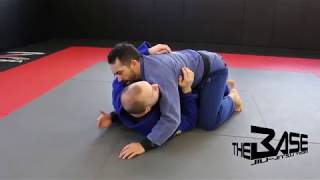
Once the opponent is flattened, the passer drives their shoulder back and penetrates for the underhook, aiming to secure a deep grip in the armpit area. The passer must keep their elbow tight to their body at all costs, as a flared elbow invites the opponent to establish a counter underhook. Hand position is secondary to maintaining a connected elbow position near the ribcage.
Defensive Responses and Grip Alternatives
If the opponent successfully defends the underhook, the passer can shift to alternative grips such as grabbing the opponent's trapezius or securing a collar grip on the back of the neck. These high-percentage alternatives maintain pressure and control when the primary underhook avenue is blocked. The passer remains flexible in grip selection while maintaining overall positional dominance.
[주랜기술#201] 니쉴드 to 언더훅 esgrima 패스 (Half Guard Underhook Esgrima Pass)
Key Takeaways
- •Introduction to Half Guard Underhook Passing
- •The Critical Flattening Phase
- •Establishing Control Grips
- •Knee Positioning and Semicircular Movement
구독과 좋아요 부탁드립니다 http://jiujitsuland.co.kr 서면역 7번 출구(도보 2분 거리, 롯데백화점 후문 도보 1분)에서 쉽게 찾아 오실 수 있습니다. 관심있는 분들은 수업시간에 맞춰서 언제든지 방문해주세요!
Frequently Asked Questions
What does this video teach about esgrima pass?
This video covers introduction to half guard underhook passing, the critical flattening phase, establishing control grips. It provides detailed instruction from Jiu Jitsu Land (중단 채널 old channel).
How long does it take to learn esgrima pass?
The basic mechanics can be understood in a single session, but developing reliable execution requires consistent drilling over weeks of practice. This 7-part breakdown helps structure your training by isolating each phase of the technique.
What are the key details for finishing esgrima pass?
Once the opponent is flattened, the passer drives their shoulder back and penetrates for the underhook, aiming to secure a deep grip in the armpit area. The passer must keep their elbow tight to their body at all costs, as a flared elbow invites the opponent to establish a counter underhook. Hand position is secondary to maintaining a connected elbow position near the ribcage.
Related videos
Jiu Jitsu Fundamentals - Half Guard Passing - Esgrima Pass
The Base Jiu Jitsu
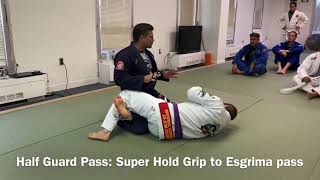
Half Guard Pass: Super Hold to Esgrima Pass
Six Blades NOVA Emil Takeuchi
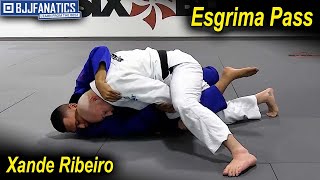
Esgrima Pass by Xande Ribeiro
BJJ Fanatics
Brazilian Jiu-Jitsu: Half Guard Cross Knee Esgrima Guard Pass
PitBlackBelt
Luis Azeredo vs Tony DeSouza
amtuncurich