Initial Head Control and Hook Establishment
The instructor begins by controlling the opponent's head with downward pressure while securing a hook with the near-side leg. This hook placement is critical—if executed properly, it should be maintained throughout the pass to prevent the opponent from curling and creating defensive complications.
Shoulder Pressure as Primary Pinning Mechanism
Rather than placing the head on the mat, the instructor positions the forehead against the opponent's shoulder to maintain pinning pressure. This contact point prevents the opponent from shrimping or creating space while allowing better positional awareness and balance.
Arm Control and Foot Lock Setup
The instructor secures control of the opponent's arm while maintaining tension on the hooked foot. The toes remain locked in position as the foundation for the subsequent hip elevation and lateral movement.
Hip Elevation and Base Positioning
The instructor elevates the hips as high as possible while maintaining a wide base, staying slightly to the side rather than directly on top of the opponent. This elevated, lateral positioning prevents losing balance during the transition and allows smooth hip movement toward the pass.
Toe-Walking Motion for Hip Height Maintenance
The instructor walks forward on the balls of the feet while keeping the hips elevated throughout the approach. This tip-toe movement pattern ensures sustained hip height, which is essential for maintaining pressure and control during the lateral pass.
Directional Choice and Top Knee Priority
The instructor maintains the option to pass to either side while prioritizing pressure on the opponent's top knee. Pushing the top knee—rather than the lower knee—is the correct contact point for controlling the half guard and advancing to side control.
Shoulder-to-Spine Alignment
As the pass progresses, the instructor's shoulder moves along an imaginary track aligned with the opponent's spine. This positioning ensures proper directional control and prevents the instructor's own balance from being compromised.
Underhook Integration and Body Pressure
The instructor establishes an underhook while maintaining forehead-to-shoulder contact, keeping constant ribcage-to-ribcage pressure throughout. This integrated control system prevents the opponent from sweeping the arm or creating escape opportunities.
Brazilian Jiu-Jitsu: Half Guard Cross Knee Esgrima Guard Pass
Key Takeaways
- •Initial Head Control and Hook Establishment
- •Shoulder Pressure as Primary Pinning Mechanism
- •Arm Control and Foot Lock Setup
- •Hip Elevation and Base Positioning
Brazilian Jiu-Jitsu: Half Guard Cross Knee Esgrima Guard Pass In this video, you will see one of many ways to pass the half guard position, to the full mount position. Passing the half guard is a very important skill to develop. Please subscribe to my channel. Links: PitBlackBelt: http://www.pitblackbelt.com/ Twitter: http://www.twitter.com/adrianiriarte Facebook: https://www.facebook.com/adrian.iriarte.56 Instagram: https://www.instagram.com/AdrianIriarte/ The Pit Online Dojo: http://www.thepitonlinedojo.com/
Frequently Asked Questions
What does this video teach about esgrima pass?
This video covers initial head control and hook establishment, shoulder pressure as primary pinning mechanism, arm control and foot lock setup. It provides detailed instruction from PitBlackBelt.
How long does it take to learn esgrima pass?
The basic mechanics can be understood in a single session, but developing reliable execution requires consistent drilling over weeks of practice. This 8-part breakdown helps structure your training by isolating each phase of the technique.
What are the key details for finishing esgrima pass?
As the pass progresses, the instructor's shoulder moves along an imaginary track aligned with the opponent's spine. This positioning ensures proper directional control and prevents the instructor's own balance from being compromised.
Related videos
![[주랜기술#201] 니쉴드 to 언더훅 esgrima 패스 (Half Guard Underhook Esgrima Pass)](https://img.youtube.com/vi/YQAbGOd87gc/mqdefault.jpg)
[주랜기술#201] 니쉴드 to 언더훅 esgrima 패스 (Half Guard Underhook Esgrima Pass)
Jiu Jitsu Land (중단 채널 old channel)
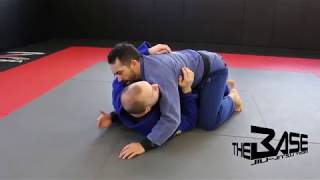
Jiu Jitsu Fundamentals - Half Guard Passing - Esgrima Pass
The Base Jiu Jitsu
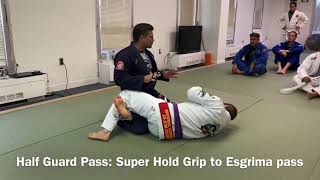
Half Guard Pass: Super Hold to Esgrima Pass
Six Blades NOVA Emil Takeuchi
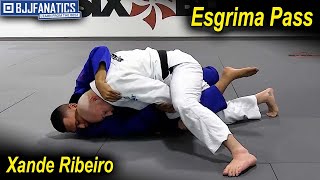
Esgrima Pass by Xande Ribeiro
BJJ Fanatics
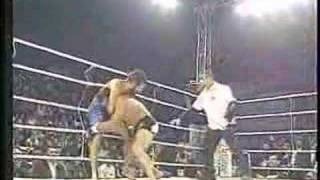
Luis Azeredo vs Tony DeSouza
amtuncurich