Mount Survival Fundamentals
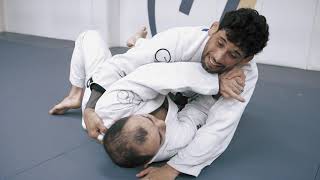
When mounted, the practitioner's primary objective is to prevent submission while creating escape opportunities. The foundation of mount defense relies on three critical elements: keeping elbows tucked inward, maintaining hand position near the face, and controlling the opponent's posture.
Defensive Hand Positioning
The hands must remain active and positioned defensively to prevent collar chokes and neck submissions. By crossing the hands and keeping elbows in, the practitioner eliminates the space needed for the opponent's knees to slide toward the armpits, which would increase control pressure.
Collar Control Defense
When the opponent attempts a collar grip, the mounted player must immediately trap that arm using both hands, creating a double-arm grip on the opponent's shoulder and armpit. This attachment prevents the opponent from establishing dominant control for submission attempts.
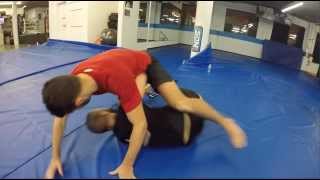
The Bridge and Roll Escape
After securing the opponent's arm, the practitioner extends their leg across the opponent's trapped arm with the foot turned outward. The escape is executed by bridging straight upward first, then rotating toward 11 o'clock while maintaining leg pressure, using an elbow assist for additional leverage.
Reacting to High Guard Position
If the opponent maintains hands positioned high and ready to strike rather than committing to collar attacks, the mounted player executes a hip buck to force hand placement. This reactive movement allows the practitioner to catch the opponent's arm in mid-recovery before re-establishing the grip.
Countering Knee Escape Defense
When the opponent spreads their knee or foot outward during a roll attempt, the mounted player transitions to half guard by placing their hand inside the opponent's knee and trapping it between their legs. This prevents the opponent from achieving side mount, which is a more dangerous position.
Managing Wide Knee Base
Against an opponent with a wide knee base, the mounted player slides backward by placing a hand on the knee and moving their hips back. Higher-level opponents will clamp their knees to prevent this escape, which actually shortens their base and creates immediate bridge-and-roll opportunities.
Escape Sequence Summary
Effective mount survival requires cycling through defensive positions: maintaining elbow-in hand defense, executing bridge-and-roll escapes when collar attacks occur, and adjusting to half guard when the opponent prevents rolls. Consistent application of these principles makes the practitioner extremely difficult to submit from mount.
Mount Survival And Escape Guide
Key Takeaways
- •Mount Survival Fundamentals
- •Defensive Hand Positioning
- •Collar Control Defense
- •The Bridge and Roll Escape
SALE SALE SALE OVER 50% OFF – BOX SET – ALL 4 COURSES 50% OFF CLICK HERE – https://bit.ly/2lAOHmp • The Blue Belt Super Series • The Kimura Attack System • The Trap Door Series • 14 Days to Better BJJ CLICK HERE – https://bit.ly/2lAOHmp PURCHASE SINGLE COURSES • The Blue Belt Super Series - https://bit.ly/2PvbrCo • The Kimura Attack System - https://bit.ly/2m3a1kF • The Trap Door Series - https://bit.ly/2DdTbX0 • 14 Days to Better BJJ - https://bit.ly/2kaavFc TESTIMONIALS ‘Started hitting the moves laid out in these courses the very next class...extremely uplifting to have such a quick improvement in my game’ - Houston, TX ‘I’m the only white belt in the academy doing these moves…I’m suddenly competing at a blue belt and above level…thanks Coach Tom’ - LA, California ‘Some of the best strategies you are going to see for control and submission’ - London, UK ‘The detailed way Prof Tom breaks down his moves into the absolute essentials is just next level for me. This is absolute gold‘ - Sydney, Australia ‘Most of the guys at my Academy, have about 60lbs on me, but since purchasing your ‘Kimura Attack system’ and ’14 days’ everything has changed. I feel much more confident, roll better and the guys on the mat have commented on the same. Thanks, Coach Tom’ – Dallas, TX ‘I know you have your names for your courses, but I’ve renamed them the ‘Zero to hero’ courses, I went from getting constantly owned, to now being completely dominant on the mat in no time at all’ - San Diego, California ‘I use the course material heaps, and just recently put it into action at a local comp, walked away with double gold. No one was more surprised than me! - Miami, Florida ‘As a new white belt, these classes have helped me so much, Prof Tom’s technique, the details, and his attitude. I love how Prof. Tom shows the ‘mistakes people make’ and then shows the correct way of doing things. The only one I have ever seen do this’ – New York, New York Great videos, great instruction. I just watch them for hours…Melbourne, Australia ‘The instructional saved me big time at a recent comp, my opponent was def more experienced, but that was ok, coz I had Prof Tom’s video in my brain. Nailed it and scored gold’ - Colorado, Denver ‘All of it. Everything you show in your awesome videos are now my ‘go to techniques’. Thanks for your vids Prof, Tom’ - Houston, TX ‘You really have to watch every second of the video because Prof, Tom drops these little nuggets of gold throughout the course. And they make ALL the difference. The only one doing this. Keep them coming Professor’ - NY, New York ‘If I could only be taught from one person, Prof Tom would be it. I can’t wait to train in person one day’ – Dallas, TX ‘Went to a recent competition with these videos fresh in my mind. I knew I had an edge and the confidence this gave me was unreal. Got the gold. All submission wins! – LA, California
Related Techniques
Frequently Asked Questions
What does this video teach about the tunnel escape?
This video covers mount survival fundamentals, defensive hand positioning, collar control defense. It provides detailed instruction from The Grappling Academy.
How long does it take to learn the tunnel escape?
The basic mechanics can be understood in a single session, but developing reliable execution requires consistent drilling over weeks of practice. This 8-part breakdown helps structure your training by isolating each phase of the technique.
What are the key details for finishing the tunnel escape?
Against an opponent with a wide knee base, the mounted player slides backward by placing a hand on the knee and moving their hips back. Higher-level opponents will clamp their knees to prevent this escape, which actually shortens their base and creates immediate bridge-and-roll opportunities.
Related videos
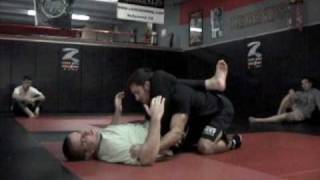
Powerful BJJ Mount Escape (Tunnel Escape)- Firas Zahabi
Tristar Gym
Granny Game Main Tunnel Escape - Fastest Strategy Guide (easy and Quick Method)
suman maharana
10th Planet Counters: Einstein's Triangle Escape
Alder Hampel
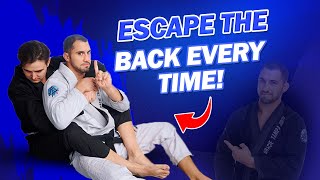
How to Escape the Back EVERY TIME | Jiu Jitsu Back Escape System
Matt Arroyo Jiu Jitsu
Marcelo Garcia: Escaping Side Control
Marcelo Garcia Jiu-Jitsu