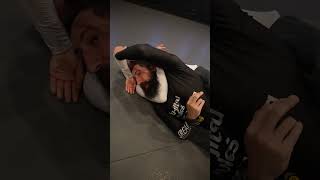
Initial Position Recognition
The defender begins trapped in an armbar with the opponent applying pressure. Recognition of the opponent's elbow position close to the body is critical, as this proximity creates the first escape opportunity. Understanding this positioning eliminates multiple finishing angles the opponent can employ.
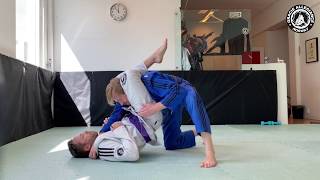
Preventing the Triangle Setup
When the defender attempts to kick the trapped arm free, the opponent gains positioning for a triangle choke. To prevent this secondary submission, the defender must proactively control the opponent's leg by positioning it under their own leg before escape attempts.
Establishing the Grip Lock
The defender secures their trapped elbow against their torso while locking the opponent's leg in place. This creates a stable base that prevents the opponent from adjusting their body angle or improving their armbar leverage.
Elbow Positioning Under the Leg
Before the opponent can secure a tighter position, the defender threads their elbow underneath the opponent's leg. This positioning must be executed before the opponent completes their setup, making timing essential.
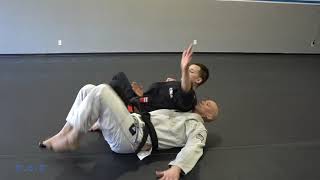
The Parallel Body Alignment Walk
The defender begins walking their hips parallel to the opponent's body rather than perpendicular. This lateral movement redistributes weight and reduces the mechanical advantage of the armbar, forcing the opponent to adjust.
Head Pressure to the Hip
As the defender continues the escape movement, they drive their head toward the opponent's hip. This pressure point disrupts the opponent's leverage by moving the defender's arm away from the opponent's body axis.
Grip Break and Recovery
Once the defender has shifted to a parallel position and reduced leverage through head pressure, breaking the opponent's grip becomes possible. The defender then posts on the mat and begins their escape.
Completion Sequence
The defender executes a final knee pull, driving the knee toward their chest while maintaining control of the opponent's leg. This final movement extracts the arm completely and allows the defender to establish a dominant or neutral position.
Last resort armbar escape #61
Key Takeaways
- •Initial Position Recognition
- •Preventing the Triangle Setup
- •Establishing the Grip Lock
- •Elbow Positioning Under the Leg
Saída do armlock em Último caso
Related Techniques
Frequently Asked Questions
What does this video teach about desperation escape?
This video covers initial position recognition, preventing the triangle setup, establishing the grip lock. It provides detailed instruction from Lucas C Santana.
How long does it take to learn desperation escape?
The basic mechanics can be understood in a single session, but developing reliable execution requires consistent drilling over weeks of practice. This 8-part breakdown helps structure your training by isolating each phase of the technique.
What are the key details for finishing desperation escape?
Once the defender has shifted to a parallel position and reduced leverage through head pressure, breaking the opponent's grip becomes possible. The defender then posts on the mat and begins their escape.
Related videos
How to escape a rear naked choke in Jiu Jitsu!#jiujitsu #jiujitsutips
Malachy Friedman
BJJ Advanced - Last Resort Triangle Escapes | BJJ teknikker på norsk | Gracie Allegiance Norway
Gracie Allegiance Norway
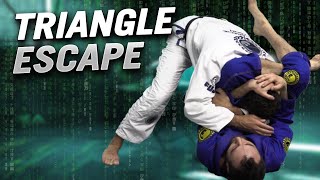
Triangle Escape Last Resort | Igor Gracie
Digitsu
Side control escape, Last Resort Escape Series - Technique on Command
Strong Hold Jiu Jitsu
Kids BJJ - Gorilla Escaping the Cage | FaMA | Singapore
FaMA - Fitness and Martial Arts