Initial Setup: Establishing the Over-Under Position
The instructor begins in a clinch position with an over-under grip, demonstrating the fundamental starting point for the body lock takedown. From this position, the practitioner attempts to gain double underhooks by pummeling the opponent's arms downward. Once secured in the clinch, the next phase involves transitioning from this defensive position into an offensive takedown sequence.
The Pummel and Posture Defense
After securing the clinch, proper pummeling mechanics are essential to prevent the opponent from establishing a headlock. The instructor emphasizes maintaining an upright posture with elbows controlled rather than flared outward. This defensive positioning creates a solid base and prevents the opponent from gaining a dominant position around the head and neck.
Grip Variations and Lock Placement
Once the double underhook is established, the practitioner secures either a palm-to-palm or S-grip at the opponent's lower back or neck area. The high lock placement on the back of the neck is preferred for maintaining control. From this locked position, the takedown is executed by swinging the opponent one direction while throwing them the opposite way to land behind them.
Hip Positioning and Defensive Stability
Proper hip positioning is critical to preventing defensive counters such as trips or inside leg sweeps. The instructor demonstrates keeping the hips low and engaged directly behind the opponent. This stance prevents the opponent from gaining leverage underneath and allows the practitioner to maintain control regardless of the opponent's defensive response.
Countering Head Block Defense
When an opponent lowers their elbows to defend against the bear hug, the instructor demonstrates a double snap with both hands applied to the back of the shoulders. This two-handed snap breaks the opponent's defensive posture and often results in a headlock opportunity. The snap should be explosive and directed upward to maximize effectiveness.
Alternative Response to Elbow Defense
If the opponent continues lowering their elbows to prevent a bear hug, the practitioner can shift the lock position downward to the opponent's hip. From this adjusted grip position, a traditional bear hug can be applied to execute the takedown. This variation provides an alternative finishing method when the opponent's defensive adjustment prevents the initial attack sequence.
Space Management and Grip Adjustments
The body lock grip allows the practitioner to create and close space dynamically during the takedown sequence. By squeezing and pushing simultaneously, the practitioner can expand the space slightly, then slip the grip lower and apply maximum pressure. This flexibility in grip positioning prevents the opponent from establishing a consistent defense throughout the technique.
Lifting Versus Trip Variations
The final takedown can be executed through either a straight lift or a leg trip depending on the opponent's weight distribution and defensive positioning. The instructor demonstrates both finishing methods, emphasizing that the practitioner should be prepared to transition fluidly between these options. Proper hip engagement ensures the takedown is completed safely without injury to either participant.
Basic CLINCH Bodylock Takedowns for EVERYONE!
Key Takeaways
- •Initial Setup: Establishing the Over-Under Position
- •The Pummel and Posture Defense
- •Grip Variations and Lock Placement
- •Hip Positioning and Defensive Stability
This video I teach my morning class a basic series I like from the pummel position. Check out the details and you are sure to find something useful! Enjoy! If you have any questions, comments, or suggestions, please comment below. More videos to come! Please like, share, and subscribe!! PLEASE Click this link to SUPPORT the TeachMeGrappling Channel!!! https://www.patreon.com/TeachMeGrappling or https://www.paypal.me/CoachBrianPeterson Your contribution is much appreciated and will help me continue to bring you content! 🙏 www.NextLevelGuy.com The NextLevelGuy Podcast with Coach Brian Peterson has been released!! Check it out!
Frequently Asked Questions
What does this video teach about standard body lock wall td?
This video covers initial setup: establishing the over-under position, the pummel and posture defense, grip variations and lock placement. It provides detailed instruction from TeachMeGrappling Coach Brian.
How long does it take to learn standard body lock wall td?
The basic mechanics can be understood in a single session, but developing reliable execution requires consistent drilling over weeks of practice. This 8-part breakdown helps structure your training by isolating each phase of the technique.
What are the key details for finishing standard body lock wall td?
The body lock grip allows the practitioner to create and close space dynamically during the takedown sequence. By squeezing and pushing simultaneously, the practitioner can expand the space slightly, then slip the grip lower and apply maximum pressure. This flexibility in grip positioning prevents the opponent from establishing a consistent defense throughout the technique.
Related videos
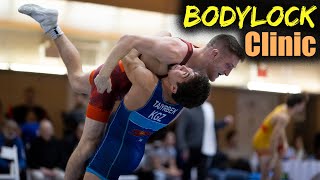
Zhumashbek Puts on a Bodylock Clinic @ Bill Farrell (Breakdown) (Excerpt)
DPS Breakdowns
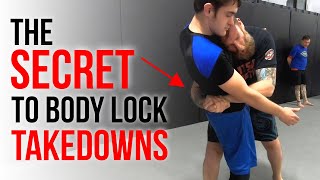
The 'Secret' To Body Lock Takedowns + 2 Submissions (Kimura + Choke)
TRITAC Martial Arts

Single leg defense variation, against the cage ..
Lyubomir Kumbarov
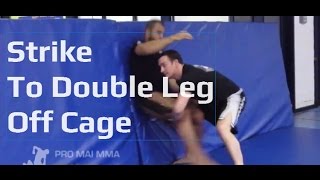
Double Leg Off Cage With Striking Set Up
MMA COACH
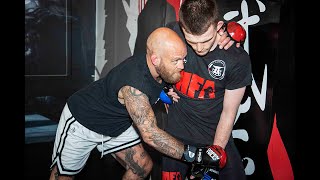
MMA Training - Using the Body Lock to Throw & Suplex off the Cage Wall with Peter Irving
Stuart Tomlinson