Introduction & Physical Requirements
The anaconda choke and Darce choke from sprawl control are effective submissions that favor athletes with longer limbs and smaller frames. While larger athletes may struggle with arm length constraints, the fundamental mechanics remain teachable to all practitioners. This technique is executed from referee's position when the opponent initiates a double-leg takedown.
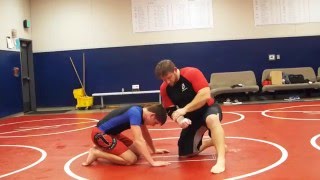
Initial Sprawl Control Setup
The instructor establishes seatbelt control from sprawl position as the opponent shoots the double leg. When the opponent drives forward with pressure on the legs, this movement naturally creates the opening needed to insert the choking arm. Proper hand positioning during sprawl control is essential before transitioning to the submission.
Arm Insertion & Positioning
The top arm threads through the opponent's guard, placing the bicep on the back of the opponent's neck or shoulder. The choke is secured by wrapping the arms tightly around the opponent's head and neck. Practitioners with longer arms will find this insertion more fluid, though proper positioning compensates for arm length differences.
First Submission Path: Side Roll
From the inserted arm position, the instructor can execute a quick roll to the side while using a bicycle motion with the legs to control the opponent's base. This explosive movement secures the choke immediately through positional pressure. The submission completes rapidly once the roll locks in the hold.
Second Submission Path: Over-the-Head Control
An alternative approach involves placing the arm over the opponent's head and securing the bicep on the back. The practitioner can disengage from their knees and establish a more elevated position for enhanced leverage. Rolling from this position generates additional finishing power for the submission.
Full Sequence Demonstration
From sprawl control, as the opponent reaches for the double leg, both hands are deployed to lock the seatbelt grip. The top hand slides completely through, placing the bicep on the opponent's back before a controlled roll to the side. A bicycle motion with the legs hooks the opponent's base, creating the final arch-back finish.
Execution with Resistance
During partner training, the instructor demonstrates the technique against active resistance at reduced intensity. The defender maintains sprawl position while the attacker slides the arm through with proper hand placement on the bicep. The roll must be committed and controlled, followed by the bicycle hook for complete submission setup.
Key Technical Points
The hand must slide completely through the opponent's guard to ensure proper arm positioning. The bicep placement on the back of the neck is critical for choke tightness. The bicycle motion with the legs provides the final control element, and the arch-back finish seals the submission with maximum mechanical advantage.
M.G.C. #415: Anaconda Choke/Darce Choke from Sprawl Control
Key Takeaways
- •Introduction & Physical Requirements
- •Initial Sprawl Control Setup
- •Arm Insertion & Positioning
- •First Submission Path: Side Roll
M.G.C. #415: Anaconda Choke/Darce Choke from Sprawl Control
Related Techniques
Frequently Asked Questions
What does this video teach about anaconda choke from sprawl?
This video covers introduction & physical requirements, initial sprawl control setup, arm insertion & positioning. It provides detailed instruction from Modesto Judo Club.
How long does it take to learn anaconda choke from sprawl?
The basic mechanics can be understood in a single session, but developing reliable execution requires consistent drilling over weeks of practice. This 8-part breakdown helps structure your training by isolating each phase of the technique.
What are the key details for finishing anaconda choke from sprawl?
During partner training, the instructor demonstrates the technique against active resistance at reduced intensity. The defender maintains sprawl position while the attacker slides the arm through with proper hand placement on the bicep. The roll must be committed and controlled, followed by the bicycle hook for complete submission setup.