Solo Practice Foundation
The Inward-Tilted Front Kick can be practiced solo by simulating an opponent's attack. Students should practice the four-count sequence repeatedly: execute the technique on counts one and two, then return to neutral position. Counts three and four follow the same pattern, building muscle memory and timing for defensive application.
Understanding Attack Angles
The technique provides defense against ordinary punching attacks from the front. When an attacker punches from the side or rear, the defender may have limited visibility. The inward tilt is most effective against direct frontal assaults, as it requires visual awareness to execute properly.
Thumb Cut Variations: Levels One and Two
The first video covered Thumb Cut techniques one and two, which defend against upper attacks targeting the head. This instruction focuses on Thumb Cut three and four, which defend against lower attacks targeting the stomach and midsection. Understanding the level distinctions is critical for proper technique application.
Blocking Mechanics for Technique Three
In Thumb Cut three, the defender blocks an incoming attack and shifts directionally away from the strike. The blocking hand moves downward while the defender adjusts their stance to protect the body and face. This simultaneous blocking and body positioning prevents secondary attacks.
Technique Three: Integration of Block and Strike
Technique three combines defensive blocking with an offensive counter-strike. The defender blocks the attacker's arm, then executes a strike while maintaining proper stance. The sequence emphasizes timing: block on count one-two, then execute the counter-strike on count three.
Technique Four: Reverse Pattern Application
Technique four mirrors technique three but uses a reversed hand and body position. The defender moves in the opposite direction while executing the same blocking-and-strike combination. Students should practice this variation with both sides to develop balanced proficiency.
Speed Progression and Partner Training
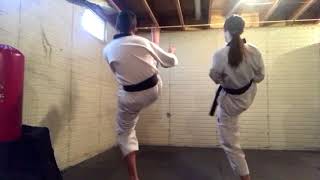
Practitioners should initially perform techniques at slow speed to establish proper form and positioning. Once mechanics are mastered, speed increases incrementally during partner drills. The instructor demonstrates on a student partner to illustrate correct speed and control while ensuring safety.
Key Practice Principles
Students must watch instructional videos segment by segment, mastering one technique before progressing to the next. These techniques are accessible even to young practitioners with proper instruction. Consistent repetition at both slow and moderate speeds builds competency and confidence in application.
Master Rubin's Fight Technique - Tom Cat 3 & 4
Key Takeaways
- •Solo Practice Foundation
- •Understanding Attack Angles
- •Thumb Cut Variations: Levels One and Two
- •Blocking Mechanics for Technique Three
Master Rubin's Tom Cat Style Fight Technique 3 & 4 - Learn Street Fighting/ Anti Bullying/ MMA Style Fighting Techniques CAUTION/ WARNING: Please note that these moves are extremely dangerous and cause serious injury/ bodily harm including breaking of bones and should not be used unless there is a serious threat to someone’s life requiring extreme measures of self defense. TOM CAT 3 (Left Side)/ TOM CAT 4 (Right Side): Defense against middle body frontal attack and counter attack AREAS ATTACKED: Middle section of body (stomach, ribs and/or groin area) FEET MOVEMENT: Forward smooth motion towards the attacking arm (into the attack rather than moving back and movement is towards shoulder of the attacker) STANCE: Front Stance DISTANCE: Depending on the height of the defender, foot placed close to the leg of the attacker (outside of the attacking foot) by engaging hip and shoulder to maximize power. HAND POSITION: Hand on the side of the attack going up to cover potential attack to the face and the one of the opposite side going straight down with fingers/palm tapping or slightly touching the attacking arm to push it out of the way. STEPS EXPLAINED: 1- The person being attacked does not back off or resist/ struggle against the force of the attack and rather moves towards the person attacking him/her. The movement consists of three simultaneous movements - one of the feet and both hands. This will not only help the body get automatically out of the line of attack but will also cover potential attack to the face. This will also enable opening up the attacker for counter attack or at least get him/her out of balance. 2- The foot on the side of the attack moves forward with toes slightly bent inward for the next steps. Just this movement of the foot will help the person being attacked get out of the line of direct hit. This will also enable the person being attacked to get behind the attacker. This way the attacker cannot use their other hand to attack any further and have no more momentum to hit back. The foot is extended in a way that it gets the body out of the line of attack while engaging hip and shoulder to gain maximum strength to reach behind the attacker. 3- The hand on the opposite side of the attack (right hand if attacker is using left hand) moves downward and is gently pushing or deflecting the attacking arm further out of the way and gets the attacker out of balance. The other hand goes up, slightly above the attacking arm, to protect against any counter attack to the face as well as getting ready for the next steps. COUNTER ATTACK: Dep[ending upon the level of threat, the hand which was protecting face is placed on top of the attacking arm to push it down. The hand which was originally deflecting the punching arm is now move up to hit the attacker in the face with a back fist.
Frequently Asked Questions
What does this video teach about inward-tilted front kick?
This video covers solo practice foundation, understanding attack angles, thumb cut variations: levels one and two. It provides detailed instruction from PG-2-GP Fitness.
How long does it take to learn inward-tilted front kick?
The basic mechanics can be understood in a single session, but developing reliable execution requires consistent drilling over weeks of practice. This 8-part breakdown helps structure your training by isolating each phase of the technique.
What are the key details for finishing inward-tilted front kick?
Practitioners should initially perform techniques at slow speed to establish proper form and positioning. Once mechanics are mastered, speed increases incrementally during partner drills. The instructor demonstrates on a student partner to illustrate correct speed and control while ensuring safety.
Related videos
How to practice inside block martial arts for beginners part 2
Fitness Karate Academy

Master Rubin's Tom Cat Style Fight Technique 1 & 2 - Using The Attacker's Force Against Them
PG-2-GP Fitness
How to do a Front Snap Kick
Excellence Martial Arts
Front Snap Kick Tutorial
Beyond Taekwondo

10 Combos with a PUSH KICK or TEEP #pushkick #teep
The Will To Fight