Baiting the Takedown
A strong sprawl can be used strategically to bait an opponent into shooting. By demonstrating solid sprawl mechanics and timing, the instructor can coax the attacker into committing to a takedown attempt, setting up the ideal moment to sprawl and achieve optimal positioning.
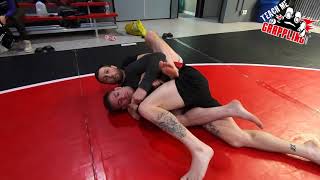
Entry Position: Chest-on-Back Control
After successfully sprawling on an incoming shooter, the defender ends up with their chest directly on the attacker's back. This position naturally transitions into the front headlock, making it one of the most common entries to this dominant control position.
Arm Placement: Head and Arm Control
From the sprawl position, the right arm wraps around the opponent's head while the left arm secures underneath their arm. This configuration is superior to wrapping both arms around the upper back, as it prevents the opponent from easily sitting out and escaping.
Controlling the Arm: Elbow vs. Tricep
The defender should control the opponent's arm near the elbow rather than at the tricep. This placement eliminates the opponent's ability to generate pushing power for escape, allowing the defender to secure the arm underneath the opponent's body with superior leverage.
Locking Down Shoulder Pressure
The defender maintains shoulder pressure on top of the opponent's back while keeping firm pressure on the back of the head. This dual pressure prevents the opponent from extracting their arm laterally or pulling their head free.
Transition to Side Turtle Position
The right arm wraps over the opponent's waist while the left knee drives inside their body. The left arm then wraps around the head as the defender transitions to secure either a rear-naked choke grip or a one-on-one grip, depending on tactical preference.
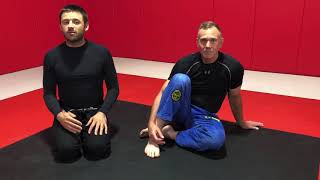
Establishing the Hardest Grip
Once the defender has knee inside and chest-on-back contact, they secure their hands in a grip that provides maximum control. This grip configuration allows the defender to dictate whether attacks will come from the front or side position.
Body Positioning: Keeping the Chest Down
Maintaining downward rib and body pressure is critical to preventing the opponent from extracting their head. When the opponent attempts to pull free, the defender's chest-on-back contact creates friction that significantly impairs their escape attempts.
Drilling the Complete Sequence
The partner initiates a shot, the defender sprawls with hips down, secures head and arm control at the elbow, drives the knee inside, and establishes the rear-naked choke grip. This combination sequence creates a complete control system that transitions smoothly from sprawl to finish position.
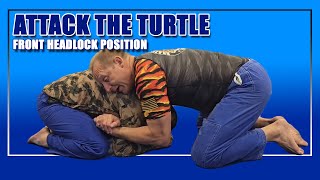
Front Headlock to Side Turtle from Sprawl - Grapplers Guide
Key Takeaways
- •Baiting the Takedown
- •Entry Position: Chest-on-Back Control
- •Arm Placement: Head and Arm Control
- •Controlling the Arm: Elbow vs. Tricep
http://www.grapplersguide.com
Frequently Asked Questions
What does this video teach about standard front headlock turtle?
This video covers baiting the takedown, entry position: chest-on-back control, arm placement: head and arm control. It provides detailed instruction from The Grapplers Guide by Jason Scully.
How long does it take to learn standard front headlock turtle?
The basic mechanics can be understood in a single session, but developing reliable execution requires consistent drilling over weeks of practice. This 9-part breakdown helps structure your training by isolating each phase of the technique.
What are the key details for finishing standard front headlock turtle?
Maintaining downward rib and body pressure is critical to preventing the opponent from extracting their head. When the opponent attempts to pull free, the defender's chest-on-back contact creates friction that significantly impairs their escape attempts.
Related videos

Sit-Through Overview from Under Front Headlock
Força Martial Arts & Fitness
HOW TO ATTACK THE TURTLE - Front Headlock System
Fargo BJJ Academy
Getting the Hooks on a Tight TURTLE!!! Seatbelt Series - 2
TeachMeGrappling Coach Brian
Front headlock basics
Lincoln Brazilian Jiu-Jitsu Center

Escape Seatbelt in Turtle with Josh Barnett
Bernardo Faria BJJ Fanatics