Objective and Setup
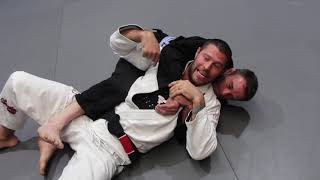
The chair sit position is executed from a mounted position with the goal of transitioning to a technical mount and then to the back control. The instructor begins by rolling the opponent's arm across the body while moving into a technical mount to position the opponent on their side.
Establishing the Seat Belt Grip
From the technical mount position, the instructor secures a seat belt grip (or hand control) around the opponent's torso. This grip serves as the foundation for controlling the opponent's upper body during the transition to back control.
Knee Placement and Leg Positioning
The top leg's knee is slid upward as high as possible, ideally passing above the opponent's head. The back leg is then placed parallel to the opponent's spine with the foot positioned close to their back for stability and control.
The Sitting Transition
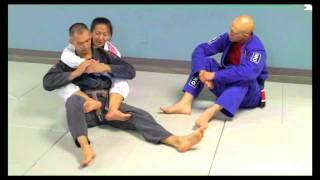
The instructor sits on their buttocks while directing their shoulder and head toward the opponent's hip rather than falling straight backward. This angled movement lifts the opponent's back off the floor and establishes proper positioning for the chair sit.
Hook Placement and Back Arch
Once seated, the instructor attempts to insert the hook around the opponent's hip. If the hook cannot be inserted due to leg length or position, the instructor arches their back to create the necessary space and easily complete the hook placement.
Advanced Variation: Arm Isolation
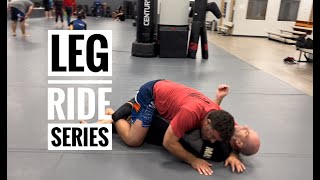
For advanced students, the instructor offers an alternative finishing option by going over top of the opponent immediately to isolate the arm rather than inserting the hook. This variation provides access to arm locks and alternative submission angles.
Grip Options and Adjustments
The instructor notes that the seat belt grip is the standard control method, though practitioners may also secure the gi directly if needed. The choice of grip should be based on what provides the most effective control for the individual.
Hook Finishing Options
Two primary methods exist for completing the chair sit: inserting the hook underneath around the hip, or for advanced practitioners, hooking over the top of the opponent's body. The over-top variation provides superior positioning for arm locks and strangulation techniques.
Chair Sit Back Take HD 1080p
Key Takeaways
- •Objective and Setup
- •Establishing the Seat Belt Grip
- •Knee Placement and Leg Positioning
- •The Sitting Transition
Great Back take option when in technical mount.
Frequently Asked Questions
What does this video teach about standard chair sit position?
This video covers objective and setup, establishing the seat belt grip, knee placement and leg positioning. It provides detailed instruction from Affinity Academy.
How long does it take to learn standard chair sit position?
The basic mechanics can be understood in a single session, but developing reliable execution requires consistent drilling over weeks of practice. This 8-part breakdown helps structure your training by isolating each phase of the technique.
What are the key details for finishing standard chair sit position?
The instructor notes that the seat belt grip is the standard control method, though practitioners may also secure the gi directly if needed. The choice of grip should be based on what provides the most effective control for the individual.