Initial Wrist Control and Head Contact
The instructor establishes control on the opponent's wrist while monitoring their posture. As the opponent begins to lower their level, the instructor uses a sharp palm strike to the head to create immediate reactionary movement and establish dominance in the exchange.
Chin Control Setup
Rather than immediately attempting the choke, the instructor first secures a firm chin grip with the hand. This intermediate control allows the instructor to manipulate the opponent's head position and prevent defensive adjustments before executing the primary submission.
Hip Positioning and Hand Placement
The instructor transitions by placing one hand on their hip while maintaining the chin grip. This hip positioning is essential for generating proper leverage and creating the necessary space to complete the arm triangle configuration.
Grip Transition and Backward Fall
Maintaining chin control, the instructor transitions the grip while falling backward. The backward momentum combined with proper hand positioning allows the instructor to slot their arm effectively for the finishing position.
Elbow Binding and Pressure Application
The instructor ties the opponent's elbow across their body. This elbow control prevents the opponent from framing and creates intense shoulder and neck pressure when combined with the arm triangle configuration.
Sweep Integration and Alternative Finishes
If the opponent resists the choke by maintaining their base, the instructor can transition to an offensive sweep. This versatility forces the opponent to choose between defending the submission or their positional stability—both unfavorable options.
Defense Countering and Elbow Control
When the opponent attempts to block the elbow to prevent the arm triangle lock, the instructor responds with a directional sweep. By attacking their base while their arm is committed to the defense, the instructor achieves the submission regardless.
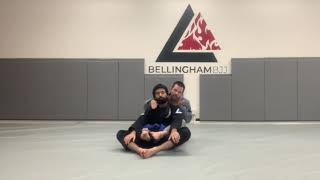
Hip Extension and Choking Mechanics
The instructor emphasizes extending the hips away from the opponent to increase choking pressure. This body positioning magnifies the mechanical advantage of the arm triangle and makes the submission effective regardless of size differentials.
Shoulder Positioning and Finalization
The instructor places their arm across the opponent's shoulder while maintaining hip extension. This shoulder contact prevents escape rotations and completes the triangle configuration for maximum effectiveness.
Old School Escape Analysis
The instructor contrasts the technique with the traditional approach where opponents jump to the opposite side. This outdated defensive movement actually worsens the opponent's position, making the modern application of the arm triangle significantly more reliable.
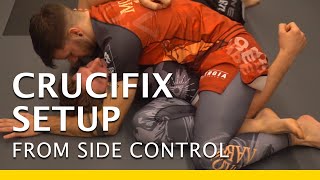
Chokes & sweeps with Chris lynd instructor at focus karate & Mma center Minneapolis. Mn start t...
Key Takeaways
- •Initial Wrist Control and Head Contact
- •Chin Control Setup
- •Hip Positioning and Hand Placement
- •Grip Transition and Backward Fall
Video created with the Socialcam app on iPhone: http://socialcam.com
Related Techniques
Frequently Asked Questions
What does this video teach about arm triangle rear naked crossover?
This video covers initial wrist control and head contact, chin control setup, hip positioning and hand placement. It provides detailed instruction from Jeff Nelson (Focus Karate).
How long does it take to learn arm triangle rear naked crossover?
The basic mechanics can be understood in a single session, but developing reliable execution requires consistent drilling over weeks of practice. This 10-part breakdown helps structure your training by isolating each phase of the technique.
What are the key details for finishing arm triangle rear naked crossover?
The instructor places their arm across the opponent's shoulder while maintaining hip extension. This shoulder contact prevents escape rotations and completes the triangle configuration for maximum effectiveness.