Introduction to the Cross Collar Choke
The cross collar choke is a fundamental submission that most beginners execute incorrectly until reaching purple belt level. This technique requires precise hand placement, blade positioning, and pressure application rather than simply throwing the arms around and squeezing. Understanding the specific mechanics and details will enable practitioners to successfully apply this choke on opponents of all skill levels.
Hand Placement and First Grip Fundamentals
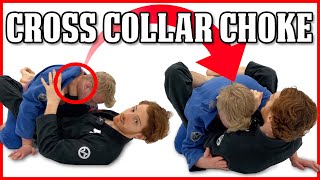
The first hand must be inserted across the opponent's body to the opposite side of the neck, not the same side. The lapel should be opened and the four fingers inserted as deep as possible, with proper thumb positioning behind the opponent's ear. This cross placement is critical because the first hand has the advantage of using both hands to achieve maximum depth before the second grip is applied.
Understanding the Choking Mechanism
The gi itself is merely a leverage and fulcrum point, not the choking agent. The actual choking is performed by the wrist blades—the hard bone areas on either side of the wrist—pressing against the carotid arteries. The space from the wristwatch area extending approximately four inches up the forearm must contact the opponent's carotid artery to be effective, as mushy tissue areas cannot generate sufficient pressure.
Blade Rotation and Positioning
After achieving a deep grip with the first hand, the wrist blade must be rotated to face the carotid artery rather than pointing toward the ceiling. This rotation transforms the grip from an ineffective squeeze with soft tissue to a precise choke using the hard blade against the artery. The palm should transition to facing upward to properly angle the blade into the target.
Inserting the Second Hand
The second hand does not require the same depth as the first hand since the first grip already controls the lapel. When using a palm-up grip, the second hand should slide under the first arm as deep as possible, aiming to position the blade on or near the opponent's ear. Even partial blade contact with the artery will be effective when combined with proper blade rotation.
The Finishing Sequence
The completion of the choke involves three decisive actions: turning both wrist blades simultaneously toward the carotid arteries, hammering an imaginary nail to create intense pulling pressure, and finally bringing both elbows down to the hips while pulling the opponent's head into the chest. Once the head makes contact with the chest, the mechanical advantage becomes nearly inescapable and the opponent must submit.
Everything You Need to Know About the Cross Collar Choke | Jiu Jitsu Fundamentals #bjj
Key Takeaways
- •Introduction to the Cross Collar Choke
- •Hand Placement and First Grip Fundamentals
- •Understanding the Choking Mechanism
- •Blade Rotation and Positioning
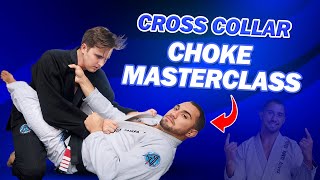
Join My Online Academy to Improve Your Jiu Jitsu FAST!!! http://academy.mattarroyo.com/home Welcome to your ultimate guide to one of the most classic and effective submissions in Brazilian Jiu-Jitsu — the Cross Collar Choke from closed guard, mount, and beyond. In this masterclass, we break down the hidden details that make this seemingly simple choke devastatingly effective, whether you’re a white belt building fundamentals or a seasoned grappler sharpening your finish rate. 👊 In this video, you’ll learn: ✅ Key grip placements for maximum pressure ✅ Angle, posture breaks, and how to set the trap ✅ Common mistakes and how to fix them ✅ Variations from closed guard, mount, and back control ✅ Timing, pressure, and clean finishes This is essential knowledge for building a dangerous gi game and developing a submission system that works at every level. 🔥 Choke smart. Choke smooth. Choke sharp. 👉 Like, drop a comment, and subscribe for more BJJ technique breakdowns and strategy. #BJJ #JiuJitsu #CrossCollarChoke #ChokeMasterclass #GiChokes #BrazilianJiuJitsu #BJJTechniques #SubmissionGrappling #BJJFundamentals #SelfDefense #JiuJitsuLifestyle
Frequently Asked Questions
What does this video teach about cross collar choke from body triangle?
This video covers introduction to the cross collar choke, hand placement and first grip fundamentals, understanding the choking mechanism. It provides detailed instruction from Matt Arroyo Jiu Jitsu .
How long does it take to learn cross collar choke from body triangle?
The basic mechanics can be understood in a single session, but developing reliable execution requires consistent drilling over weeks of practice. This 6-part breakdown helps structure your training by isolating each phase of the technique.
What are the key details for finishing cross collar choke from body triangle?
The second hand does not require the same depth as the first hand since the first grip already controls the lapel. When using a palm-up grip, the second hand should slide under the first arm as deep as possible, aiming to position the blade on or near the opponent's ear. Even partial blade contact with the artery will be effective when combined with proper blade rotation.
Related videos
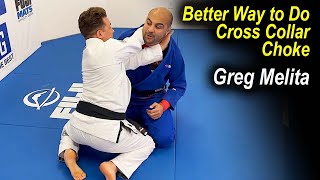
A Better Way to Do the Cross Collar Choke- Greg Melita
Bernardo Faria BJJ Fanatics
How to Actually FINISH The Cross Collar Choke from Guard
Stephan Kesting

Cross Collar Choke - Fundamentals Made Easy
Jordan Teaches Jiujitsu
Everything You Need to Know About the Cross Collar Choke | Jiu Jitsu Fundamentals #bjj
Matt Arroyo Jiu Jitsu
Head And Arm Rear Naked Choke by Heath Pedigo
BJJ Fanatics