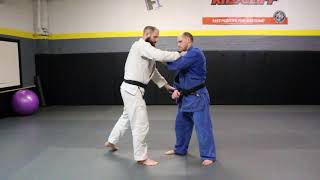
Grip Setup and Initial Position
The instructor establishes the fundamental ai-yotsu (same-side grip) position by controlling both the lapel and sleeve on the same side. Practitioners begin with sets of five repetitions, alternating sides to develop symmetrical competency. The emphasis is placed on achieving proper hand placement before introducing pressure or movement.
Pressure Generation from the Legs
Rather than relying on arm strength, pressure in the grip should originate from the legs and be transmitted through the hips and torso. The instructor demonstrates how tension applied downward and through the partner's center is generated by engaging the lower body. This principle prevents reliance on isolated upper-body strength and creates more sustainable control.
Direction and Vector of Force
The instructor corrects common errors in pressure application, distinguishing between pushing forward, pushing backward, and driving pressure diagonally through the opponent's center. Proper technique involves directing force not merely in isolation but through the entire body structure. Arm tension alone is ineffective without coordinated leg drive.
Reactive Hand Engagement
Once a grip is established, the defending player must immediately create a reaction to disrupt the opponent's control. The instructor emphasizes that securing a grip is only the beginning; the opponent should begin countering action immediately upon hand contact. This reactive principle prevents the opponent from consolidating their position.
Hip Control During Movement
Maintaining hip position and control is critical while applying grip pressure and moving simultaneously. The instructor demonstrates that power application requires keeping the hips stable and connected to the upper body. As movement increases, practitioners must preserve positional integrity rather than abandoning hip control for greater arm tension.
Grip Consolidation and Pressure Sequence
Once the grip is firmly established, the practitioner should transition from hand-based control to pressure generated entirely through the legs. The sequence involves securing the grip with the hands, then immediately shifting power generation to the lower body to control the opponent's posture. This forces the opponent to expend energy merely maintaining balance.
Sleeve Control and Grip Exchange
The instructor introduces variations in sleeve control and discusses how grip exchanges occur during dynamic grip-fighting. Understanding what constitutes a successful grip position versus an incomplete one allows practitioners to recognize when to release and re-engage. The ideal grip may vary depending on resistance and movement.
Feinting and Hand Placement Strategy
The instructor demonstrates mixing approaches by feinting in one direction before committing in another. Leading with false intent (such as appearing to attack one side before switching) creates openings for hand placement. This deceptive element prevents opponents from predicting the direction of grip establishment.
Follow-Through and Technique Continuation
After winning the grip exchange and achieving hand placement, the practitioner must immediately continue toward a throwing technique or positional advantage. The grip itself is presented as a foundation rather than an end goal. Practitioners should understand that grip mastery directly leads to improved throwing opportunities and posture disruption.
Grip Fighting Drills - Basic to Advanced
Key Takeaways
- •Grip Setup and Initial Position
- •Pressure Generation from the Legs
- •Direction and Vector of Force
- •Reactive Hand Engagement
Want to learn grip fighting drills? - here we start with the basics and move to more advanced work. https://www.youtube.com/watch?v=SR2qBZ-GAgk&feature=youtu.be Don't forget to follow me on other social media: https://www.instagram.com/vinceskillcorn https://www.facebook.com/VinceSkillcornCoach https://twitter.com/Vinceskillcorn Gripping is such an important part of Judo (you cannot throw, what you cannot hold), in this tutorial we look at gripping a same sided opponent (if you are right handed, your partner will be right handed). It is really simple to start with, taking the sleeve first and then the lapel. Our partner does not try to stop us. We add some movement, footwork, pressure, reactions, resistance then voila all of a sudden we have some advanced grip fighting drills. Take your Judo skills to the next level with The Judo Coach! Join our community! Facebook - https://www.facebook.com/thejudocoach Instagram - https://www.instagram.com/thejudocoach/ TikTok - https://www.tiktok.com/@thejudocoach?lang=en and www.thejudocoach.com to stay up-to-date on the latest techniques, training tips, and motivational content. And make sure to get exclusive access to our content before anyone else by signing up for our mailing list http://bit.ly/3mjJkba today! I encourage everyone to do this in stages and do not rush, I am using this gripping strategy as a teaching framework over 6 weeks. If you want to throw more, here is a good start. #Judo #Throw #Gripping #GripFighting
Related Techniques
Frequently Asked Questions
What does this video teach about same-side grip — ai-yotsu?
This video covers grip setup and initial position, pressure generation from the legs, direction and vector of force. It provides detailed instruction from The Judo Coach.
How long does it take to learn same-side grip — ai-yotsu?
The basic mechanics can be understood in a single session, but developing reliable execution requires consistent drilling over weeks of practice. This 9-part breakdown helps structure your training by isolating each phase of the technique.
What are the key details for finishing same-side grip — ai-yotsu?
The instructor demonstrates mixing approaches by feinting in one direction before committing in another. Leading with false intent (such as appearing to attack one side before switching) creates openings for hand placement. This deceptive element prevents opponents from predicting the direction of grip establishment.
Related videos
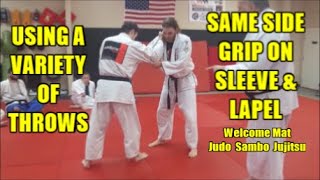
SAME SIDE GRIP ON SLEEVE & LAPEL USING A VARIETY OF THROWS
welcomematstevescott
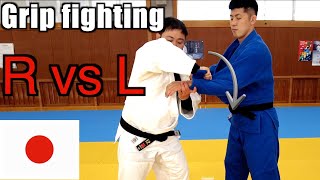
Secret Technique: kenka yotsu Kumite, how to grip right vs left.
FLUID JUDO JAPAN
Ken Ken Throws
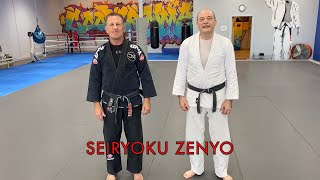
Seiryoku Zenyo
Advanced Judo Grip Fighting: A powerful way to avoid the post arm during grip fighting
Rochester Judo
Basic Judo throws and concepts
Shintaro Higashi