Basic Takedown Defence
0
Takedown Defence·Absolute MMA St Kilda - Melbourne
Full Course Playlist → https://youtube.com/playlist?list=PLDrQXekZsfYZfV1QZ4T5UkxLwFwQ12EbP Find the Introduction course…
Translation: takedown defence
The Takedown Defence group encompasses all defensive techniques used to prevent an opponent from bringing the fight to the ground through takedown attempts. [1] Takedown defence is one of the most critical skill sets in MMA and wrestling, as the ability to keep the fight standing (or take it down) is often the primary tactical battleground in mixed-rules competition. [1],[2] This group includes sprawling (hips back defence against shots), whizzer defence (overhook-based counter), underhook defence (re-pummelling), crossface defence, stance-and-base defence, cage-specific defence, and counter-attack defences that punish takedown attempts. [2],[3]
Takedown defence has been a core component of wrestling training since the sport's earliest forms, with sprawling and counter-wrestling techniques evolving alongside offensive takedowns. [1] The importance of takedown defence increased dramatically with the advent of MMA, where strikers needed to develop wrestling defence to prevent being taken down by grapplers. [2],[3]
Takedown defence percentage is one of the most important statistics in MMA. [1]
No images yet for this technique.
Sign in to suggest an image.
Full Course Playlist → https://youtube.com/playlist?list=PLDrQXekZsfYZfV1QZ4T5UkxLwFwQ12EbP Find the Introduction course…
No instructional courses yet for this technique.
Sign in to suggest a course.
Risk of injury to the person this technique is applied to
Sprawls and stuffs involve sudden body weight displacement; knee/hip strain risk
Skill level needed to execute this technique reliably
Whether this technique is allowed under major competition rule sets
Freestyle Wrestling: A Complete Guide for Coaches and Wrestlers (Petrov, 1977)
Alias sources — [1] Wrestling Physical Conditioning Encyclopedia (Welker, 2010) [2] Wrestling for Fighting (Couture, 2007) [3] Boxing Mastery (Hatmaker, 2004)
Effectiveness sources — [1] Wrestling Physical Conditioning Encyclopedia (Petrov, 1977) [2] Wrestling for Fighting (Couture, 2007)
Standard katakana transliteration of Western martial arts terminology (外来語) — used in Japanese MMA, boxing, and BJJ communities
Alias sources — [1] Wrestling Physical Conditioning Encyclopedia (Welker, 2010) [2] Wrestling for Fighting (Couture, 2007) [3] Boxing Mastery (Hatmaker, 2004)
Effectiveness sources — [1] Wrestling Physical Conditioning Encyclopedia (Petrov, 1977) [2] Wrestling for Fighting (Couture, 2007)
reaction speed, explosive hip extension, downward driving force
long legs for quick sprawl, heavy upper body
hip extensors, glutes, core, shoulders (dead weight)
Every move, in any martial art, shares a few universal traits. Mix and match below to pinpoint the right tool — or compare equivalents across styles.
The Cage-Wall Takedown Defence family covers defensive techniques specific to defending takedowns when pressed against the cage wall or fence in MMA competition. [1] Cage takedown defence is a distinct tactical challenge because the wall prevents the defender from retreating, changes the dynamics of sprawling, and creates unique positional scenarios not found in open-mat wrestling. [1,2] This family includes cage bracing (using the cage for support and leverage) and fence walk stand-ups (using the cage to facilitate returning to the feet). [2,3]
The Counter-Attack Takedown Defence family covers defensive techniques that defend against takedowns by attacking the opponent during their takedown attempt, using the takedown entry's vulnerabilities to counter with strikes or submissions. [1] Counter-attack defence exploits the fact that takedown attempts require the attacker to change level and move forward, exposing them to guillotine chokes, knee strikes, and other counters. [1,2] These defences are the highest-risk, highest-reward takedown defences because they aim to not just stop the takedown but to score or finish the opponent. [2,3]
The Crossface Defence family covers takedown defence techniques where the defender drives a forearm across the attacker's face during a takedown attempt, using the crossface to turn the attacker's head, break their alignment, and prevent them from completing the takedown. [1] The crossface is effective because it targets the head — the body follows the head, so turning the head with a crossface forces the attacker's body to rotate, disrupting their takedown mechanics. [1,2] The crossface defence is used against both single-leg and double-leg takedowns. [2,3]
The Sprawl family covers the primary takedown defence technique where the defender drives the hips backward and downward, removing the legs from the attacker's reach and placing defensive weight on the attacker's upper body. [1] The sprawl is universally regarded as the single most important takedown defence technique in wrestling and MMA because it directly addresses the most common takedown mechanic — the level change with penetration step. [1,2] Sprawling removes the target (the legs and hips) while simultaneously punishing the attacker by driving heavy hip pressure onto their back or head. [2,3]
The Stance-Base Defence family covers takedown defence techniques that use body positioning, low centre of gravity, and wide base to make takedowns mechanically difficult to execute. [1] Stance-based defence is a preventive approach — by maintaining a posture and base that is inherently difficult to take down, the defender reduces the likelihood of successful takedown attempts before they are even initiated. [1,2] This family includes hip sit defence (dropping the hips and sitting back) and low base defence (maintaining a wide, low athletic stance). [2,3]
The Underhook Defence family covers defensive techniques for preventing the opponent from establishing or maintaining underhooks, which are the primary clinch position for initiating takedowns. [1] Underhook defence is critical because an opponent with underhooks has inside position and direct access to the body for takedowns — denying underhooks is therefore equivalent to denying the most common takedown platform. [1,2] The primary underhook defensive technique is re-pummelling — swimming the arm back inside to re-establish the underhook after the opponent has secured one. [2,3]
The Whizzer Defence family covers defensive techniques that use the overhook with hip pressure (whizzer) to counter takedown attempts, particularly single-leg takedowns and underhook drives. [1] The whizzer is one of the most important reactive takedown defences because it can be applied immediately when the opponent secures an underhook, using the overhook and hip drive to neutralise the opponent's forward pressure. [1,2] This family includes the standard overhook counter and the whizzer-to-kimura transition, which converts the defensive whizzer into an offensive submission. [2,3]
Takedown defense — sprawling, underhooking, and counter-wrestling — is the fundamental skill that determines whether a fight stays standing. Sprawl appears in 629 passages across 97 books. In MMA, takedown defense percentage is one of the most important fighter statistics. (97 books; Gable, Coaching Wrestling Successfully; MMA statistics)
The sprawl is the primary defense, which prevents your opponent from getting a good grip on your legs by moving your hips forward and your feet back while keeping your hands protecting your legs.
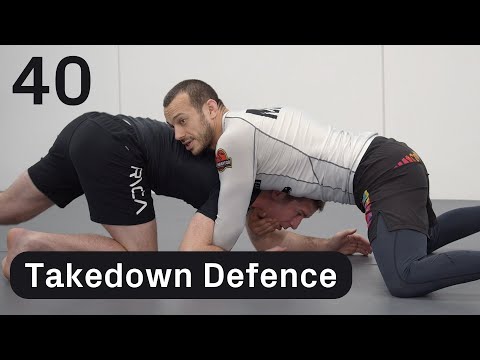
According to Absolute MMA St Kilda, two common errors are keeping your toes planted on the mat (which prevents you from sliding backward when driven into) and reaching your feet back before your hips—instead, your hips should lead the action as your knees and hips drop to the mat with toes free to slide.
Your feet should not stay planted; instead, you want your hips and knees low on the mat with toes free so you can slide backwards when your opponent drives forward, rather than getting stuck and pushed back up.
Your hips should come forward and down toward your opponent first as your feet move back, making your legs further away and more difficult to reach; your hips and knees should touch the mat while keeping your toes free to allow backward sliding.
The Takedown Defence group encompasses all defensive techniques used to prevent an opponent from bringing the fight to the ground through takedown attempts. Takedown defence is one of the most critical skill sets in MMA and wrestling, as the ability to keep the fight standing (or take it down) is often the primary tactical battleground in mixed-rules competition.
Takedown defence has been a core component of wrestling training since the sport's earliest forms, with sprawling and counter-wrestling techniques evolving alongside offensive takedowns. The importance of takedown defence increased dramatically with the advent of MMA, where strikers needed to develop wrestling defence to prevent being taken down by grapplers.
Unified MMA: legal — Legal defensive technique; IBJJF: legal — Legal — defensive techniques are fundamental to grappling; IJF: legal — Legal defensive action; ADCC: legal — Legal; UWW: legal — Legal defensive technique; FIAS Sport Sambo: legal — Legal
Danger rating 3/10. Moderate — sprawls and stuffs involve sudden body weight displacement; knee/hip strain risk
The standard setup chain: Anticipate the Attack → Execute Defence → Recover Stance → Counter or Disengage.
Standard counters include: Timing — attack when the defence is recovering or between movements / Feint — use deception to create openings in the defensive structure / Angle Change — attack from an unexpected angle that the defence does not cover.
Common variants: Full sprawl (both legs kicked back, hips dropped to the mat); Half sprawl (one leg back while the other posts for balance); Sprawl to front headlock (sprawling and immediately securing head control).
Takedown defence percentage is one of the most important statistics in MMA.
Top errors to watch for: Defending with straight legs — the sprawl requires hip drop with knees bending, not just leaning forward / Reaching down for the opponent's head without sprawling — the hips must go back first, then establish the front headlock / Defending too late — once the opponent has your legs, the takedown is nearly complete; defend the entry, not the finish / Standing square — a staggered stance makes it harder for the opponent to reach both legs.
The Takedown Defence is also known as Teikudaun Difensu, Anti-Wrestling, Takedown Prevention, Sprawl And Brawl Defence.