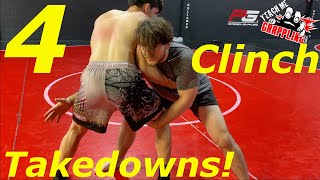
Introduction: Two Fundamental Clinch Takedowns
Roy Marsh introduces two essential takedowns from the clinch: the body fold and leg fold. These techniques form the foundation of clinch takedown strategy and are applicable across MMA, self-defense, and competitive grappling. The session demonstrates both the technical execution and common problem-solving scenarios.
Establishing the Proper Clinch Position
A correct clinch requires full body contact from shoulder to hip rather than isolated hand grips. The instructor emphasizes creating a continuous line of contact while stepping with the outside leg, positioning the ear against the opponent's chest. Hand locks—whether gable grip, ball hook, or S-grip—should follow after establishing this structural foundation.
Hip Connection and Defensive Integrity
Hip-to-hip connection is critical to prevent knee strikes and defend against hip displacement attempts. Maintaining tight connection eliminates space that opponents can exploit. The clincher must keep legs bent with an open stance for base and mobility while following the opponent's movements.
Clinch Maintenance and Positioning
Maintaining the clinch is as important as establishing it, requiring constant adjustment to prevent escape attempts. The clincher should position slightly off-center (three-quarter angle) to balance face protection with offensive opportunity. Head placement forward maintains better defensive coverage than excessive lateral positioning.
Reading Posture and Selecting the Appropriate Takedown
Technical efficiency requires reading the opponent's posture and leg position to determine which takedown applies. When opponents maintain square feet and upright posture or lean back, the body fold takedown becomes available. This reactive approach ensures the technique matches the opponent's position rather than forcing a predetermined technique.
Body Fold Takedown Mechanics
The body fold uses coordinated pushing with the head and pulling with the arms while backing the hips slightly. The clincher lifts on the toes and drives the head downward while pulling the opponent into a bent position. As the opponent falls, the grip releases and transitions to cupping the back to control the landing.
Proper Landing Position and Top Control
Upon completing the takedown, the clincher must land in a stable position with knees and elbows connected, sitting above the opponent's thigh. Descending with the opponent rather than locking legs prevents being thrown off or swept. This positioning allows immediate top control without allowing the opponent to recover their guard or escape.
Controlling the Descent and Stabilization
As the opponent goes down, the clincher must move with them, adjusting laterally if positioned too far to the side. The head position should remain safe throughout the descent. Following through with control ensures the opponent doesn't scramble or regain offensive capability immediately after impact.
Two Fundamental Takedowns from the Clinch
Key Takeaways
- •Introduction: Two Fundamental Clinch Takedowns
- •Establishing the Proper Clinch Position
- •Hip Connection and Defensive Integrity
- •Clinch Maintenance and Positioning
These are two fundamental self defense takedowns from the Clinch
Frequently Asked Questions
What does this video teach about from clinch?
This video covers introduction: two fundamental clinch takedowns, establishing the proper clinch position, hip connection and defensive integrity. It provides detailed instruction from roymarsh jiujitsu.
How long does it take to learn from clinch?
The basic mechanics can be understood in a single session, but developing reliable execution requires consistent drilling over weeks of practice. This 8-part breakdown helps structure your training by isolating each phase of the technique.
What are the key details for finishing from clinch?
Upon completing the takedown, the clincher must land in a stable position with knees and elbows connected, sitting above the opponent's thigh. Descending with the opponent rather than locking legs prevents being thrown off or swept. This positioning allows immediate top control without allowing the opponent to recover their guard or escape.
Related videos

How To DOMINATE THE CLINCH in UFC 5 (CLINCH GUIDE) | EA SPORTS UFC 5
IC4Games
4 CLINCH Takedowns to Destroy your Opponents!
TeachMeGrappling Coach Brian
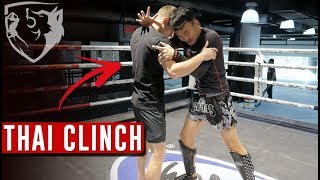
Dominate the Muay Thai Clinch with Petchboonchu
fightTIPS
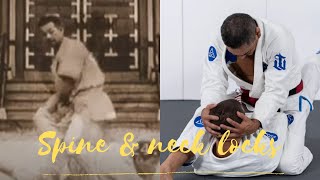
The lost neck cranks and spine locks of Judo 首関節技
Chadi
Compression Lock and Axis Lock: A Tale of Two Locks
John Cacey