Understanding the Nelson System
The Nelson family of submissions is categorized by the number of gaps controlled along the opponent's neck and shoulders. A quarter nelson uses one gap with a single arm, while the half nelson controls two gaps across the body. The three-quarter nelson controls three gaps and is the foundation for this neck crank technique.
Establishing the Initial Grip
The instructor pressures downward on the opponent's head to widen the target gap, then slides the arm deep through the chest cavity. The hand must be positioned far enough to see all fingers; insufficient depth compromises submission effectiveness. An S-grip is then applied to align both cutting bones with the sides of the head for maximum mechanical advantage.
Transitioning to Side Control
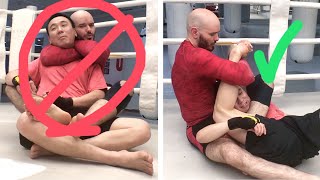
The elbows are scissored together to roll the opponent onto their side—not to achieve a pin, but to establish proper positioning for the crank. The shoulder is driven in firmly while maintaining the grip structure. This positioning prevents the opponent from escaping or flattening their body.
Generating the Neck Crank Pressure
Twisting alone is ineffective; the instructor's chest must be positioned directly on the opponent's shoulder to generate proper pressure. By pulling upward slightly, the instructor prevents the opponent from pushing away or moving laterally. This body-to-body contact and control creates the mechanical foundation for the submission.
Executing the Chancery Finish
The lower cutting bone aligns with the bottom of the jaw while the upper bone positions above the ear. The thumbs are twisted together as the instructor drives pressure through the shoulder into the neck. This lateral twisting motion compresses the neck against the jaw line, forcing the opponent to submit.
Maintaining Control During the Submission
The instructor must keep the opponent on their side and lifted slightly—removing weight allows escape. Adjusting with the opponent's movement while maintaining pressure prevents any repositioning. The submission force comes entirely from body weight on the shoulder, not arm strength, making it highly efficient and minimizing injury risk.
Catch Wrestling: 3/4 Nelson to 3/4 Chancery Neck Crank: @SnakePitUSA
Key Takeaways
- •Understanding the Nelson System
- •Establishing the Initial Grip
- •Transitioning to Side Control
- •Generating the Neck Crank Pressure
Snake Pit U.S.A. Founder/Head Coach, Joel Bane demonstrates a 3/4 Nelson to Chancery Neck Crank. Please keep in mind there are MANY other Nelson’s but the ones discussed at the beginning are the basic 4. For more with Coach Bane & The World’s Premier Catch Wrestling Organization head over to http://SnakePitUSA.com Coach Bane Bio: http://snakepitusa.com/about-us/
Related Techniques
Frequently Asked Questions
What does this video teach about nelson neck crank?
This video covers understanding the nelson system, establishing the initial grip, transitioning to side control. It provides detailed instruction from Snake Pit U.S.A. Original No-Gi .
How long does it take to learn nelson neck crank?
The basic mechanics can be understood in a single session, but developing reliable execution requires consistent drilling over weeks of practice. This 6-part breakdown helps structure your training by isolating each phase of the technique.
What are the key details for finishing nelson neck crank?
The lower cutting bone aligns with the bottom of the jaw while the upper bone positions above the ear. The thumbs are twisted together as the instructor drives pressure through the shoulder into the neck. This lateral twisting motion compresses the neck against the jaw line, forcing the opponent to submit.
Related videos
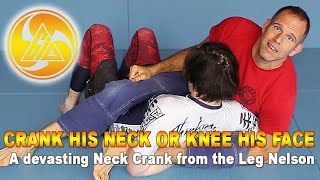
Crank his neck or knee his face - A devasting Neck Crank from the Leg Nelson
EffortlessJiuJitsu

Mastering Neck Cranks: Wrestling to Jiu-Jitsu Submission Techniques Explained
Scientific Wrestling

Avellan Shows Bas Rutten Neck Crank for BJJ and MMA
Freestyle Fighting Academy
16 backmount submissions besides the RNC
Ramsey Dewey
Breaking down the Turtle using the Power Half/half-Nelson
Five Points Jiu Jitsu